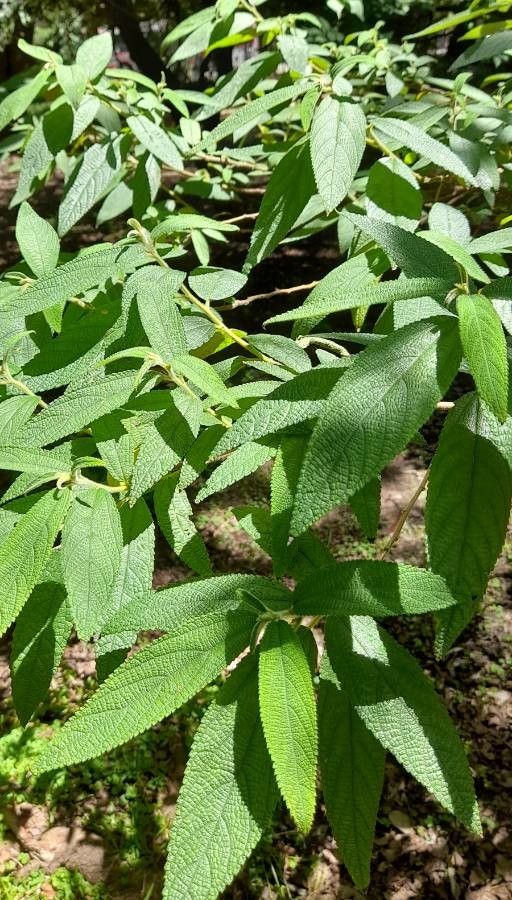
Oh, hello there! I’m so glad you’re curious about propagating Debregeasia longifolia. It’s a truly charming plant, isn’t it? With its soft, silvery-green foliage and delicate, almost airy growth habit, it brings such a lovely texture to the garden. And the best part? This isn’t a plant that will leave you tearing your hair out. While some propagation can feel like advanced wizardry, Debregeasia longifolia is actually quite amenable, making it a rewarding project for even those just dipping their toes into the world of plant reproduction. You’ll love the satisfaction of nurturing a new life from just a small piece of the parent plant.
The Season to Sow the Seeds of Success
For the highest success rates with Debregeasia longifolia, spring is your prime time. As the days begin to lengthen and the plant is actively putting on new growth, it has the energy reserves needed to focus on developing roots rather than just maintaining itself. You’re looking for that sweet spot right after the last frost, when things are warming up but haven’t yet reached the intense heat of summer. This active growth phase is key.
Your Propagation Toolkit
Before we dive in, let’s get our hands on the essentials. Don’t worry, it’s nothing too complicated!
- Sharp Pruning Shears or a Clean Knife: For taking clean, precise cuttings. Make sure they’re sterilized, perhaps with a bit of rubbing alcohol, to prevent disease.
- Rooting Hormone (Optional but Recommended): This isn’t strictly necessary for Debregeasia, but a little dip can really encourage a robust root system. Look for a powder or gel.
- Well-Draining Potting Mix: A good blend for starting cuttings often includes perlite, peat moss, or coco coir to keep things airy and prevent soggy roots. A standard houseplant mix with added perlite works well too.
- Small Pots or a Propagation Tray: Clean pots with drainage holes are vital. Small ones, around 3-4 inches in diameter, are perfect for starting out.
- Watering Can with a Fine Rose: To water gently without disturbing your precious cuttings.
- Clear Plastic Bag or Propagator Lid: To maintain humidity around your cuttings.
- Labels and a Marker: Because trust me, you’ll forget what you planted and when before you know it!
Letting Nature Do Its Work: Propagation Methods
Debregeasia longifolia is quite forgiving, and you’ll find success with a couple of straightforward methods.
Stem Cuttings
This is my go-to for this plant. It’s efficient and usually yields great results.
- Select Your Cutting: In spring, look for healthy, non-flowering stems on your established plant. You want pieces that are about 4-6 inches long and have at least two or three sets of leaves. The stem should be flexible but not so soft that it wilts instantly.
- Make the Cut: Using your sterilized shears, make a clean cut just below a leaf node. A leaf node is where a leaf attaches to the stem; this is where roots are most likely to form.
- Prepare the Cutting: Gently remove the lower leaves from the bottom two-thirds of the stem. This prevents them from rotting in the soil. If your cutting is long, you can even root cuttings with just one or two leaves at the top.
- Apply Rooting Hormone (If Using): Dip the cut end of the stem into your rooting hormone, tapping off any excess.
- Planting: Fill your small pots with your prepared potting mix. Make a small hole in the center with your finger or a pencil. Insert the cutting into the hole, ensuring the leaf nodes are buried, and gently firm the soil around it.
- Water Wisely: Water thoroughly but gently. You want the soil to be moist, not waterlogged.
- Create a Mini-Greenhouse: Cover the pot with a clear plastic bag, or place it in a propagator with the lid on. This traps humidity, which is crucial for cuttings that can’t absorb water through roots yet.
Water Propagation
If you’re feeling particularly keen to watch those roots develop, water propagation is a lovely visual.
- Take Your Cutting: Follow steps 1-3 from the stem cutting method.
- Place in Water: Fill a clean jar or glass with room-temperature water. Submerge the bottom portion of the cutting, ensuring that the leaf nodes are below the water line. Crucially, make sure no leaves are submerged – those will rot and contaminate the water.
- Find a Spot: Place the jar in a bright location, but out of direct, harsh sunlight.
- Change the Water: Change the water every few days, or whenever it looks cloudy. This keeps it fresh and prevents bacterial growth.
- Watch and Wait: You should see tiny root nubs appearing from the leaf nodes within a few weeks. Once the roots are about an inch long, it’s time to plant them in soil.
The “Secret Sauce”: My Garden Wisdom
Now, for those little tricks that make all the difference.
- Bottom Heat is Your Friend: While not strictly essential for Debregeasia, if you’re struggling with cuttings taking their sweet time, placing your pots on a gentle heat mat can really speed things up. It encourages root development from the bottom up. Just ensure it’s not too hot – think warm bath water, not scorching!
- Don’t Be Afraid to Pinch: Once your cutting has rooted and starts putting out new top growth, pinch off the very tip. This encourages the plant to branch out, giving you a bushier, more robust plant from the start. It’s a small step with a big visual impact.
- Know Your “Green” Stage: When taking cuttings, aim for semi-hardwood. This means the stem is still a bit pliable and green, but it has started to develop a bit of woody strength. Avoid overly soft, brand-new growth or stems that are completely woody and stiff.
Aftercare and When Things Go Wrong
Once you see those promising little roots peeking out, it’s time for the next stage.
- Transplanting: If you propagated in water, carefully transplant your rooted cuttings into pots with your well-draining potting mix. Gently firm the soil around the new roots. If you propagated directly in soil and see new leaf growth, they’re ready for a slightly larger pot if needed, ensuring the new pot also has excellent drainage.
- Watering Routine: Water the newly potted plants thoroughly. Then, ease them into a regular watering schedule, allowing the top inch of soil to dry out between waterings. This might be more frequent initially because they have a smaller root system to draw from.
- Acclimatization: If you covered your cuttings with a plastic bag, gradually introduce them to open air over a few days before removing the bag completely. This helps them adjust to lower humidity levels.
Now, what if things don’t quite go to plan? The most common culprit is rot. This usually happens because the soil is staying too wet, or the air is too humid but not circulating. You might see the stem going black and mushy at the soil line, or leaves yellowing and falling off. If you suspect rot, remove the affected cutting immediately. Check your watering practices and ensure good airflow. Sometimes, stems just fail to root; don’t be discouraged! It’s all part of the learning curve.
Happy Growing!
Propagating Debregeasia longifolia is such a satisfying journey. It’s a gentle reminder of the resilience and magic of the plant world. Be patient with your little cuttings; they’re on their own timeline. Enjoy the process, celebrate every tiny root, and before you know it, you’ll have a whole new collection of these beautiful plants to share or enjoy. Happy gardening!
Resource: