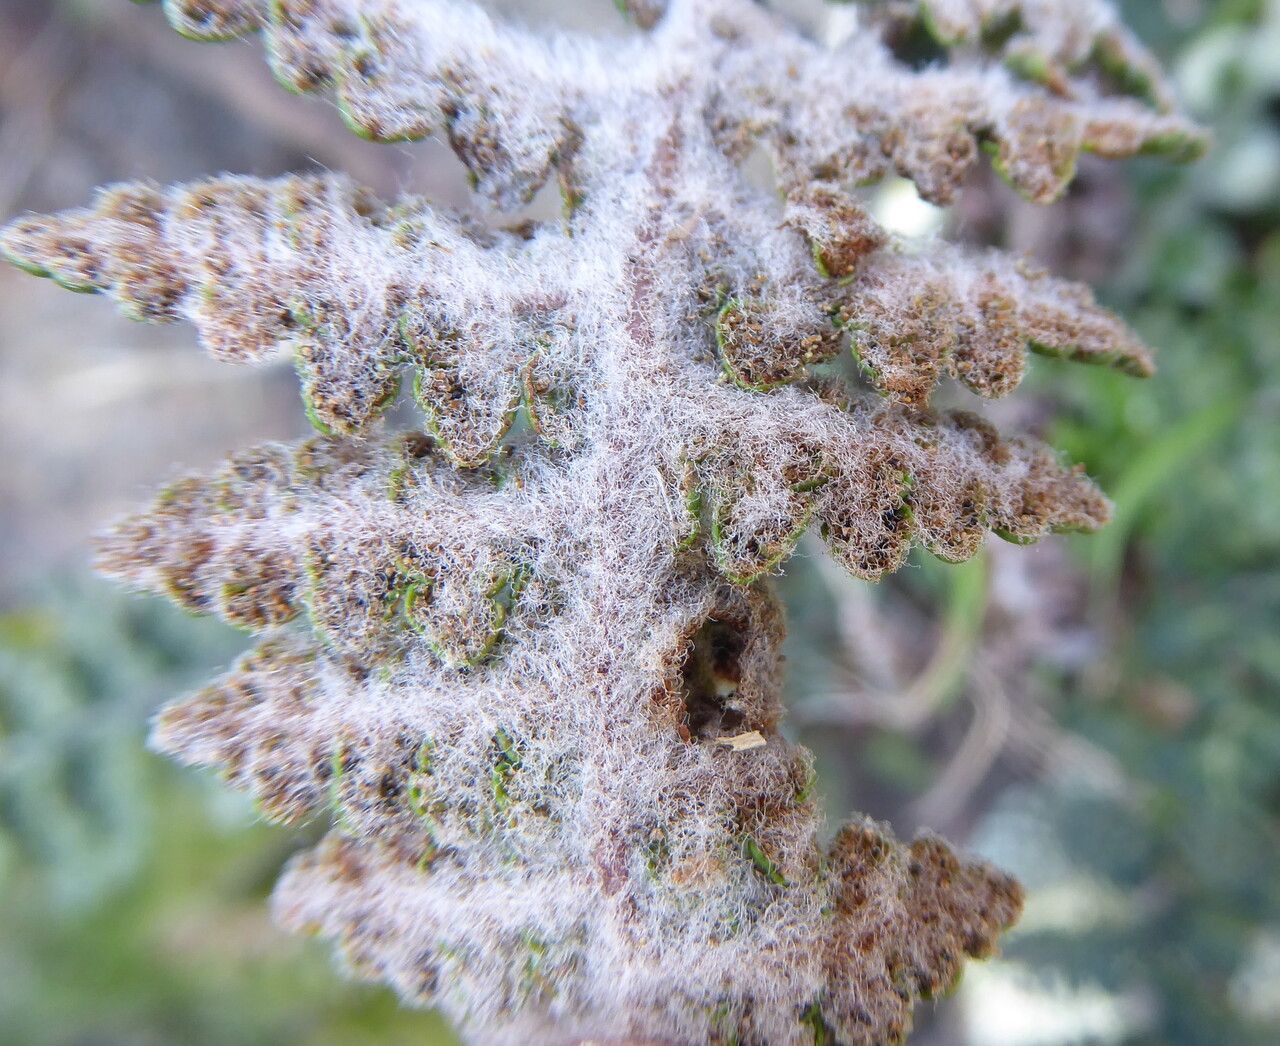
Oh, hello there! Come on in, grab a mug. Today, we’re diving into one of my absolute favorite feathery friends: Cosentinia vellea. If you’ve ever marveled at its delicate, silver-gray foliage, a mist of pure glamour in the garden, you’re not alone. The appeal lies in that ethereal beauty, a touch of the wild garden that feels both ancient and utterly modern. And the best part? Sharing that magic by propagating it yourself! Now, I won’t lie; Cosentinia vellea can be a tad bit finicky for absolute beginners. It demands a little extra attention, but with a few key pointers, you’ll be surprising yourself with how successful you can be.
The Best Time to Start
My personal sweet spot for propagating Cosentinia vellea is definitely late spring to early summer. This is when the plant is in its active growth phase, bursting with energy. New growth is usually softer and more responsive to rooting. Trying to propagate when the plant is stressed, perhaps during extreme heat or cold, will only lead to disappointment. Just as we feel our best when we’re healthy and energized, so do our plants.
Supplies You’ll Need
Gathering your tools makes the process so much smoother. Here’s what I always have on hand:
- Sharp Pruning Shears or a Craft Knife: Clean cuts are paramount for preventing disease.
- Rooting Hormone: This is a good idea for Cosentinia vellea. I prefer a powder form, as it seems to coat the stem nicely.
- Well-Draining Potting Mix: A blend of good quality potting soil with plenty of perlite or sharp horticultural sand is ideal. You want it to drain like a sieve!
- Small Pots or Seed Trays: Clean and ready for their new occupants.
- Plastic Bags or a Propagator: To create a humid environment.
- Watering Can with a Fine Rose: For gentle watering.
Propagation Methods: Stem Cuttings
This is my go-to method for Cosentinia vellea. It’s straightforward once you get the hang of it.
- Take Your Cuttings: In the late spring or early summer, select healthy, non-flowering stems from your mature plant. Look for stems that are about 4-6 inches long. Make a clean cut just below a leaf node. This is where the magic happens, where the plant has the best chance of forming roots.
- Prepare the Cuttings: Gently remove the lower leaves. You only want to leave a few leaves at the very top. This reduces water loss and prevents leaves from rotting in the soil. If the remaining leaves are very large, you can even snip them in half to further decrease transpiration.
- Apply Rooting Hormone: Dip the cut end of each stem into your rooting hormone, tapping off any excess.
- Plant the Cuttings: Fill your small pots or trays with your well-draining mix. Make a small hole with a pencil or your finger and gently insert the cutting. Firm the soil around the stem.
- Create Humidity: Water the soil gently. Then, cover the pots with a clear plastic bag or place them in a propagator. This traps moisture and creates the humid microclimate these cuttings crave. You can prop the bag up with a few skewers so it doesn’t touch the leaves.
The “Secret Sauce”
Now for a few little tricks I’ve picked up over the years. These can really make a difference!
- Bottom Heat is Your Friend: Cosentinia vellea really appreciates a little warmth from below. Placing your pots on a heated propagator mat can significantly speed up root development. It mimics the cozy soil temperatures of spring.
- Don’t Drown Them: This is crucial. While they need humidity, soggy soil is the fastest way to rot your cuttings. Let the soil surface dry out slightly between waterings. You’ll get a feel for it. I often just gently mist the soil surface if it looks a bit dry, instead of a full watering.
- Be Patient with Airflow: While a humid environment is key, you don’t want stagnant, damp air to fester. Open the plastic bag or propagator lid for a few minutes every day to allow for some air circulation. This helps prevent fungal issues.
Aftercare & Troubleshooting
Once you start to see signs of new growth – a little leaf unfurling or a tiny stem appearing – that’s your cue that roots are forming! You’ll know for sure when you gently tug on the cutting and feel resistance.
- Gradual Acclimation: Once roots are well-established (this can take several weeks to a couple of months), it’s time to gradually acclimate your new plants to normal humidity. Start by removing the plastic bag for longer periods each day.
- Move to Bigger Pots: When they have a good root system, transplant them into slightly larger pots with fresh potting mix.
- Watch for Rot: The biggest enemy here is rot. If you see your cuttings turning black and mushy, or developing brown spots, it’s usually a sign of too much moisture and not enough drainage or airflow. Discard any rotten cuttings immediately to prevent it from spreading. Sometimes, despite your best efforts, a cutting just won’t take. Don’t take it personally; it happens to all of us!
A Little Encouragement
Propagating plants is a journey, and Cosentinia vellea will certainly test your patience. But the reward of nurturing a whole new plant from a tiny cutting is so satisfying. Enjoy the process, learn from each attempt, and before you know it, you’ll have a little silver cloud of your own to admire and share. Happy propagating!
Resource:
https://identify.plantnet.org/k-world-flora/species/Cosentinia%20vellea%20(Aiton)%20Tod./data