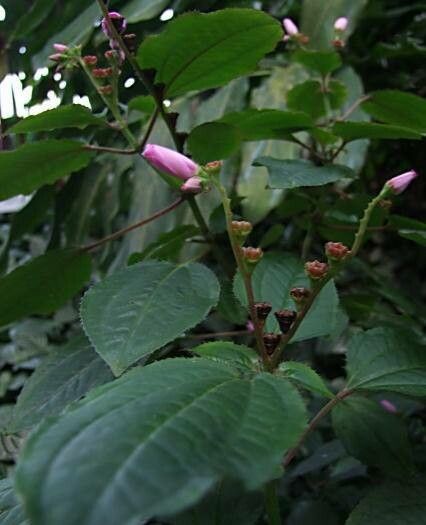
Hello there, fellow garden lovers! Today, we’re diving into the delightful world of Calvoa orientalis, a plant that has a special place in my heart. Its delicate, star-shaped blooms and lovely foliage bring a touch of elegance to any space, whether it’s gracing a sunny windowsill or adding charm to a shaded corner of the garden. And the joy of coaxing a new life from a piece of the parent plant? Well, that’s truly one of gardening’s greatest rewards. Now, if you’re a beginner, don’t shy away from Calvoa orientalis. With a little patience and these tips, you’ll be well on your way to success.
The Best Time to Start
For the highest chance of success, I find spring and early summer are your golden windows. This is when the plant is actively growing and has plenty of energy to put into developing new roots. Look for stems that are mature but still somewhat flexible – not the very young, tender shoots, nor the old, woody ones. You want that sweet spot in between.
Supplies You’ll Need
Gathering your supplies beforehand makes the whole process much smoother. Here’s what I always have on hand:
- Sharp pruning shears or a clean knife: For making clean cuts.
- Rooting hormone (optional but recommended): This can give your cuttings a significant boost. Look for a powder or gel.
- Well-draining potting mix: A good blend of perlite, coco coir, and a little bit of compost works wonders. You can also buy specialized seed starting or propagation mixes.
- Small pots or seed trays: With drainage holes, of course!
- Plastic bags or a propagator: To create a humid environment.
- Watering can with a fine rose: For gentle watering.
- Labels and a waterproof pen: To keep track of your efforts!
Propagation Methods
Calvoa orientalis is quite amenable to propagation, and I usually have the best luck with stem cuttings. It’s a tried-and-true method for this beauty.
Stem Cuttings:
- Select your cutting: Choose a healthy stem that’s about 4-6 inches long. Make a clean cut just below a leaf node (the point where a leaf attaches to the stem). This is where the magic happens for root formation.
- Prepare the cutting: Gently remove the lower leaves, leaving just a few at the top. This prevents them from rotting in the soil and directs the plant’s energy towards rooting.
- Apply rooting hormone (optional): If you’re using it, dip the cut end of the stem into the rooting hormone, tapping off any excess.
- Potting up: Fill your small pots with your well-draining potting mix. Make a small hole in the center with your finger or a pencil.
- Insert the cutting: Gently place the prepared cutting into the hole and firm the soil around it.
- Water gently: Water thoroughly but gently, making sure the soil is moist but not waterlogged.
- Create humidity: Cover the pot with a clear plastic bag or place it in a propagator. This is crucial to keep the cutting from drying out before it develops roots. Make sure the leaves don’t touch the inside of the bag.
Another method that can work, and is a bit more hands-off, is water propagation.
Water Propagation:
- Prepare the cutting: Similar to stem cuttings, select a healthy stem and remove the lower leaves.
- Place in water: Put the cutting in a jar or glass of clean water, ensuring no leaves are submerged.
- Location: Place it in bright, indirect light.
- Change water: Change the water every few days to keep it fresh.
- Root development: You should start seeing small white roots emerge from the leaf nodes within a few weeks. Once the roots are about an inch long, you can transfer them to soil.
The “Secret Sauce” (Pro Tips)
Here are a few little tricks that have made all the difference for me:
- Bottom heat is your friend: I’ve found that placing my pots on a heated propagator mat or even a warm windowsill significantly speeds up root development. It mimics the warmth of spring soil and encourages those roots to get going faster.
- Don’t rush the transplant: When you’re propagating in water, wait until the roots are a good inch or so long before moving them to soil. They’ll be stronger and more adaptable.
- Patience with the humidity dome: Keep that plastic bag or propagator lid on until you see clear signs of new growth (new leaves unfurling). Removing it too soon can stress the young plant.
Aftercare & Troubleshooting
Once your cuttings have developed a healthy root system, it’s time for their next chapter!
- Transitioning to soil: If you propagated in water, carefully transplant your rooted cuttings into their small pots filled with your well-draining mix. Water gently. If you started them directly in soil, you’ll know they’ve rooted when you see new leaf growth.
- Gradual acclimatization: If they were under a plastic bag, gradually introduce them to drier air by poking a few holes in the bag each day, then removing it for longer periods before taking it off entirely.
- Light and water: Place your new plants in bright, indirect light. Water them when the top inch of soil feels dry.
Now, what if things don’t go quite as planned? The most common issue you might encounter is rot. This usually happens when the cuttings are too wet and don’t have enough air circulation, or if your soil mix isn’t draining well enough. If you see the stem turning mushy and dark, it’s likely gone. Don’t despair! Just clear it out and try again, making sure your conditions are drier and airier. Yellowing leaves on a cutting can also indicate too much or too little water, or not enough light.
A Little Encouragement
Propagating plants is a journey of learning and observation. Some days you’ll be met with instant success, and other times a cutting might decide it’s just not its season. The most important thing is to be patient with yourself and the process. Each attempt teaches you something new. Enjoy watching that tiny cutting transform into a beautiful, thriving plant – it’s a feeling of accomplishment that just can’t be beat. Happy propagating!
Resource:
https://identify.plantnet.org/k-world-flora/species/Calvoa%20orientalis%20Taub./data