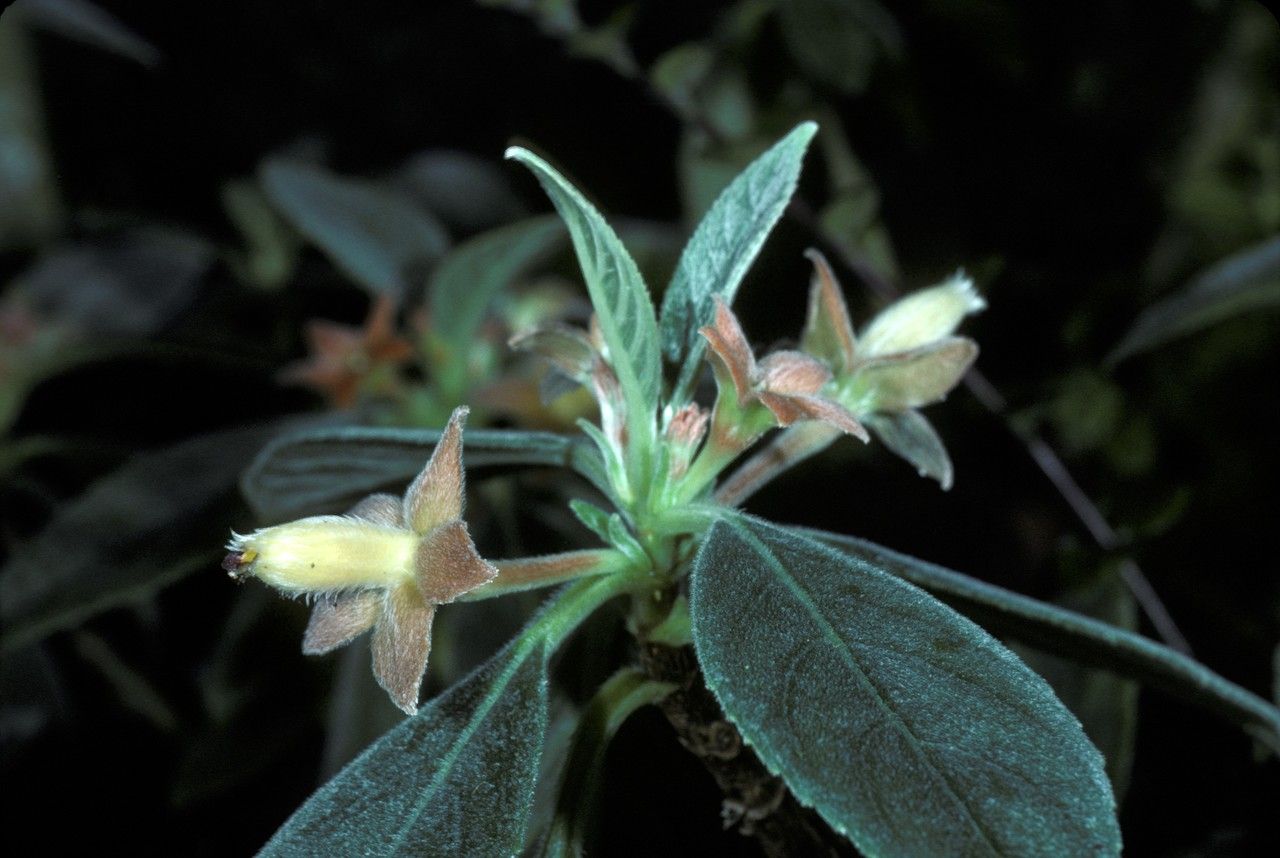
Oh, hello there! It’s so lovely to have you in my little corner of the garden world. Today, I want to introduce you to a truly captivating plant that’s been bringing smiles to my conservatory for years: Alloplectus calochlamys. If you’re looking for a plant that offers vibrant color and unique charm, you’ve found it. And the best part? You can easily multiply your collection by propagating it yourself.
Some plants can be a bit fussy when it comes to making new ones, but Alloplectus calochlamys is surprisingly generous. While not an absolute beginner plant in terms of everyday care, propagating it is quite manageable and incredibly rewarding. Seeing those tiny new roots emerge is one of life’s little joys, don’t you think?
The Best Time to Start
For the highest chance of success, I find spring is your best friend. When your Alloplectus is actively growing, bursting with life, it has the energy reserves to put into developing new roots. Aim to take cuttings or divide plants when new growth is just beginning to emerge in early to mid-spring. Avoid propagating during the plant’s dormant period in winter, as it’s less likely to establish and more susceptible to issues.
Supplies You’ll Need
Gathering your supplies beforehand makes the whole process so much smoother. Here’s what I always have on hand:
- Sharp pruning shears or a clean knife: For making clean cuts.
- Rooting hormone (optional but helpful): A liquid or powder to encourage root development.
- Well-draining potting mix: I prefer a blend of peat moss, perlite, and a little bit of orchid bark for good aeration. A general houseplant mix with extra perlite is also a good starting point.
- Small pots or propagation trays: Clean ones are a must to prevent disease.
- Plastic bags or a clear plastic dome: To create a humid environment for cuttings.
- Watering can with a fine rose or mister: For gentle watering.
- Labels and a marker: To keep track of what you’ve propagated and when.
Propagation Methods
Alloplectus calochlamys is best propagated through stem cuttings or by division.
Stem Cuttings
This is my go-to method for increasing my Alloplectus population.
- Select a healthy stem. Look for a stem that is actively growing but not woody or old. Aim for a section that has at least two or three sets of leaves.
- Make the cut. Using your clean shears or knife, make a clean cut just below a leaf node (where a leaf attaches to the stem). This is where roots are most likely to form.
- Prepare the cutting. Gently remove the lower leaves, leaving just the top one or two. If you notice tiny aerial roots already forming at the nodes, that’s a fantastic sign!
- Apply rooting hormone (if using). Dip the cut end of the stem into your rooting hormone powder or liquid, tapping off any excess.
- Plant the cutting. Fill your small pot with your prepared potting mix. Make a small hole with your finger or a pencil and insert the cut end of the stem. Gently firm the soil around it.
- Provide humidity. Water the soil lightly. Then, cover the pot with a plastic bag secured with a rubber band or place it under a clear plastic dome. This creates a mini-greenhouse effect.
- Place in bright, indirect light. Find a spot that receives plenty of light but no direct sun, which can scorch the leaves.
Division
If your Alloplectus has grown into a lovely clump with multiple stems arising from the base, it’s a perfect candidate for division.
- Remove the plant from its pot. Gently ease the entire plant out of its container.
- Gently tease apart the root ball. If the roots are tightly bound, you might need to use a clean trowel or your fingers to carefully separate the root system and individual crowns. Be patient; you don’t want to rip or damage the roots unnecessarily.
- Separate into smaller sections. Aim for sections that have at least one or two healthy stems and a good portion of roots attached.
- Pot up the divisions. Plant each division in its own pot filled with your fresh potting mix. Ensure the crown of the plant is at soil level.
- Water and place in similar conditions. Water each pot lightly and place them in bright, indirect light. Division often results in quicker establishment than cuttings.
The “Secret Sauce” (Pro Tips)
Here are a few tricks I’ve learned over the years that really seem to boost propagation success:
- Don’t let the leaves touch the water in propagation jars. If you decide to try water propagation (which works for some Alloplectus species, though I prefer soil methods for calochlamys), make sure only the cut stem is submerged. Leaves sitting in water are prone to rot and will likely take the cutting down with them.
- Bottom heat is your friend. Placing your propagation pots on a heat mat can significantly speed up root development. It mimics the warmth of spring soil and encourages those roots to get growing. Just a gentle warmth, not hot!
- Mist regularly, but avoid sogginess. While humidity is crucial, you don’t want the potting mix to be constantly waterlogged. A light misting of the leaves every day or two, along with keeping the soil consistently moist (but not soggy), is ideal.
Aftercare & Troubleshooting
Once you see signs of new growth – tiny leaves unfurling from a cutting or the divisions perking up and looking robust – you’re on your way! Gradually acclimate your new plants to a bit more light and reduce the humidity over a week or two. Continue to water when the top inch of soil feels dry.
The most common issue you’ll face is rot. This usually happens when the cuttings are kept too wet or in conditions that aren’t airy enough. If you notice your cutting turning black and mushy, it’s often a lost cause. Prevent this by using well-draining soil, not overwatering, and ensuring good air circulation around your pots. If you’re dividing, make sure the separated pieces have enough root mass.
A Little Patience Goes a Long Way
Propagating plants is a wonderful way to connect with nature and fill your home with greenery. Don’t be discouraged if a few cuttings don’t take. Gardening is all about experimenting and learning. Be patient with your new little Alloplectus babies, give them a little love and the right conditions, and soon you’ll have a whole collection to admire and share. Happy propagating!
Resource:
https://identify.plantnet.org/k-world-flora/species/Alloplectus%20calochlamys%20Donn.Sm./data