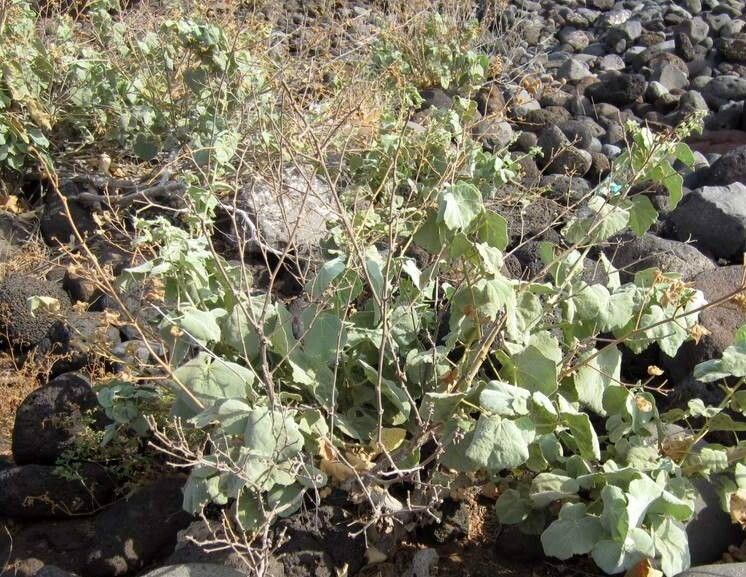
Hello there, fellow plant lovers! It’s so lovely to have you join me today. I’m thrilled to chat about a plant that has brought so much vibrant color and charm to my garden over the years: Abutilon pannosum, often called Flowering Maple or Indian Mallow. Its delicate, bell-shaped flowers in warm hues of apricot and peach are just divine, and watching a tiny cutting transform into a lush, flowering bush is one of gardening’s greatest joys. If you’re looking to multiply your Abutilon treasures, I’m here to guide you. And for those of you just starting out, don’t worry – while it has its quirks, propagating Abutilon pannosum is wonderfully rewarding and certainly achievable. Let’s get our hands dirty!
The Best Time to Start
For the highest success rate with your Abutilon pannosum, you want to focus on the warmer months, specifically late spring or early summer. This is when the plant is actively growing and has plenty of new, healthy shoots to work with. Trying to propagate when the plant is stressed or dormant, like in the dead of winter, will lead to much slower progress, if any. Think about starting when your mature plant is bursting with life – that’s your cue!
Supplies You’ll Need
Gathering your tools before you begin makes the whole process so much smoother. Here’s what I always have on hand:
- Sharp Pruning Shears or a Clean Knife: For making clean cuts, which is crucial for good rooting.
- Seed Starting Mix or a Well-Draining Potting Mix: A blend of peat or coco coir, perlite, and a bit of compost works wonderfully. You want something that drains freely.
- Small Pots or Propagation Trays: Clean pots are key to preventing disease.
- Rooting Hormone (Optional but Recommended): This is a powder or gel that encourages strong root development.
- Plastic Bags or a Clear Propagation Dome: To create a humid environment for your cuttings.
- Watering Can with a Fine Rose: For gentle watering.
- Labels and a Marker: It’s easy to forget what you’ve planted!
Propagation Methods
Abutilon pannosum is a trooper and takes to propagation quite readily. I’ve had the most success with stem cuttings. Here’s how I do it:
Stem Cuttings:
- Select Your Cuttings: Choose healthy, non-flowering stems from your mature plant. Look for stems that are about 4-6 inches long and have at least two sets of leaves. The best ones are semi-hardwood – they should feel firm but still have a bit of flexibility, not old and woody.
- Make the Cut: Using your clean shears or knife, make a clean cut just below a leaf node. A leaf node is where a leaf attaches to the stem; this is where roots are most likely to form.
- Prepare the Cutting: Gently remove the lower leaves, leaving just two or three at the very top. This prevents them from rotting when buried and reduces water loss.
- Apply Rooting Hormone (Optional): Dip the cut end of the stem into the rooting hormone, tapping off any excess. This gives your cutting a helpful boost in forming roots.
- Potting Up: Fill your small pots or trays with your prepared, moistened potting mix. Make a small hole in the center of the soil with your finger or a pencil.
- Plant the Cutting: Insert the cut end of your stem into the hole. Firm the soil gently around the base of the cutting to ensure good contact.
- Create Humidity: Water the soil gently. Then, cover the pot with a clear plastic bag, securing it with a rubber band or by tucking it around the pot. Alternatively, place the pot under a propagation dome. The goal is to maintain high humidity, mimicking the moist conditions the cutting needs to root. Place the pots in a bright spot, but avoid direct, harsh sunlight, which can scorch the delicate cuttings.
The “Secret Sauce” (Pro Tips)
After years of tinkering, I’ve learned a few tricks to really boost my success rates.
- Firstly, don’t let the leaves of your cuttings touch the sides of the plastic bag. If they’re wilting and touching the plastic, they’re more prone to rot. I often use small stakes or bend the plastic away from the leaves to prevent this.
- Secondly, bottom heat is a game-changer, especially if your room isn’t super warm. Placing your pots on a seedling heat mat can significantly speed up root formation. It encourages root growth without stressing the emerging foliage.
- And a little one – when you water, I find that using lukewarm water rather than cold water is much gentler on the young cuttings and can encourage them to settle in more happily.
Aftercare & Troubleshooting
Once your cuttings have been potted up and covered, it’s all about patience and observation. Keep the soil consistently moist but not waterlogged. You want it to feel like a wrung-out sponge. Check your cuttings every few days.
You’ll know your cutting has rooted when you see new leaf growth or when you gently tug on the stem and feel a bit of resistance. This usually takes anywhere from 4 to 8 weeks, sometimes longer. Once new growth is evident, you can start gradually acclimating your new plant to normal room conditions. This means slowly opening the plastic bag a little each day for a week or so. Then, remove it completely.
The most common issue you’ll encounter is rot. If you see the stem turning black and mushy at the soil line, that’s a sign of overwatering or poor drainage. Unfortunately, rotted cuttings are usually a lost cause, so it’s better to discard them and try again with a fresh one. Good air circulation is your best friend in preventing fungal issues.
A Encouraging Closing
So there you have it – a pathway to more of your beloved Abutilon pannosum. Remember, gardening is a journey of learning and experimentation. Don’t be discouraged if your first attempt isn’t perfect. Be patient with your little greenlings, celebrate every tiny success, and enjoy the incredibly rewarding process of bringing new life into your garden. Happy propagating!
Resource:
https://identify.plantnet.org/k-world-flora/species/Abutilon%20pannosum%20(G.Forst.)%20Schltdl./data