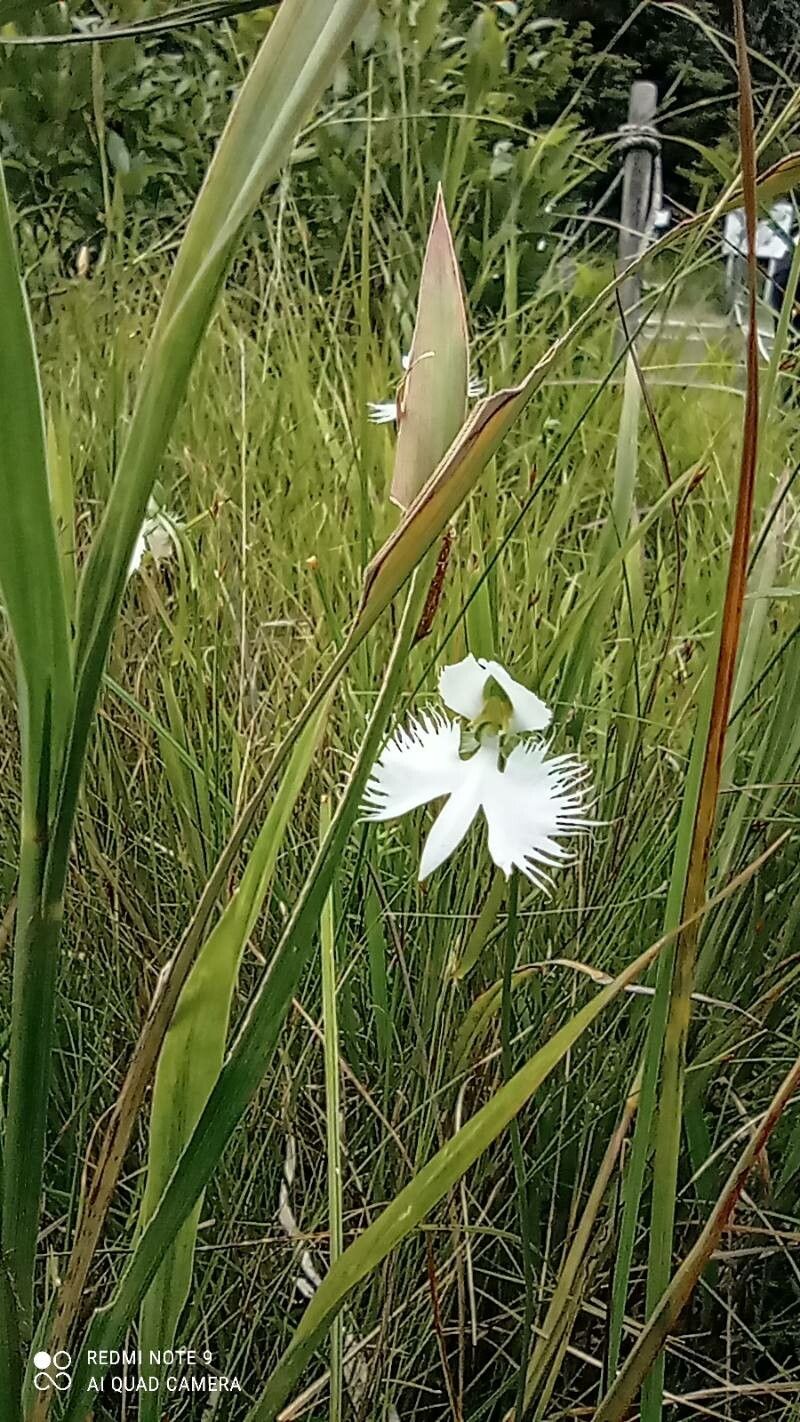
Oh, hello there! So glad you stopped by. Today, we’re diving into a real gem of the garden: Pecteilis radiata, often called the Orchid Spider Lily. If you’ve ever seen this delicate beauty with its fringed, star-like white flowers, you know exactly why it’s so captivating. They truly are breathtaking, like little bursts of snowy lace gracing the landscape.
Now, I’ll be honest, Pecteilis radiata isn’t always the easiest plant for absolute beginners to propagate. It’s a bit particular, like many orchids. But don’t let that shy you away! With a little patience and these tips, you can absolutely succeed. And the reward? Having more of these exquisite blooms to share or simply enjoy yourself. It’s incredibly satisfying, trust me.
The Best Time to Start
For Pecteilis radiata, timing is everything. The sweet spot for propagation is late spring to early summer, just as the plant is actively growing after its dormancy period. You’re looking for new shoots to emerge from the underground tubers. This is when the plant has the most energy reserves to dedicate to developing new roots and growth. Trying to propagate too early, before it’s really woken up, or too late, when it’s starting to think about winding down, can significantly reduce your chances of success.
Supplies You’ll Need
To give your Pecteilis radiata cuttings the best start, gather these essentials:
- Well-draining potting mix: A mix specifically for orchids or a blend of peat moss, perlite, and orchid bark is ideal. You want something that holds a little moisture but never stays soggy.
- Sharp, sterile pruning shears or a sharp knife: For clean cuts that minimize damage and disease.
- Rooting hormone (optional but recommended): A powder or gel can give your cuttings a helpful boost.
- Small pots or containers: With drainage holes, of course! Think 3-4 inch pots.
- Spray bottle: For gentle misting.
- Clear plastic bag or propagation dome: To create a humid environment.
- Labels: To keep track of what you’ve potted and when.
Propagation Methods
While Pecteilis radiata can be propagated by division, focusing on offsets or bulbils is often the most successful route.
Propagating by Offsets/Bulbils:
This is where we’re essentially coaxing new baby bulbs to grow from the parent tuber.
- Gently Excavate: When you see new shoots emerging in late spring or early summer, carefully GENTLY loosen the soil around the base of the parent plant. You’re not trying to rip it out of the ground, just create space to see what’s happening.
- Identify the Offsets: Look for small, bulb-like structures attached to the main tuber or very close to it, often with a tiny shoot already emerging. These are your potential new plants.
- Carefully Detach: Using your sterile knife or shears, carefully cut the offset away from the parent tuber. Try to get a small bit of the parent tuber attached if possible, but don’t stress if it’s a clean break from the offset itself. The goal is a clean separation.
- Allow to Dry (Optional but Recommended): Let the detached offsets sit in a dry, shaded spot for a few hours, or even overnight. This allows the cut surface to callus over, which helps prevent rot when planted.
- Apply Rooting Hormone (Optional): If you’re using rooting hormone, dip the cut end of the offset into the powder or gel. Gently tap off any excess.
- Planting: Fill your small pots with your well-draining potting mix. Create a small hole in the center and plant the offset so the top of the bulb is just at or slightly below the soil surface. You want the emerging shoot to be pointing upwards.
- Water Gently: Water the potting mix lightly. You want it moist, not soaked.
- Create Humidity: Place the potted offset into a clear plastic bag, sealing it loosely, or cover it with a propagation dome. This will trap moisture and mimic the humid conditions the plant loves for root development. Place it in a location with bright, indirect light.
The “Secret Sauce” (Pro Tips)
Here are a few things I’ve learned over the years that really make a difference:
- Don’t Drench, Mist! When you’re trying to get roots established, misting is your best friend. Overwatering is the quickest way to lose a precious cutting to rot. A light misting a couple of times a day, especially if the pot feels dry, is much better than a heavy watering. Think of it as a gentle morning dew.
- Bottom Heat is Your Friend: If you can, place your pots on a gentle heat mat designed for seedlings. This slightly warmer temperature at the root zone can significantly speed up root development and give your offsets that extra push they need to thrive. It mimics the warmth of spring soil.
- Patience is Paramount: This is probably the most important tip for Pecteilis radiata. These little bulbs can take their time. Don’t panic if you don’t see new leaf growth or feel resistance when you very gently tug on the sprout within a few weeks. Give them at least a month, sometimes longer, to really establish themselves underground.
Aftercare & Troubleshooting
Once you see a little bit of new leaf growth appearing from your offset, that’s usually a good sign that roots are forming! Continue to keep the soil lightly moist and the humidity high. Gradually acclimate the new plant to the surrounding environment by opening the plastic bag or dome for longer periods each day over a week or two.
The most common sign of failure is rot. If your offset turns mushy, black, and smells unpleasant, it’s likely rotted. This is usually due to too much moisture. Sadly, there’s not much you can do once this happens.
Another sign of a struggle can be wilting without any apparent rot. This could mean the roots aren’t developing fast enough to take up moisture, or the environment is too dry.
A Encouraging Closing
Propagating Pecteilis radiata is a journey, and like all gardening endeavors, it requires a bit of faith and a lot of love. Don’t get discouraged if your first few attempts aren’t perfect. Each new plant you successfully grow is a testament to your dedication and a little bit of gardening magic. Be patient, cherish the process, and soon you’ll have a delightful collection of these magnificent Orchid Spider Lilies. Happy growing!
Resource:
https://identify.plantnet.org/k-world-flora/species/Pecteilis%20radiata%20(Thunb.)%20Raf./data