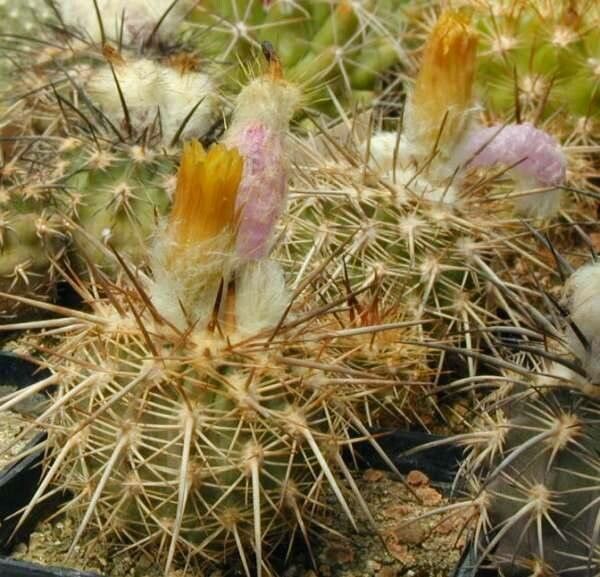
Oh, Eriosyce islayensis! It’s a truly fascinating cactus, isn’t it? With its spiky, fuzzy silhouette and often beautiful flowers, it really adds a unique touch to any collection. Propagating these beauties is incredibly rewarding. You get to create more of these quirky characters, and it’s a wonderful way to expand your cactus family without breaking the bank. Now, to be honest with you, Eriosyce isn’t the absolute easiest cactus for a complete beginner to start with, but with a little patience and these tips, you’ll be well on your way to success.
The Best Time to Start
My favorite time to get my hands dirty with propagating Eriosyce islayensis is during their active growing season. Think late spring through summer. This is when the plant has plenty of energy to put into developing roots and growing into a new, independent individual. Waiting until the plant is actively showing signs of growth – new spines, perhaps a new pup – is your best bet.
Supplies You’ll Need
Here’s what I like to have on hand:
- Sharp, clean knife or pruning shears: Sterilize them with rubbing alcohol between cuts!
- Well-draining cactus and succulent mix: I usually make my own with equal parts perlite, pumice, and coarse sand, mixed with a bit of cactus soil.
- Rooting hormone (optional but recommended): A powder or gel form can give your cuttings a helpful boost.
- Small pots or rooting trays: Make sure they have drainage holes.
- Gravel or small stones: For top-dressing and better drainage.
- Spray bottle: For gentle misting.
- Gloves: To protect your hands from those spines!
Propagation Methods
The most common and effective way to propagate Eriosyce islayensis is through offsets (or pups). These little beauties sprout from the base of the parent plant.
Separating Offsets:
- Wait for the right moment: Gently check if an offset is large enough to handle. A good rule of thumb is if it’s at least a quarter of the size of the parent plant, and ideally has developed some of its own tiny root nubs.
- Carefully remove from the parent: Using your sterilized knife or shears, make a clean cut right at the base where the offset meets the main stem. Try to get a little bit of the parent’s flesh attached if possible, as this can sometimes encourage faster rooting.
- Let it callus: This is crucial! Place the separated offset in a dry, well-ventilated spot away from direct sunlight for several days, up to a week. You want the cut end to dry and form a protective callus. This prevents rot when you plant it.
- Planting: Once callused, gently place the offset onto the surface of your prepared cactus mix in a small pot. You can press it in ever so slightly so it stands upright. Don’t bury it too deep. You can add a layer of gravel on top for stability and to wick away excess moisture.
The “Secret Sauce” (Pro Tips)
Now for a couple of little tricks I’ve learned over the years:
- The gentle touch with water: Once planted, resist the urge to water immediately. I usually wait another week or two. When you do water, do it sparingly. Aim to water just enough to moisten the soil surface. Overwatering at this stage is the fastest way to invite rot. A good method is to water from the bottom by sitting the pot in a shallow tray of water for about 15-20 minutes, allowing the soil to wick up moisture.
- Warmth is key for rooting: While you want indirect light for callusing and initial placement, once the offset is planted, providing a little gentle bottom heat can dramatically speed up root development. A seedling heat mat set to a low temperature (around 70-75°F or 21-24°C) is perfect for this.
Aftercare & Troubleshooting
Once you’ve planted your offset, patience is your best friend. Keep it in a bright spot with indirect light. Remember, no direct, harsh sun at this stage.
Signs of Success: Slowly, you’ll see new signs of life. Tiny new spines developing, or the offset looking a bit plumper. You can also gently tug on it after a few weeks – if there’s resistance, roots have likely formed.
Troubleshooting:
- Rot: This is the biggest enemy. If you see the offset turning mushy, yellowing excessively, or smelling funky, it’s likely rotting. Unfortunately, severely rotted parts can’t be saved. If it’s just a small section, you might try recutting above the rot and re-callusing.
- No growth: Don’t despair immediately! Some Eriosyce varieties can take their sweet time to root. Ensure you’re not overwatering and that it’s getting enough warmth and light.
A Encouraging Closing
Propagating Eriosyce islayensis is a journey, not a race. Enjoy the process of nurturing these little sprouts. Observe them, learn from them, and celebrate every tiny sign of progress. Soon, you’ll have a whole new patch of these delightful cacti, and all your efforts will look and feel so worthwhile. Happy propagating!
Resource: