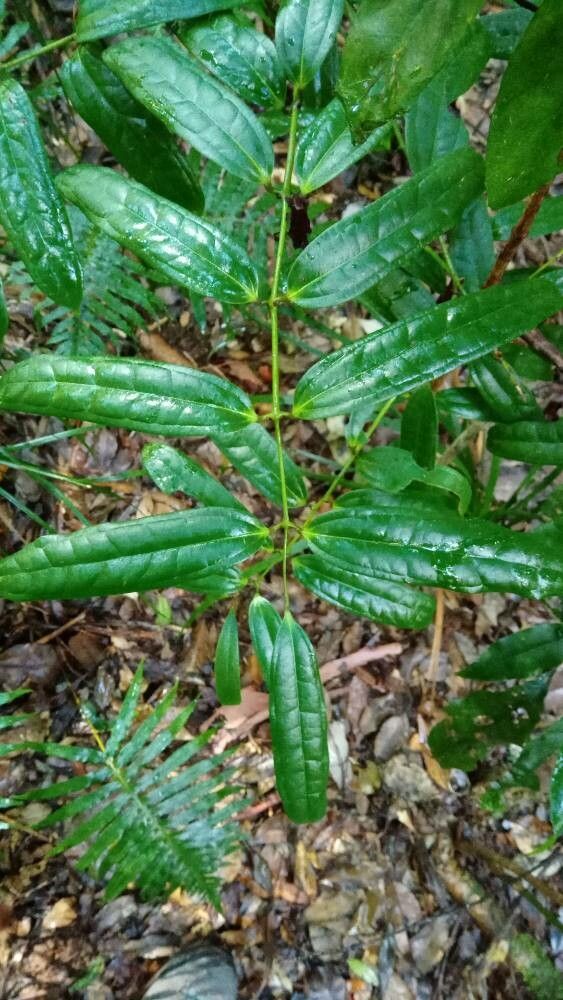
Hey there, fellow plant enthusiasts! It’s so lovely to have you join me today. We’re going to talk about a plant that has truly captured my heart over the years: Ripogonum discolor. If you haven’t had the pleasure, imagine glossy, dark green leaves that have a lovely, almost leathery texture. They can create a beautiful cascade or add wonderful structure to a shady spot in your garden. And the best part? Creating more of these beauties from your existing plant is incredibly satisfying.
Now, if you’re just starting out with propagation, Ripogonum discolor is a wonderfully rewarding plant to try. It’s generally quite forgiving, which is a big plus when you’re learning the ropes. You’ll get a real sense of accomplishment as you watch those tiny roots emerge.
The Best Time to Start
For the highest success rate with Ripogonum discolor, I’ve found that the late spring or early summer is your golden window. This is when the plant is actively growing, and the new shoots are usually nice and firm, but not yet woody. Think of it as striking when the iron is hot – or rather, when the sap is flowing!
Supplies You’ll Need
Before we dive in, let’s gather our toolkit. Having everything ready makes the process so much smoother:
- Sharp pruning shears or a clean, sharp knife: For making clean cuts.
- Rooting hormone (optional, but recommended): A powder, gel, or liquid form can give your cuttings a good boost.
- Small pots or seed trays: Clean pots are crucial to prevent disease.
- Well-draining potting mix: I personally love a blend of peat moss or coco coir, perlite, and a little bit of compost.
- Watering can or mister: For gentle watering.
- Plastic bags or a propagator lid: To create a humid environment for your cuttings.
- Labels and a permanent marker: Because trust me, you’ll forget which plant is which!
Propagation Methods
Ripogonum discolor is quite adaptable, and I’ve had great success with a couple of methods. Let’s tackle stem cuttings first, as this is often the most straightforward.
Stem Cuttings
- Select your cuttings: Look for healthy, non-flowering stems that are about 10-15 cm (4-6 inches) long. You want stems that are firm and flexible, not brittle and woody, nor too soft and floppy.
- Make the cut: Using your sharp shears, make a clean cut just below a leaf node (where a leaf attaches to the stem). This is where the plant has the best chance of forming roots.
- Prepare the cutting: Gently remove the lower leaves. You want to leave just a couple of leaves at the top to help with photosynthesis. If the remaining leaves are very large, you can snip them in half. This reduces water loss.
- Apply rooting hormone (optional): Dip the cut end of the stem into your rooting hormone. Tap off any excess.
- Plant your cuttings: Fill your small pots with your well-draining mix. Make a small hole with your finger or a pencil, and insert the cutting. Gently firm the soil around the stem.
- Water gently: Water the soil thoroughly but gently, allowing excess water to drain away.
- Create humidity: I like to pop each pot into a clear plastic bag, sealing it loosely with a twist tie, or cover the tray with a propagator lid. This creates a mini-greenhouse effect.
- Place in bright, indirect light: Find a spot that gets plenty of bright light but no direct sun. Too much sun can scorch the tender cuttings.
Water Propagation (For the Patient!)
This method is also quite effective for Ripogonum discolor, and it’s lovely to watch the roots develop.
- Take your cuttings: Follow steps 1-3 from the stem cutting method.
- Place in water: Put the prepared cuttings into a clean glass jar or vase filled with fresh water.
- Crucial detail: Make sure none of the leaves are submerged in the water. If they are, they’ll rot. You can trim away lower leaves or even use a split toothpick to keep them above the waterline.
- Change water regularly: Aim to change the water every few days, or whenever it looks cloudy. This keeps it fresh and oxygenated.
- Location, location, location: Just like with soil cuttings, place the jar in a bright spot with indirect light.
The “Secret Sauce” (Pro Tips)
After years of getting my hands dirty, I’ve picked up a few tricks that I think you’ll find really helpful:
- Don’t be afraid to experiment with different stem types. While I prefer semi-hardwood cuttings, sometimes a slightly older, firmer stem can also root well. Just observe your plant and try different stages.
- Bottom heat is your friend. If you’re propagating in a cooler environment, placing your pots on a heat mat specifically designed for plants can significantly speed up root development. It mimics the warmth of spring soil.
- Gentle is key for watering. Overwatering is the quickest way to kill a potential new plant. It’s better to let the surface of the soil dry out slightly between waterings than to keep it constantly soggy.
Aftercare & Troubleshooting
Once you see signs of new growth, like tiny leaves unfurling or, in the case of water propagation, roots that are a few centimeters long, it’s time for the next step.
- Transitioning to soil: Very carefully transplant your rooted cuttings into small pots filled with your good draining mix. Water them in gently.
- Gradual acclimatization: If your cuttings were in a propagator or plastic bag, gradually introduce them to the open air over a week or so. This helps them adjust to normal humidity levels.
- Keep watering consistently: Keep the soil consistently moist but not waterlogged.
- Watch out for rot: The most common problem you’ll encounter is rot, often indicated by stems turning soft, mushy, and black. If you see this, it’s usually a sign of overwatering or poor drainage. Unfortunately, once rot sets in, it’s often too late to save the cutting.
A Little Patience Goes a Long Way
Taking cuttings and waiting for them to root can feel like a slow dance, but it’s so worth it. Be patient with your new plants, give them good care, and enjoy the process of creating new life for your garden. Happy propagating!
Resource:
https://identify.plantnet.org/k-world-flora/species/Ripogonum%20discolor%20F.Muell./data