Oh, hello there, fellow garden enthusiast! It’s so lovely to share some time with you today, ideally with a cup of tea in hand and the scent of damp earth in the air. We’re diving into the wonderful world of Penstemon gentianoides, a plant I’ve come to adore over my two decades in the garden.
Why Grow Penstemon Gentianoides?
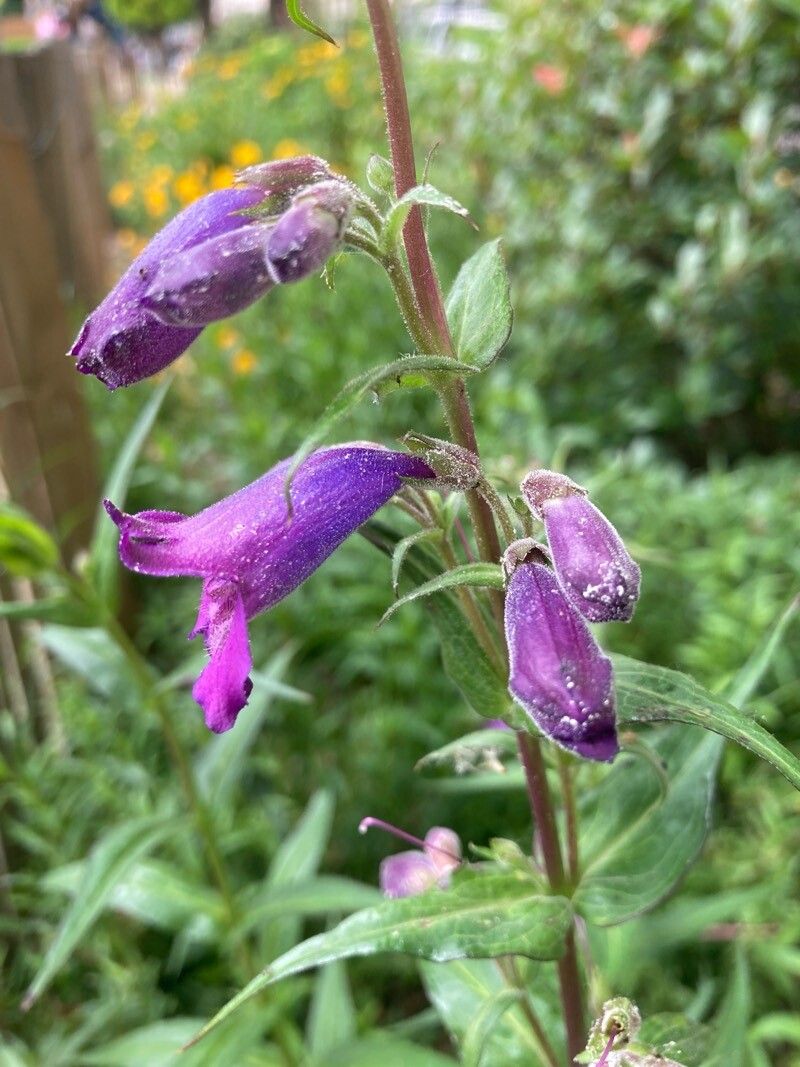
Penstemon gentianoides, with its delicate, bell-shaped flowers in vibrant shades of blue, purple, and sometimes even pink, is an absolute showstopper. It attracts pollinators like buzzing bees and fluttering butterflies, bringing such life and charm to any sunny corner. And the best part? These beauties are surprisingly good-natured when it comes to propagation. If you’re looking to expand your collection or share some garden joy with friends, this is a fantastic plant to get your hands dirty with. I’d say it’s relatively beginner-friendly, especially with stem cuttings, so don’t shy away!
When is the Magic Time?
For the best chance of success with Penstemon gentianoides, I always aim for propagation in late spring or early summer. This is when the plant is in a strong growth phase, producing plenty of fresh, new stems that are perfect for taking cuttings. Harvesting them when they’re semi-hardwood – meaning they’re not too soft and floppy but not yet woody – gives them a real boost.
What You’ll Need on Your Propagation Adventure
Gathering your supplies beforehand makes the whole process much smoother. Here’s what I usually keep on hand:
- Sharp Pruning Shears or a Craft Knife: Cleanliness is key to prevent disease.
- Small Pots or Seed Trays: Make sure they have drainage holes!
- A Good Potting Mix: I prefer a well-draining blend. You can use a mix specifically for cuttings, or create your own by combining peat-free compost with perlite or coarse sand (about a 50/50 ratio works well).
- Rooting Hormone (Optional but Recommended): This little helper can significantly speed up root development.
- Watering Can with a Fine Rose or a Spray Bottle: Gentle watering is crucial.
- Labels and a Marker: To keep track of what you’ve planted and when.
- A Clear Plastic Bag or a Propagator Lid: To create a humid environment.
Getting Started: My Favorite Propagation Methods
While you can try division, I find stem cuttings to be the most reliable and rewarding method for Penstemon gentianoides.
Method 1: Stem Cuttings
- Select Your Cuttings: Look for healthy, non-flowering shoots on your Penstemon gentianoides. Aim for stems that are about 4-6 inches long. You want stems that have just finished flowering or are in active growth.
- Make the Cut: Using your clean shears or knife, make a cut just below a leaf node (the point where a leaf grows from the stem). This is where new roots are most likely to form.
- Prepare the Cuttings: Gently remove the lower leaves, leaving just a few at the very top. This reduces moisture loss. If the leaves are particularly large, you can even snip them in half to further reduce water demand.
- Dip in Rooting Hormone (If Using): Lightly dip the cut end of the stem into your rooting hormone powder or gel. Tap off any excess.
- Pot Them Up: Fill your small pots with your prepared potting mix. Make a small hole with a pencil or your finger. Insert the cutting into the hole, ensuring that the nodes where you removed the leaves are below the soil surface. Gently firm the soil around the stem.
- Water Gently: Water the soil thoroughly but gently. You want the soil to be moist, not waterlogged.
- Create Humidity: Cover the pots with a clear plastic bag or place them inside a propagator. Drape the bag over a few stakes or use the propagator lid to ensure the leaves don’t touch the plastic. This will create a humid environment, which is vital for cuttings to root.
- Place in Good Light: Position your pots in a bright spot out of direct sunlight. A warm windowsill is usually perfect.
Method 2: Water Propagation (A Quick Trial)
This is a simpler method, though I find it’s a bit more hit-or-miss for long-term success than soil propagation.
- Prepare Cuttings: Follow steps 1-3 from the stem cutting method.
- Place in Water: Put the prepared cuttings into a clean glass or jar filled with fresh water.
- The Crucial Tip: Make sure no leaves are submerged in the water. Any leaves below the water line will rot, which can quickly kill your cutting.
- Change Water Regularly: Change the water every few days to keep it fresh and prevent bacterial growth.
- Wait for Roots: You should see tiny roots developing after a few weeks.
- Pot Up: Once the roots are about an inch long, carefully transplant them into pots filled with your well-draining potting mix. Be very gentle with these young roots.
The “Secret Sauce”: My Insider Tips
After years of trial and error – and yes, a few failed attempts – I’ve learned a thing or two!
- The Gift of Bottom Heat: If you have a heated propagator or can place your pots on a heat mat, this is a game-changer. Penstemon gentianoides cuttings absolutely love a bit of warmth from below. It significantly encourages root development and speeds up the whole process.
- Don’t Rush the Transplant: Patience is a virtue! Resist the urge to tug at your cuttings to see if they have roots. Instead, look for signs of new growth at the top of the stem. This indicates that roots are forming below. When you do eventually check, a gentle tug should reveal resistance.
- A Light Mist is Best: I find that misting the leaves of the cuttings every so often, particularly if they aren’t in a sealed propagator, helps keep them turgid and happy. It’s better than overwatering the soil, which can lead to rot.
Aftercare and Troubleshooting: Nurturing Your New Sprouts
Once you see those little roots emerging, or new growth appearing at the top of your cutting, it’s time for some gentle adjustments.
- Acclimatize Gradually: If your cuttings are in a sealed propagator or have been covered with a plastic bag, start to gradually remove the covering over a week or so. Poke a few holes in the bag initially, then open it for longer periods. This helps them adjust to normal humidity levels.
- Watering When Rooted: Continue to water them as needed, allowing the top inch of soil to dry out slightly between waterings.
- Potting Up: Once the plants are well-rooted and have a decent amount of foliage, you can carefully transplant them into slightly larger pots.
- Watch for Rot: The most common sign of failure is rot. If your cuttings look black and mushy, or if the soil stays constantly soggy and they wilt, it’s usually a sign of too much moisture. Ensure good drainage and ease up on the watering.
- No Growth? If nothing happens after several weeks, don’t despair! Sometimes they just take their sweet time. Ensure they are in a bright, warm spot. If they still show no signs of life after a good couple of months, it’s likely they haven’t rooted.
Happy Propagating!
There you have it – my tried-and-true methods for propagating Penstemon gentianoides. Remember, gardening is a journey, and sometimes things don’t go as planned, but that’s all part of the learning process. Be patient, enjoy the quiet observation of your cuttings, and relish the satisfaction of creating new life from just a little piece of a beloved plant. Happy gardening!
Resource:
https://identify.plantnet.org/k-world-flora/species/Penstemon%20gentianoides%20(Kunth)%20Poir./data