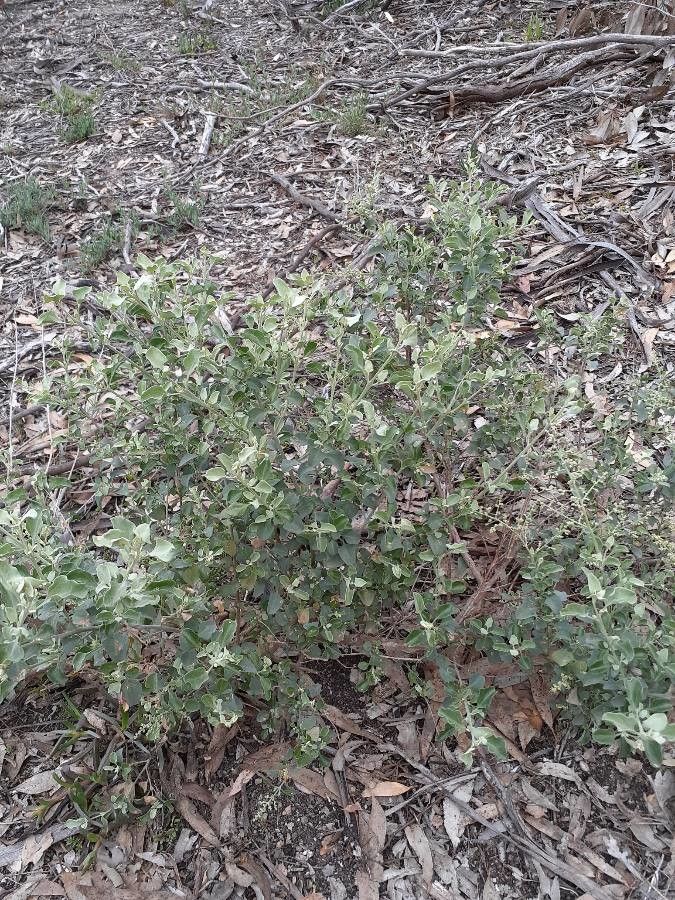
Hey there, fellow plant lovers! Today, we’re diving into a bit of a hidden gem in the garden – Chenopodium parabolicum. This lovely plant, often overlooked, has this amazing ability to add a touch of wild beauty to any space. Its feathery foliage and subtle charm make it a real delight, and the thought of creating more of them from just a snippet? That’s pure gardening joy!
Now, if you’re new to the propagation game, don’t fret. Chenopodium parabolicum is generally a pretty forgiving plant, making it a wonderful choice for beginners looking to expand their green family. You’ll find the process quite rewarding, and soon you’ll be sharing cuttings with all your friends.
The Best Time to Start
For the highest success rate with Chenopodium parabolicum, I always aim to propagate in late spring or early summer. This is when the plant is actively growing, and the stems are vigorous and full of life. You’re essentially catching it at its peak energy, which means it’s more likely to root quickly and healthily. You can also take cuttings in early fall, but the rooting process might be a touch slower as growth begins to wind down.
Supplies You’ll Need
Gathering your supplies beforehand makes the whole process much smoother. Here’s what I usually have on hand:
- Sharp Pruning Shears or a Clean Knife: Essential for making clean cuts.
- Small Pots or Seed Trays: For housing your cuttings.
- Well-Draining Potting Mix: I often use a blend of equal parts peat moss, perlite, and compost. A store-bought seed-starting mix works well too.
- Rooting Hormone (Optional but Recommended): This little boost can significantly speed up the rooting process.
- Plastic Bags or a Propagation Dome: To create a humid environment for your cuttings.
- Watering Can with a Fine Rose or Spray Bottle: For gentle watering.
- Labels and a Marker: So you don’t forget what you’ve planted where!
Propagation Methods
Chenopodium parabolicum is quite adaptable, and thankfully, pretty easy to propagate from stem cuttings. It’s my go-to method.
Stem Cuttings:
- Select Healthy Stems: Look for healthy, non-flowering stems on your mature plant. You want pieces that are actively growing but not too woody. Aim for cuttings that are about 4-6 inches long.
- Make the Cut: Using your sharp shears or knife, make a clean cut just below a leaf node. A leaf node is where a leaf attaches to the stem. This is where the magic of rooting happens. Remove any lower leaves that would be submerged when you plant the cutting.
- Apply Rooting Hormone (Optional): If you’re using rooting hormone, dip the cut end into the powder or gel. Tap off any excess.
- Plant Your Cuttings: Fill your small pots or trays with your prepared potting mix. Make a small hole in the center with your finger or a pencil. Gently insert the cut end of the stem into the hole and firm the soil around it.
- Water Gently: Water the soil thoroughly but gently, ensuring it’s moist but not waterlogged.
The “Secret Sauce” (Pro Tips)
Here are a few little tricks I’ve picked up over the years that can really make a difference:
- Humidity is Your Friend: These cuttings really thrive in a humid environment. Once you’ve potted them up, cover the pots loosely with a clear plastic bag, or use a propagation dome. This traps moisture around the leaves and stems, mimicking their natural environment and encouraging root development. Just make sure the leaves aren’t pressed directly against the plastic.
- Bottom Heat is a Game Changer: If you have the space, placing your pots on a gentle heated propagation mat can significantly speed up rooting. It provides warmth to the root zone, encouraging them to form faster. I find this is especially helpful if you’re propagating a bit later in the season.
- Don’t Overwater: This is probably the most common mistake. While they need moisture, sitting in soggy soil will cause your cuttings to rot before they even have a chance to root. Let the top inch of soil dry out slightly between waterings.
Aftercare & Troubleshooting
Once your cuttings have been planted, place them in a bright location but out of direct sunlight. Direct sun can scorch those tender new cuttings. Keep the humidity high as mentioned before.
You’ll know your cuttings are rooting when you see new growth appearing or feel a gentle tug when you lightly pull on the stem. This could take anywhere from 2-6 weeks, depending on the conditions.
If you notice your cuttings wilting consistently, looking mushy, or developing black spots, it’s usually a sign of overwatering and potential rot. In this case, try to remove the affected cutting immediately to prevent it from spreading. Ensure your soil is draining well and reduce watering frequency. Yellowing leaves can sometimes mean they’re not getting enough light.
A Encouraging Closing
Growing new plants from cuttings is such a fulfilling part of gardening. It’s about patience and observation, and there’s a real thrill when you see those tiny roots forming. So, take a deep breath, gather your supplies, and give it a go. Most importantly, enjoy the process and celebrate every little success. Happy propagating!
Resource: