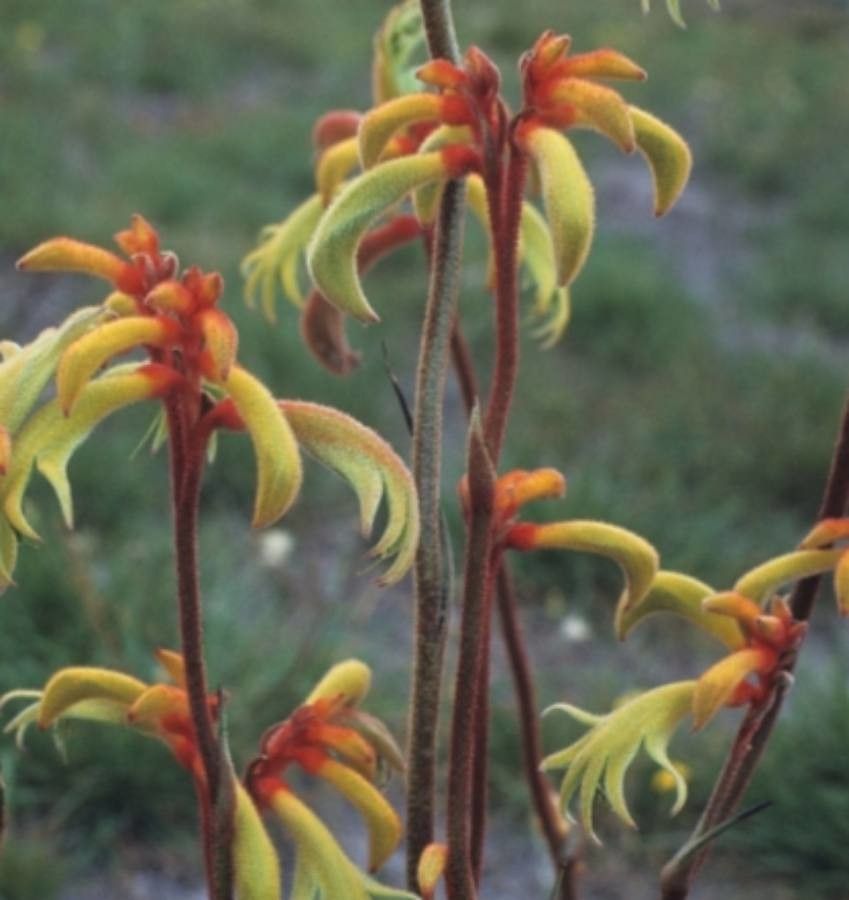
Hello fellow plant lovers! I’m so excited you’re thinking about diving into the wonderful world of propagating Anigozanthos preissii, more commonly known as the Red and Green Kangaroo Paw. These beauties are just spectacular with their fuzzy, claw-like flowers that bring a unique splash of color and texture to any garden or pot. Watching one of these little guys take root and grow into a healthy new plant is one of the most satisfying things a gardener can do. Now, if you’re a beginner, you might be wondering if this is a tough one. Honestly, Kangaroo Paws can be a little finicky, but with the right approach, it’s absolutely achievable and so rewarding. Let’s get them to grow!
The Best Time to Start
For Anigozanthos preissii, the sweet spot for propagation is usually in late spring or early summer. This is when the plant is actively growing after its spring flush and has plenty of energy. You’ll want to pick healthy, vigorous stems that haven’t flowered yet, or have just finished flowering. Avoid trying to propagate during the plant’s dormant period in winter; you’ll just be fighting against nature.
Supplies You’ll Need
Think of this as your propagation toolkit. Having everything ready makes the process so much smoother.
- Sharp Pruning Shears or a Knife: Cleanliness is key! I always give mine a good wipe down with rubbing alcohol.
- Well-Draining Potting Mix: This is non-negotiable for Kangaroo Paws. A mix designed for succulents or cacti, or a blend of regular potting soil with perlite and coarse sand, works beautifully. Aim for about two parts potting soil to one part perlite or sand.
- Small Pots or Seed Trays: Whatever you have available, as long as they have drainage holes.
- Rooting Hormone (Optional but Recommended): A powder or gel can give your cuttings a little boost.
- Clear Plastic Bag or Dome: To create a humid environment for your cuttings.
- Watering Can with a Fine Rose: For gentle watering.
- Labels or Plant Markers: To remember what you’ve planted!
Propagation Methods
While you can try dividing established plants, I find the most reliable method for multiplying Kangaroo Paws is through stem cuttings. It’s a tried-and-true technique that usually gives great results.
- Select Your Cuttings: Head out to your healthy Kangaroo Paw plant. Look for young, non-flowering stems. They should be firm and green, not woody or papery. Aim for cuttings that are about 4-6 inches long.
- Make the Cut: Using your clean shears or knife, make a clean cut just below a leaf node. A leaf node is where a leaf emerges from the stem; this is where new roots will form. Remove the lower leaves from the cutting. You want to expose a few nodes for rooting.
- Apply Rooting Hormone (If Using): Dip the cut end of the stem into your rooting hormone. Tap off any excess.
- Plant Your Cuttings: Fill your small pots with your well-draining mix. Make a small hole in the center of the soil using a pencil or your finger. Gently insert the cut end of the Kangaroo Paw cutting into the hole, ensuring at least one or two leaf nodes are buried. Firm the soil gently around the stem.
- Water Gently: Water the soil until it’s evenly moist but not waterlogged.
- Create Humidity: Place the pot inside a clear plastic bag, sealing it loosely at the top, or cover it with a clear dome. This creates a mini-greenhouse effect, which is essential for cuttings to root. Place the pot in a bright spot that receives indirect sunlight. Direct sun can scorch the tender cuttings.
The “Secret Sauce” (Pro Tips)
Over the years, I’ve learned a few tricks that often make the difference between success and disappointment with these plants.
- Don’t Drown Your Cuttings: While humidity is important, sitting water is the enemy of most cuttings, including Kangaroo Paws. Ensure your potting mix drains exceptionally well. If you see condensation pooling heavily on the inside of the bag, open it up for a few hours to let it air out.
- Bottom Heat is Your Friend: If you can, place your pots on a heat mat designed for seedlings. This gentle bottom warmth encourages root development without overheating the foliage. It’s like giving your cutting a warm hug to help it get started.
- Patience, Patience, Patience: Kangaroo Paws can be a bit slow to establish roots. Don’t be tempted to pull them up too soon to check. I usually wait at least 4-6 weeks, and sometimes longer, before gently tugging on a cutting to see if there’s resistance – that’s a sign of roots!
Aftercare & Troubleshooting
Once you see signs of new growth, like tiny leaves emerging, that’s a great indication that roots have formed.
- Acclimatize Gradually: Slowly remove the plastic bag or dome over a few days to help your new plant adjust to normal humidity levels.
- Water When Dry: Continue to water when the top inch of soil feels dry. They still prefer good drainage, so don’t let them sit in soggy conditions.
- Watch for Rot: The most common sign of failure is rot. If your cutting turns black and mushy, it’s likely succumbed to too much moisture or a fungal issue. This is why good drainage and ventilation are so crucial. If you catch rot early, you might be able to trim away the affected parts, but often, it’s a sign the cutting is lost.
So there you have it! Propagating Anigozanthos preissii is a journey. It might take a little time and a few attempts, but the satisfaction of creating new life from your favorite plants is truly unmatched. Be patient with yourself and your cuttings. Happy gardening, and may your Kangaroo Paws thrive!
Resource:
https://identify.plantnet.org/k-world-flora/species/Anigozanthos%20preissii%20Endl./data