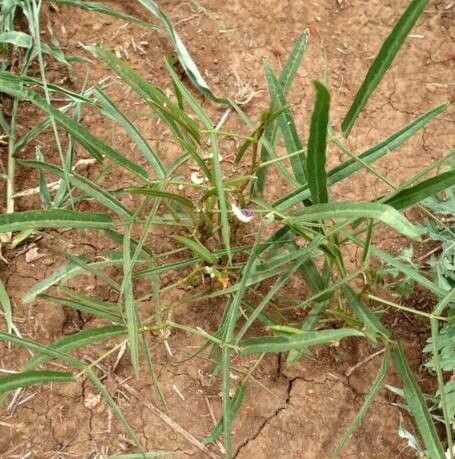
Oh, hello there! Come on in and let’s chat about one of my absolute favorite vines: Vigna friesiorum. You know, the one with those gorgeous, often vibrant purple or pink pea-like flowers that just drip with charm? I’ve been growing it for years, and honestly, there’s nothing quite like the satisfaction of coaxing a whole new plant from a tiny piece of an established one. It’s a fantastic way to share the beauty, or just to make sure you always have one of these stunners around. And for beginners? Don’t you worry, this one is pretty forgiving. You’ll likely have success right off the bat.
The Best Time to Start
For Vigna friesiorum, the sweet spot for propagation is really when the plant is in its active growing phase. Think late spring to early summer. The days are getting longer, the temperatures are warming up nicely, and the plant has plenty of energy to put into developing new roots. You want to be taking cuttings from healthy, vigorous stems that haven’t flowered yet, or just finished flowering. Avoid anything that looks weak or stressed.
Supplies You’ll Need
Here’s what I like to have handy when I’m propagating:
- Sharp Pruning Shears or Scissors: Cleanliness is key!
- Rooting Hormone (Optional but Recommended): A little boost can work wonders.
- Well-Draining Potting Mix: I usually go for a 50/50 blend of seed starting mix and perlite or coarse sand. This prevents soggy roots.
- Small Pots or Seedling Trays: Clean, of course!
- Plastic Bags or a Humidity Dome: To keep that humidity high.
- Watering Can with a Fine Rose: For gentle watering.
Propagation Methods
I find two methods work particularly well for Vigna friesiorum. You can pick whichever feels most comfortable to you.
Stem Cuttings
This is my go-to method. It’s straightforward and usually yields fantastic results.
- Select a Healthy Stem: Look for a piece of stem that’s about 4-6 inches long and has at least two to three sets of leaves.
- Make the Cut: Using your clean shears, make a clean cut just below a leaf node (the little bump where a leaf grows from).
- Prepare the Cutting: Gently strip off the lower leaves, leaving just the top two to four sets. This prevents them from rotting in the soil.
- Apply Rooting Hormone (If Using): Dip the cut end into your rooting hormone powder or gel. Tap off any excess.
- Plant the Cutting: Fill your small pot with your prepared potting mix. Make a small hole in the center with your finger or a pencil. Insert the cutting, ensuring the nodes where you removed the leaves are buried. Gently firm the soil around it.
- Water Gently: Water the potting mix until it’s evenly moist but not waterlogged.
- Create a Humid Environment: Cover the pot with a plastic bag, securing it loosely around the rim, or place it under a humidity dome. This is crucial!
Water Propagation
This method is super satisfying to watch!
- Select and Prepare Your Cutting: Follow steps 1-3 from the stem cutting method.
- Place in Water: Find a clean jar or glass. Fill it with fresh, room-temperature water.
- Submerge Lower Nodes: Place the prepared cutting in the water, making sure the leaf nodes are submerged. Be careful not to let the leaves themselves touch the water.
- Find a Bright Spot: Place the jar in a bright location out of direct sunlight.
- Change the Water Regularly: Change the water every few days, or whenever it looks cloudy, to keep it fresh and prevent bacterial growth.
The “Secret Sauce” (Pro Tips)
Here are a few little tricks I’ve picked up over the years that seem to make all the difference:
- Don’t Let Those Leaves Touch the Water: Seriously, any leaves submerged in water are just asking for trouble. They’ll turn mushy and start to rot, which can then infect the whole cutting. Keep them above the waterline, always!
- Bottom Heat is Your Friend: If you have a heating mat designed for seedlings, it’s absolute gold for propagating. Vigna friesiorum cuttings love a bit of warmth from below. It really encourages root development and speeds things up. Just place your pots on the mat in a bright, but not overly hot, location.
- Sterilize Everything! I can’t stress this enough. Make sure your pots, tools, and even your hands are clean. Any little bit of bacteria or fungus can spell doom for tender cuttings. A quick wipe with rubbing alcohol does wonders.
Aftercare & Troubleshooting
Once you see signs of roots – you might notice new leaves emerging or feel a gentle tug when you lightly pull on the cutting – it’s time for a little adjustment.
- Gradual Acclimation: If you used a plastic bag or humidity dome, start by gradually introducing your new plant to drier air. Lift the bag for a few hours each day, increasing the time over a week.
- Potting Up: Once the roots are well-established (you should see them peeking out of the drainage holes or the cutting is growing vigorously), you can pot your new Vigna friesiorum into a slightly larger pot with your regular potting mix.
- Watering: Keep the soil consistently moist but not soggy. Water when the top inch of soil feels dry.
- Light: Continue to provide bright, indirect light. As it grows stronger, you can slowly introduce it to more direct sun.
Troubleshooting: The most common issue you might encounter is rot. If you see your cutting turning black and mushy, it’s likely due to too much moisture and poor air circulation. If this happens, try to salvage any clean parts and start again, paying close attention to drainage and humidity control. Sometimes, a cutting just won’t take, and that’s okay! It’s part of the learning process.
So there you have it! Propagating Vigna friesiorum is a wonderfully rewarding endeavor. Be patient with your little green babies, give them the right conditions, and before you know it, you’ll have a whole new fleet of these beauties to enjoy. Happy gardening!
Resource:
https://identify.plantnet.org/k-world-flora/species/Vigna%20friesiorum%20Harms/data