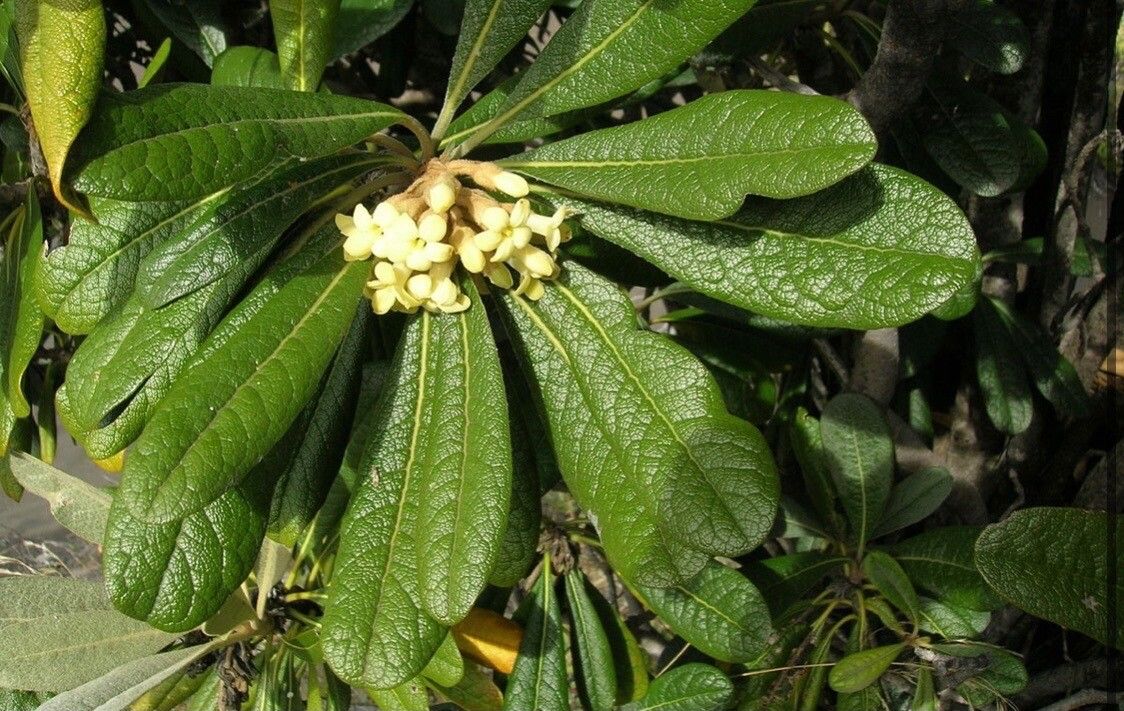
Oh, Pittosporum gatopense! What a lovely choice. I’ve always admired its glossy, deep green leaves and the subtle, sweet fragrance it can offer when it blooms. It has this wonderful way of adding structure and elegance to any garden, whether it’s a rambling cottage garden or a more formal setting. And the best part? Propagating it is a genuinely rewarding experience. You get to witness that incredible life force firsthand, turning a tiny cutting into a whole new plant.
Now, about beginners. Honestly, I’d say Pittosporum gatopense is moderately easy to propagate, making it a fantastic project for those looking to expand their plant parent skills. It’s not quite as foolproof as a Pelargonium, but with a little attention to detail, you’ll be well on your way.
The Best Time to Start
My absolute favorite time to take cuttings is in late spring to early summer, right as the plant is in its active growth phase. You’re looking for what we call “semi-hardwood” cuttings. This means the stems are no longer brand-new and floppy, but they haven’t become fully woody and mature either. They should be firm enough to snap cleanly but still have a bit of flexibility. Think of it as the plant’s prime energy-boosting time – perfect for establishing new roots.
Supplies You’ll Need
Gathering your supplies beforehand makes the whole process so much smoother. Here’s what I always have on hand:
- Sharp, clean pruning shears or a sharp craft knife: Essential for making clean cuts, which helps prevent disease.
- Rooting hormone powder or gel: This isn’t strictly necessary for Pittosporum, but it definitely gives your cuttings a good boost and increases your success rate.
- Small pots or seed trays: Anything that can hold your potting mix and accommodate your cuttings. Make sure they have drainage holes.
- A well-draining potting mix: I prefer a mix of equal parts perlite and peat moss, or a good quality seed starting mix. This ensures air circulation and prevents waterlogging.
- A watering can with a fine rose or a spray bottle: For gentle watering.
- Plastic bags or a propagator: To create a humid environment for your cuttings.
- Labels and a marker: Trust me, you’ll thank yourself later for labeling your pots!
Propagation Methods
For Pittosporum gatopense, stem cuttings are my go-to method. It’s reliable and yields the best results from what I’ve seen.
Stem Cuttings:
- Take Your Cuttings: Head out to your plant in late spring or early summer. Look for healthy, non-flowering shoots. Using your clean shears or knife, cut a piece of stem that’s about 4-6 inches long. Make your cut just below a leaf node (where a leaf attaches to the stem).
- Prepare the Cuttings: Gently remove the lower leaves from the cutting, leaving just a few at the top. This prevents them from rotting when buried in the soil and encourages the energy to focus on root development. If any of the remaining leaves are very large, you can even cut them in half horizontally. This further reduces water loss.
- Apply Rooting Hormone: Dip the cut end of the stem into your rooting hormone. Tap off any excess. This step is crucial for encouraging strong root growth.
- Plant Your Cuttings: Fill your pots with your prepared potting mix. Make a small hole in the center of the soil with a pencil or your finger. Insert the cut end of the cutting into the hole, ensuring the hormone-coated part is covered by soil. Gently firm the soil around the base of the cutting.
- Create a Humid Environment: Gently water the soil until it’s moist but not soggy. Then, cover the pot loosely with a clear plastic bag or place it in a propagator. This creates a mini-greenhouse effect, keeping humidity high, which is vital for cuttings to root. You can prop up the bag with sticks to keep it from touching the leaves.
- Provide Light and Warmth: Place your pots in a location that receives bright, indirect light. Avoid direct sun, as this can scorch the delicate cuttings. A slightly warmer spot is beneficial, but not essential if you’re not using bottom heat.
The “Secret Sauce” (Pro Tips)
Now, for a couple of tricks I’ve learned over the years that really make a difference:
- The “Jiggle Test”: After about 6-8 weeks (or sometimes longer, so be patient!), give your cuttings a very gentle tug. If you feel any resistance, it’s a good sign new roots are forming! Don’t pull them out to check too often, though; just a little wiggle.
- Cleanliness is King: I can’t stress this enough. Sterilize your tools before you start and between plants if you’re doing a few. This drastically reduces the risk of fungal infections, which are the bane of propagation. A quick wipe with rubbing alcohol does wonders.
Aftercare & Troubleshooting
Once you’ve spotted that resistance from your cuttings (or seen a tiny root emerge if you did a water propagation, though I always lean towards soil for Pittosporum), it’s time for the next stage.
Aftercare:
- Gradual Acclimation: Once your cuttings are showing good signs of rooting, your greenhouse environment still helps. However, you’ll need to gradually acclimate them to normal room humidity. Start by opening the plastic bag for a few hours each day, then leave it off completely for a week before removing it all together.
- Consistent Moisture: Keep the soil consistently moist, but never waterlogged. Overwatering is your biggest enemy here and can lead to rot.
- Light Transition: Continue to provide bright, indirect light. As the new plant grows stronger, you can slowly introduce it to more direct sunlight, but always watch for signs of stress.
Troubleshooting:
- Yellowing Leaves: This can be a sign of overwatering or underwatering. Check the soil moisture. If it’s too wet, let it dry out a bit. If it’s bone dry, water more consistently.
- Wilting: This often indicates the cutting hasn’t rooted yet and is struggling to take up water. Continue to keep the humidity high and be patient. Sometimes, a wilted cutting will perk up if it eventually roots.
- Rotting/Black Stems: This is the most common failure, and it’s usually due to too much moisture and not enough air circulation. Unfortunately, if the stem turns black and mushy, it’s unlikely to recover. This is where good drainage and a well-aerated mix are absolutely crucial.
A Encouraging Closing
And there you have it! Propagating Pittosporum gatopense is a journey, not a race. Some cuttings will take off immediately, while others might need a little more time. Don’t get discouraged if you lose a few along the way – every gardener does. Just embrace the process, enjoy watching those tiny roots unfurl, and celebrate each new plant you bring into the world. Happy propagating!
Resource:
https://identify.plantnet.org/k-world-flora/species/Pittosporum%20gatopense%20Guillaumin/data