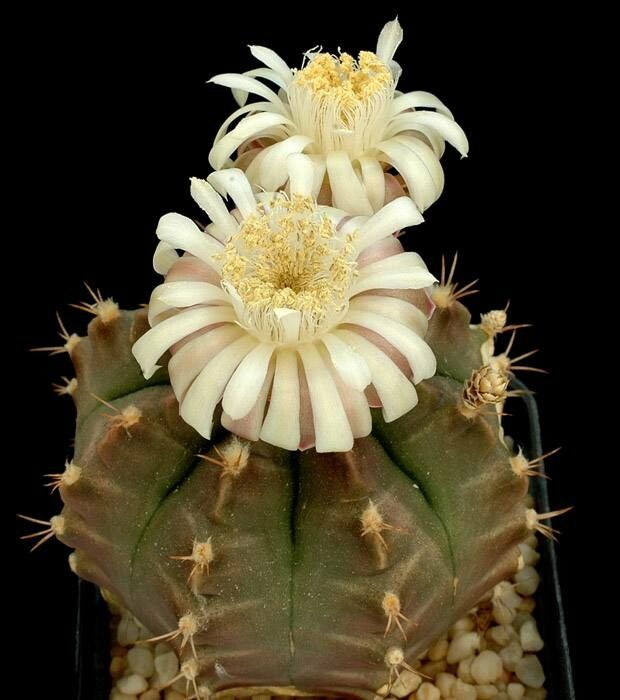
Hello, fellow plant lovers! Today, we’re diving into the wonderful world of propagating Gymnocalycium marsoneri. If you’ve ever admired the unique beauty of this cactus – its beautiful ribbed body and the gorgeous flowers it produces – then you’re in for a treat. Sharing and growing more of these beauties is incredibly satisfying, and I’m here to guide you through it. Now, is it easy for beginners? I’d say it’s moderately easy. With a little patience and the right approach, you’ll be well on your way to success.
The Best Time to Start
My favorite time to get propagating is definitely late spring or early summer. This is when your Gymnocalycium marsoneri is actively growing and has the most energy. You’ll see new growth, and any offsets or pups will be plumping up, ready for their new adventure. Starting during this active period gives your cuttings or divisions the best chance to root quickly.
Supplies You’ll Need
Gathering your supplies before you begin is key! Here’s what I always have on hand:
- Well-draining potting mix: A cactus and succulent mix is perfect. I often amend mine with extra perlite or pumice for even better aeration.
- Sharp, sterile knife or pruning shears: A clean cut is crucial to prevent disease. I use a well-loved pair of secateurs that I always sterilize before using on any plant.
- Rooting hormone (optional but recommended): This can give your cuttings a nice boost.
- Small pots or trays: Terracotta pots are fantastic because they breathe well. Make sure they have drainage holes!
- Gravel or a coarse sand layer: For the bottom of your pots to improve drainage.
- Trowel or spoon: For scooping soil.
- Watering can with a fine rose: For gentle watering.
Propagation Methods
Gymnocalycium marsoneri is a pretty straightforward plant to propagate, and the most common methods are taking offsets (pups) or sometimes stem cuttings, though offsets are much easier and more reliable.
Method 1: Offsets (Pups)
Many Gymnocalycium marsoneri plants will produce little baby plants, called offsets or pups, around their base. These are the easiest to propagate!
- Gently remove the parent plant from its pot. Be careful not to damage the roots.
- Inspect the base. You’re looking for offsets that have started to form their own tiny roots or that are at least a good size (about an inch or so).
- Carefully separate the offset. Use your sterile knife or gently twist it away from the parent plant. If it has its own roots, that’s wonderful! If not, don’t worry, it will grow them.
- Allow the offset to air dry (callus over). This is a critical step. Place the separated offset in a dry, shaded spot for 3-7 days. You want the cut surface to form a dry, protective callus. This prevents rot when you plant it.
- Pot it up. Fill a small pot with your well-draining cactus mix. You can add a thin layer of gravel at the bottom for extra drainage.
- Plant the offset. Make a small hole in the soil and insert the callused end. You can gently press the soil around it. If it has its own roots, nestle them into the soil.
- Resist the urge to water immediately! Wait about a week to water. This gives any tiny nicks from the separation time to heal and further reduces the risk of rot.
Method 2: Stem Cuttings (Less Common, More Advanced)
This is generally done if you need to rescue a part of the plant or want to try something different. It’s less straightforward than offsets.
- Choose a healthy stem section. Look for a firm, green section that’s at least an inch or two long.
- Make a clean cut. Using your sterile knife, cut the stem section from the main plant.
- Remove any lower spines or leaves that would be below the soil line.
- Allow to callus. Just like with offsets, this is non-negotiable. Let the cutting sit in a dry, bright, but indirect light location for 7-14 days until the cut end is completely dry and callused.
- Pot the cutting. Insert the callused end into your well-draining cactus mix. You can use rooting hormone before inserting the cutting if you like.
- Water sparingly. Again, wait at least a week before lightly watering.
The “Secret Sauce” (Pro Tips)
Over the years, I’ve learned a few tricks that really make a difference.
- Bottom Heat is Your Friend: If you’re propagating in a cooler environment or during early spring, consider placing your pots on a gentle heating mat. This little bit of warmth encourages root development much faster. Just make sure it’s not too hot – a gentle warmth is all you need.
- Don’t Overcrowd Your Propagation Station: Give your new little ones space. If they are too close together, they can harbor moisture and encourage fungal issues. Good airflow is just as important as light and water.
- Observe, Don’t Fuss: It’s tempting to constantly check on your new plants, but try to resist. Let them be. Overwatering or constantly disturbing them is the quickest way to cause problems. Trust the process and the plant.
Aftercare & Troubleshooting
Once you see signs of new growth or feel a gentle tug when you lightly try to pull on the cutting/offset (indicating roots!), you’re on the right track.
- Gradual Transition: When your new Gymnocalycium marsoneri has developed a good root system, you can start giving it a bit more light and water. Gradually introduce it to brighter conditions, but avoid direct, scorching sun for its first few months. Water when the soil is completely dry.
- Common Pitfalls: The biggest enemy here is rot. If your cutting or offset turns mushy, black, or smells foul, it’s likely rotted. This is usually due to overwatering, poor drainage, or not allowing it to callus properly. If you catch it early, you might be able to cut away the rotten part and try to callus and re-pot the healthy section, but often, it’s a loss. Another sign of failure is if the plant simply shrivels up and never roots; this can happen if conditions are too dry throughout the rooting period.
A Little Patience Goes A Long Way
Propagating plants is truly a labor of love. There will be times when things don’t go as planned, but don’t be discouraged. Celebrate your successes, learn from your setbacks, and most importantly, enjoy the journey of growing these marvelous Gymnocalycium marsoneri. Happy propagating!
Resource: