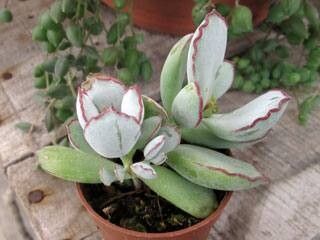
Ah, Cotyledon papillaris! Talk about a plant that brings a smile to my face. Its chubby, velvety leaves, often dusted with a charming powdery film, are just delightful. And the way some varieties get those adorable little “fingers” or tassels at the tips? Pure charm! Propagating them is incredibly rewarding. You get to create more of these little treasures, and frankly, watching a tiny cutting transform into a thriving plant is one of gardening’s greatest joys. For beginners, I’d say Cotyledon papillaris is moderately easy. It’s not as foolproof as some succulents, but with a little attention to detail, you’ll do wonderfully.
The Best Time to Start
When it comes to getting the best results with Cotyledon papillaris, I always lean towards the active growing season. That’s usually late spring through early summer. The plant is full of vigor then, and cuttings are more likely to root quickly. Trying to propagate during its dormant period will likely lead to disappointment. Give it a chance to stretch and grow!
Supplies You’ll Need
Here’s what I like to have on hand when I’m ready to get propagating:
- Sharp, clean pruning shears or a sharp knife: For making clean cuts. A dull tool can crush the plant tissue.
- Well-draining potting mix: I usually use a mix of half succulent/cactus soil and half perlite or pumice. It’s essential for preventing rot.
- Rooting hormone (optional, but helpful): A bit of rooting powder or gel can give your cuttings a boost.
- Small pots or propagation trays: Terracotta pots are great because they breathe and help dry out the soil faster.
- Watering can or spray bottle: For gentle watering.
- Labels and a marker: To keep track of what you’ve propagated and when.
- Bottom heat mat (optional): This can really speed up rooting for some plants, including these.
Propagation Methods
Let’s get our hands dirty! Here are the ways I’ve found most successful for Cotyledon papillaris.
Stem Cuttings
This is my go-to method for these lovely succulents.
- Select a healthy stem: Look for a plump, robust stem that’s not too old or woody, but has a bit of length to it – at least 2-3 inches is ideal.
- Make the cut: Using your clean, sharp shears or knife, take a cutting. Make sure to cut just above a leaf node. This is where new roots are most likely to form.
- Remove lower leaves: Gently strip off the bottom few leaves from the cutting. You can even pop these leaves off and try to root them separately! More on that in a moment.
- Callus over: This is a crucial step! Let your cuttings sit in a dry, shaded spot for 2-7 days. The cut end needs to dry out and form a protective callus. This prevents rot when you plant it.
- Dip in rooting hormone (optional): If you’re using rooting hormone, dip the callused end into the powder or gel. Tap off any excess.
- Plant your cutting: Fill your small pot with your well-draining mix. Make a little hole in the center and insert the callused end of the cutting into the soil. Firm the soil gently around it.
- Water sparingly: Give it a light watering. You don’t want to soak it, just moisten the soil.
Leaf Cuttings
Yes, you can try this, though it’s often less successful than stem cuttings.
- Gently remove leaves: Carefully twist or slide mature, healthy leaves from the stem. Try to get a little bit of the stem base attached to the leaf if possible.
- Allow to callus: Just like stem cuttings, let these leaves dry and form a callus for a few days.
- Lay on soil: Place the callused leaves on top of your well-draining potting mix in a shallow tray or pot. You can lightly press the callused end into the soil, but don’t bury them.
- Mist lightly: Mist the soil surface gently every few days, just enough to keep it from drying out completely. Patience is key here!
The “Secret Sauce” (Pro Tips)
After years of tinkering, here are a few tricks up my sleeve:
- Don’t let leaves touch the water: If you try water propagation (which I find less reliable for Cotyledon papillaris than soil propagation), make sure the leaves themselves are never submerged. Only the cut stem should be in contact with the water. Rot sets in fast if leaves sit in water.
- Bottom heat is your friend: Pop your pots on a heat mat set to a low temperature. This warmth encourages root development from below, mimicking ideal soil conditions. I’ve found it significantly speeds up the process.
- Air circulation is vital: When you have multiple cuttings in a pot or tray, ensure good airflow. This helps the soil dry sufficiently between waterings and deters fungal issues.
Aftercare & Troubleshooting
Once you see those precious little roots peeking out (or new growth on a leaf cutting), it’s time for a gentle transition.
- Watering: Water your new plants only when the soil is completely dry. Overwatering is the quickest way to kill a newly rooted succulent. You can often tell by the weight of the pot.
- Light: Gradually introduce your new plants to brighter light. Start with bright, indirect sunlight. Direct, scorching sun can burn delicate new growth.
- Repotting: Once your cutting has a good root system and has started to grow noticeably, you can pot it up into a slightly larger container with fresh, well-draining soil.
What if things go wrong? The most common culprit is rot. If your cutting turns mushy and black, it’s likely rotted. This usually happens from too much moisture or not enough air circulation. If a leaf cutting shrivels up and does nothing, it might just be that it didn’t have enough stored energy or the conditions weren’t right. Don’t be discouraged if a few cuttings don’t make it; it’s part of the learning process!
A Encouraging Closing
Propagating Cotyledon papillaris is a journey, and like any good journey, it requires a dash of patience and a whole lot of enjoyment. Watch your little cuttings, offer them good conditions, and I promise, you’ll be rewarded with more of these delightful plants to admire and share. Happy propagating!
Resource:
https://identify.plantnet.org/k-world-flora/species/Cotyledon%20papillaris%20L.f./data