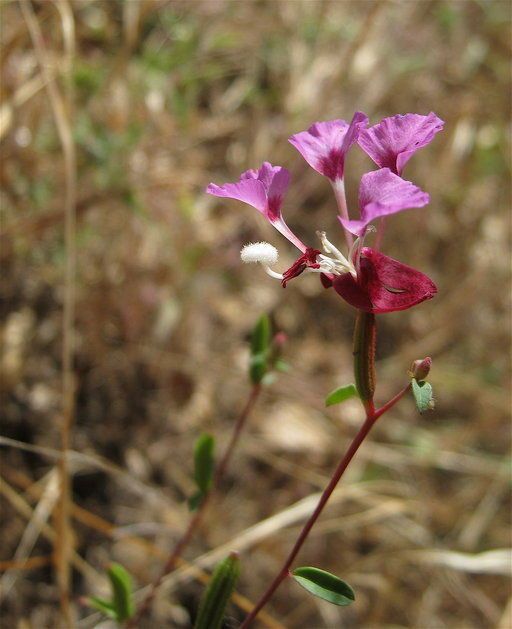
Hey there, fellow garden enthusiasts! It’s so lovely to have you here to chat about one of my absolute favorite wildflowers: Clarkia springvillensis. You know, those delicate, popping colors that just brighten up any corner of the garden? They’re a real treat, and I’ve found that propagating them myself has been incredibly rewarding. It means I can stretch their beauty across more of my garden, or even share them with friends. Now, if you’re just starting out, don’t be intimidated! Clarkia is generally quite forgiving, making it a wonderful plant to practice your propagation skills on.
The Best Time to Start
When it comes to Clarkia springvillensis, timing is everything. The sweet spot for propagation is really in late spring to early summer. This is when the plants are actively growing, and you’ll find you have the best luck with getting cuttings to root. You want to take cuttings from healthy, vigorous stems that haven’t yet flowered. Think of it as tapping into their youthful energy!
Supplies You’ll Need
Gathering your supplies before you dive in makes the whole process so much smoother. Here’s what I always have on hand:
- Sharp pruning shears or a clean craft knife: For making clean cuts. No crushing those delicate stems!
- A well-draining seedling mix: I like a blend of peat moss, perlite, and a tiny bit of compost. Good aeration is key.
- Small pots or seed trays: Clean ones, of course! Anything with good drainage holes will work.
- Watering can with a fine rose: To water gently without disturbing your new cuttings.
- Rooting hormone (optional but helpful): For a little extra oomph in getting those roots to kickstart.
- A plastic bag or a mini-greenhouse: To create a humid environment for your cuttings.
- A spray bottle: For misting.
Propagation Methods
For Clarkia springvillensis, stem cuttings are my go-to method. It’s effective and gives you a great chance of success.
- Take Your Cuttings: Select a healthy stem from your mature Clarkia plant. Using your sharp shears, make a clean cut just below a leaf node (where a leaf attaches to the stem). You’re looking for cuttings that are about 3-4 inches long.
- Prepare the Cuttings: Carefully remove the lower leaves. You want to expose the nodes where roots will eventually form. If your cutting has any flower buds, it’s best to pinch those off. All the plant’s energy should go towards root development, not flowering!
- Apply Rooting Hormone (Optional): Dip the cut end of the stem into your rooting hormone powder or gel. Tap off any excess.
- Plant Your Cuttings: Fill your small pots with your moistened seedling mix. Make a small hole in the center with your finger or a pencil. Then, gently insert the cutting into the hole, ensuring the leaf nodes are buried in the soil. Firm the soil gently around the base of the cutting.
- Create a Humid Environment: Water your cuttings gently. Then, place the pot inside a clear plastic bag or cover it with a mini-greenhouse lid. This will trap moisture and create that humid environment they love. Make sure the leaves aren’t touching the sides of the bag, as this can encourage rot.
- Find a Suitable Spot: Place your pots in a bright location, but out of direct, scorching sunlight. A bright window sill or a spot in the greenhouse is ideal.
The “Secret Sauce” (Pro Tips)
After years of nurturing these little beauties, I’ve picked up a few tricks that seem to make a real difference.
First, and this is a big one, don’t let the leaves touch the water if you ever consider trying water propagation (though I personally find soil methods more reliable for Clarkia). Any foliage submerged will just start to rot and can take the whole cutting down with it. Keep things clean!
Another tip that has proven invaluable is to use bottom heat. If you have a heating mat designed for seedlings, placing your pots on top of it can significantly speed up root formation. That gentle warmth encourages those roots to get going much quicker than cooler temperatures.
And finally, be patient with misting. Even with the bag or greenhouse cover, occasional light misting of the leaves can be beneficial, especially in drier climates. Just a light spritz now and then to keep them happy.
Aftercare & Troubleshooting
Once you see tiny roots starting to peek out of the drainage holes (hooray!), it’s time for a slight shift in care. You can gradually remove the plastic bag or lid over a few days, allowing the new plants to acclimatize to the ambient humidity. Continue to keep the soil consistently moist but not soggy.
The most common issue you might face is rot. If you notice your cutting turning mushy and black, it’s usually a sign of too much moisture and not enough air circulation. Make sure your soil is draining well and that you’re not overwatering. If you spot a rotting cutting, remove it immediately to prevent it from affecting others. Yellowing leaves can sometimes just mean the plant is struggling to establish, but if it’s widespread and accompanied by wilting, it could be a sign of insufficient light or moisture stress.
A Final Thought
Watching a new plant sprout from a little cutting is one of the most satisfying experiences in gardening. Don’t be discouraged if your first few attempts aren’t perfect. Gardening is a journey of learning and observation. Be patient, enjoy the process of nurturing these little bits of life, and soon you’ll have a whole garden full of delightful Clarkia springvillensis to admire! Happy propagating!
Resource:
https://identify.plantnet.org/k-world-flora/species/Clarkia%20springvillensis%20Vasek/data