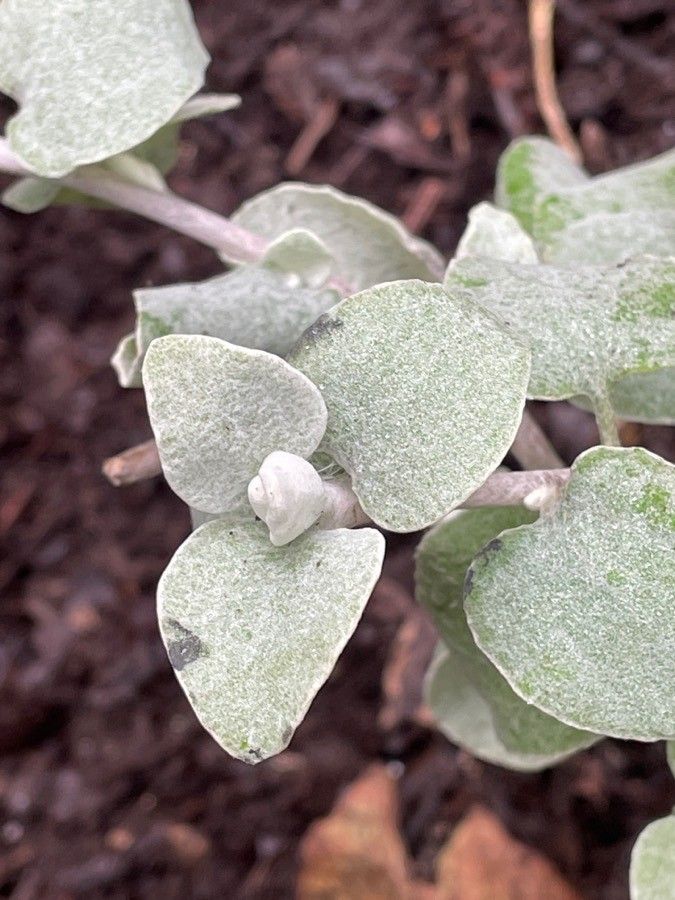
Hey there, fellow plant enthusiasts! Today, we’re diving into the wonderful world of Helichrysum petiolare, or as many of us lovingly call it, licorice plant or silver bush. If you adore that silvery-grey foliage cascading over the edge of a pot or weaving through your garden beds, you’re in for a treat. Propagating this beauty is surprisingly straightforward, making it a fantastic project for beginners and seasoned gardeners alike. There’s something incredibly satisfying about taking a single plant and coaxing it into becoming several new, little friends.
The Best Time to Start
When it comes to Helichrysum petiolare, spring and early summer are your golden ticket. This is when the plant is in its active growing phase, and cuttings taken now have the best chance of rooting quickly. Aim for healthy, non-flowering stems. You’ll want to strike while the iron is hot, so to speak, before the intense heat of mid-summer sets in.
Supplies You’ll Need
Gathering your supplies beforehand always makes the process smoother. For propagating Helichrysum petiolare, here’s what you’ll want:
- Sharp pruning shears or clean scissors: For making clean cuts.
- Rooting hormone (optional): A little boost can speed things up, especially for beginners.
- Small pots or seed trays: Clean ones are crucial to prevent disease.
- Well-draining potting mix: A mix formulated for cacti and succulents, or a blend of potting soil and perlite/vermiculite, works wonders.
- A clear plastic bag or propagator lid: To create a humid environment.
- Watering can with a fine rose: For gentle watering.
Propagation Methods
The most reliable way to propagate Helichrysum petiolare is through stem cuttings. It’s easy and yields great results!
- Take Your Cuttings: Select healthy, non-woody stems from your mature plant. Look for stems that are about 4-6 inches long. Using your clean shears, make a clean cut just below a leaf node (that little bump where a leaf grows out). This is where roots are most likely to form.
- Prepare the Cuttings: Gently remove the lower leaves from the bottom half of each cutting. You want to expose the leaf nodes, as this is where the magic happens. If your cutting has a lot of leaves, you can even pinch off the top few leaves to reduce water loss.
- Apply Rooting Hormone (Optional): If you’re using rooting hormone, dip the cut end of the stem into the powder or gel. Tap off any excess.
- Plant Your Cuttings: Fill your small pots or trays with your well-draining potting mix. Moisten the soil slightly. Using a pencil or your finger, make a small hole in the soil for each cutting. Insert the prepared cutting, ensuring the leaf nodes are buried. Gently firm the soil around the base.
- Water and Cover: Water the soil gently to settle it around the cuttings. Then, cover the pots with a clear plastic bag or a propagator lid. This creates a mini greenhouse, keeping the humidity high, which is essential for preventing the cuttings from drying out before they can form roots.
The “Secret Sauce” (Pro Tips)
Here are a few little tricks I’ve picked up over the years that can really give your propagation efforts a boost:
- Don’t Let Leaves Touch the Water in Water Propagation (If you choose that route): While stem cuttings in soil are my preferred method for Helichrysum, some people enjoy water propagation. If you go this route, ensure no leaves are submerged in the water. Rot is a sure bet if they are. Only the stem should be in contact with the water.
- Bottom Heat is Your Friend: If you have access to a seedling heat mat, place your pots on it. Consistent, gentle warmth from below can significantly speed up the rooting process. It mimics the ideal conditions of spring.
- Watch the Air Flow: While you want humidity, stagnant air can encourage mold and fungal diseases. If you’re using a plastic bag, it’s a good idea to open it for a few minutes each day to allow for some air circulation.
Aftercare & Troubleshooting
Once your cuttings are planted and tucked into their humid environment, the waiting game begins! Keep the soil consistently moist but not waterlogged. Think of it as damp but not soggy. You should see signs of new growth within a few weeks.
The first real sign of success is when you gently tug on a cutting and feel resistance. This means roots have formed! You can also look for tiny new leaves emerging.
Now, about troubleshooting. The most common culprit for failure is overwatering, leading to rot. If your cuttings look mushy or discolored at the base, it’s a bad sign. Ensure your soil drains exceptionally well. If you notice any signs of mold, increase air circulation. Patience is key – some cuttings take longer than others!
A Encouraging Closing
See? Not so daunting, right? Propagating Helichrysum petiolare is a rewarding journey, and with these tips, you’re well on your way to multiplying your gorgeous silver plants. Be patient with yourself and the process. Gardening is all about learning, experimenting, and enjoying the growth, both for the plants and for us! Happy propagating!
Resource: