Hello fellow plant lovers!
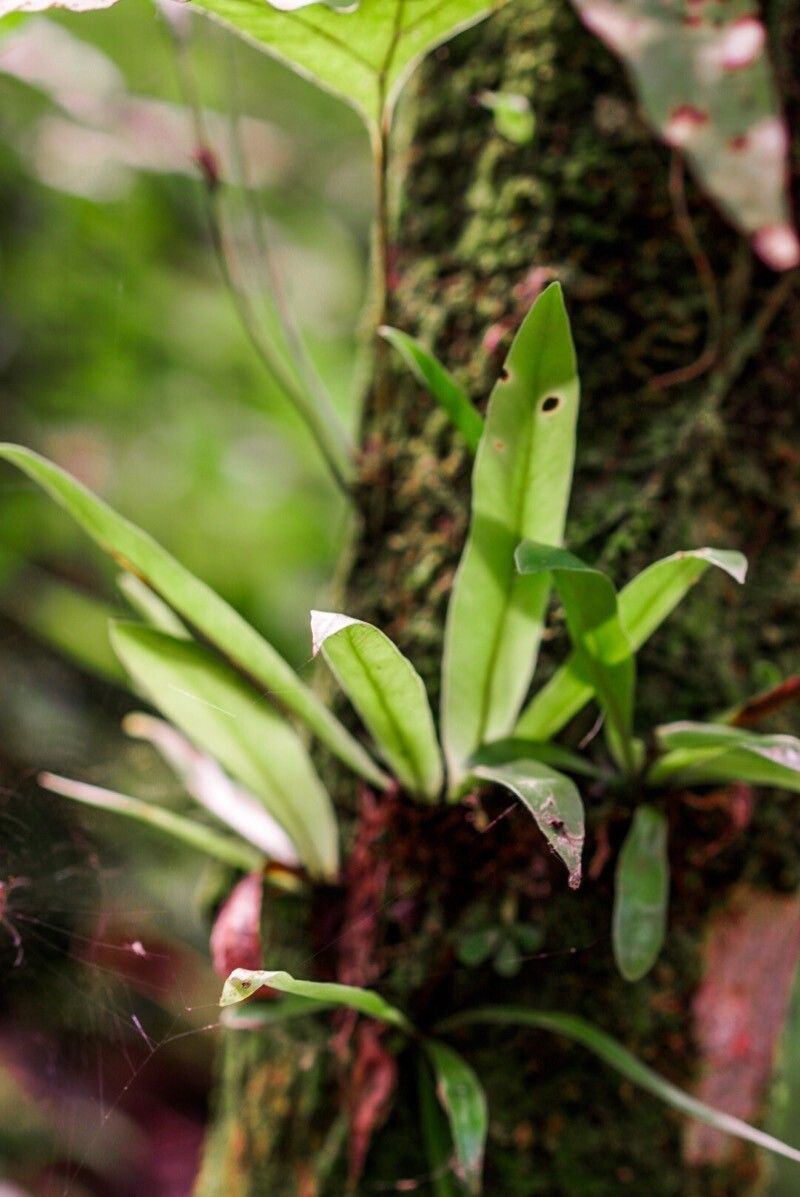
Today, we’re diving into the wonderful world of Elaphoglossum longicrure, often called the “Long-stalked Tounge Fern.” If you’ve ever admired its glossy, lance-shaped fronds, you’ll know why it’s such a sought-after specimen. There’s just something so elegant and sculptural about this beauty. And the best part? You can bring more of that beauty into your home by propagating it! It’s a truly rewarding feeling to watch a tiny snippet of a plant unfurl into its own magnificent self. Now, full disclosure, Elaphoglossum longicrure can be a tad on the fussy side, so while it’s not the absolute easiest for a brand-new beginner, with a little patience and these tips, you’ll be celebrating success in no time.
The Best Time to Start
For Elaphoglossum longicrure, the sweet spot for propagation is spring and early summer. This is when the plant is in its most vigorous growth phase. You’ll find it’s much more receptive to taking cuttings and developing new roots during these warmer, brighter months. Think of it as giving your little plant startups the best chance to thrive with ample sunlight and warmth.
Supplies You’ll Need
Before we get our hands dirty, let’s gather our essentials:
- Sharp, clean pruning shears or a razor blade: Crucial for making clean cuts that heal well.
- Well-draining potting mix: I like a blend of peat moss, perlite, and a bit of orchid bark. This ensures good aeration and prevents waterlogging.
- Small pots or propagation trays: Nothing too big to start with.
- Rooting hormone (optional but recommended): This can give your cuttings a boost.
- Clear plastic bag or dome: To create a humid microclimate.
- Spray bottle: For misting.
- Gravel or LECA: For a humidity tray if you’re not using a dome.
Propagation Methods
Elaphoglossum longicrure is best propagated through division. While stem cuttings can work, they are significantly more challenging with this particular fern and often don’t yield the consistent results we’re aiming for. Division, on the other hand, is quite straightforward and very effective.
Division
This method involves carefully separating established crowns from the parent plant.
- Prepare the parent plant: Water your Elaphoglossum thoroughly a day or two before you plan to divide it. This ensures the plant is hydrated and less stressed.
- Gently remove from pot: Carefully tip the pot on its side and slide the plant out. If it’s stuck, a gentle tap on the bottom or sides of the pot might help.
- Inspect the root ball: Gently tease away some of the old soil from the root ball. You’re looking for distinct sections or clumps that have their own root systems and at least one healthy frond or growth point.
- Make the separation: Using your clean, sharp knife or pruning shears, carefully cut between the sections. Ensure each new division has a good number of roots attached. If you can’t easily separate a section by hand, don’t force it.
- Pot up the divisions: Plant each division in its own small pot filled with your well-draining potting mix. Ensure the crown (where the fronds emerge from the roots) is at or just slightly above the soil line.
- Water gently: Water the newly potted divisions thoroughly.
The “Secret Sauce” (Pro Tips)
Here are a few things I’ve learned over the years that can really make a difference:
- Don’t overwater the divisions from the get-go. While humidity is key, soggy soil is the fastest way to rot those precious new roots. Let the top inch of soil dry out slightly between waterings.
- Give them a humid hideaway. Elaphoglossum plants love humidity. After potting, cover each division with a clear plastic bag or place them under a clear dome. This traps moisture and creates the ideal environment for root development. Make sure the leaves don’t directly touch the plastic, as this can encourage rot. I often use small stakes to prop up the bag.
- Consider a gentle bottom heat. If you have a seedling mat or can place your pots on top of a gently warmed surface (not hot!), this can significantly speed up root formation. Ferns, in general, appreciate that little extra warmth from below.
Aftercare & Troubleshooting
Once your divisions are potted, keep them in that humid environment. Mist them lightly every few days if you’re not using a bag or dome, but again, avoid saturating the soil. As roots begin to form, you’ll notice new frond growth. This is your cue that all is well!
The most common sign of failure is rot. If you see mushy, brown stems or fronds, or if the plant easily pulls away from the soil with no roots, it’s likely rotted. This is usually due to too much moisture and not enough airflow. Discard any rotted material immediately to prevent it from spreading. If you catch it early, sometimes you can salvage a healthy part if it hasn’t succumbed to the rot.
Yellowing leaves can indicate too much or too little light, or sometimes a nutrient deficiency down the line, but for new divisions, focus on moisture and humidity first.
A Encouraging Closing
Propagating plants is a journey, and it’s so rewarding to watch them thrive. Be patient with your Elaphoglossum longicrure divisions. It might take a few weeks, or even a couple of months, for you to see substantial new growth. But when you do, that’s your little fern saying “thank you!” Enjoy the process, celebrate the successes, and learn from any challenges. Happy propagating!
Resource:
https://identify.plantnet.org/k-world-flora/species/Elaphoglossum%20longicrure%20Christ/data