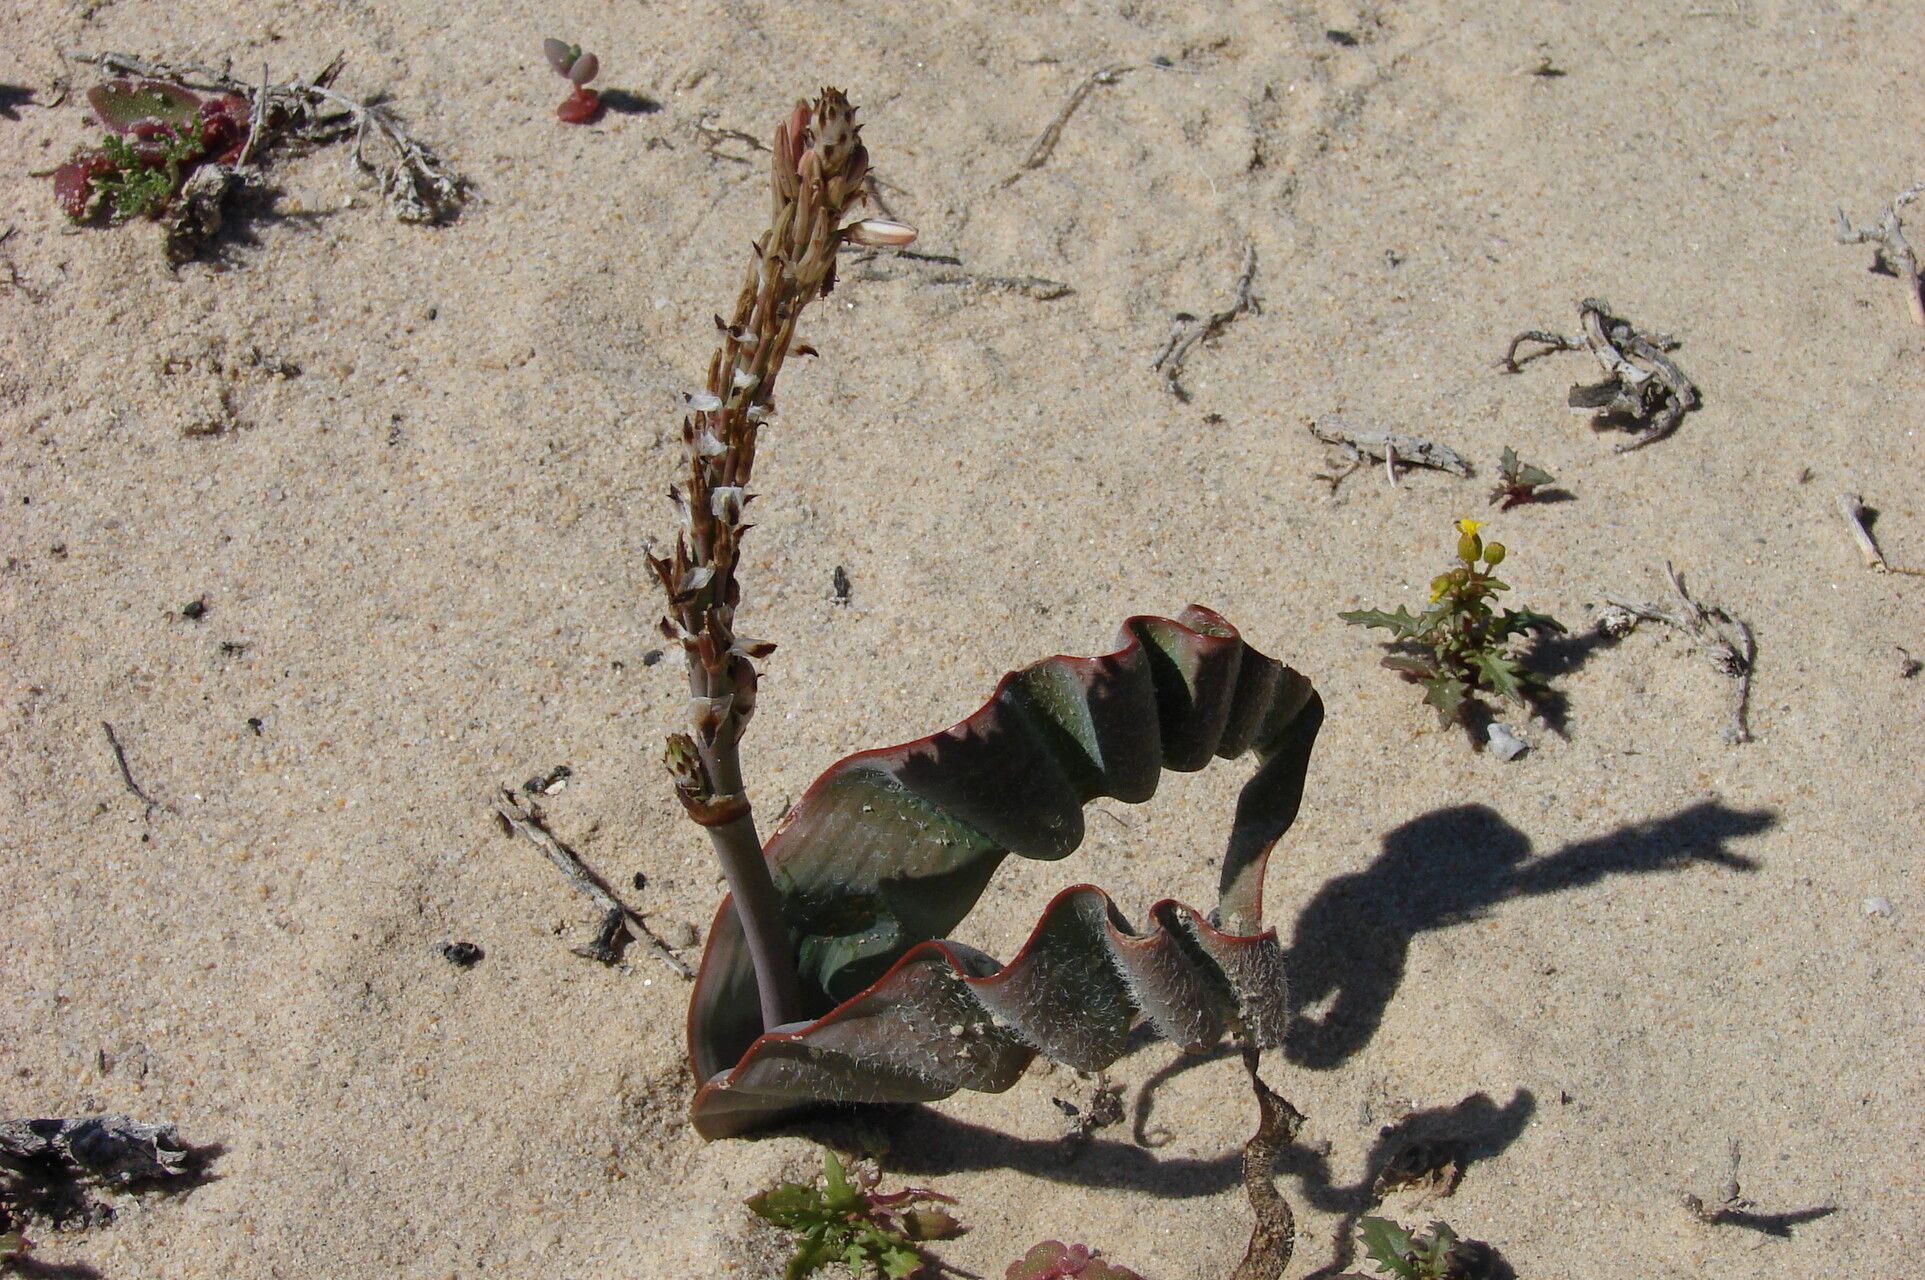
Ah, Trachyandra tortilis! If you’ve ever seen one of these beauties with its corkscrew-like leaves, you know their quirky charm is utterly captivating. They have this way of twisting and turning, like living sculptures. For me, growing them from scratch is one of the most satisfying gardening adventures. It’s a bit of a journey, I won’t lie – it’s not quite a beginner’s walk in the park, but with a little care and patience, it’s absolutely doable and so worth the effort.
The Best Time to Start
Spring is your golden ticket for propagating Trachyandra tortilis. This is when the plant is bursting with new energy and ready to grow. You’ll have the best luck when the weather is warming up, and daylight hours are increasing. Look for active new growth on your existing plant – that’s your signal that it’s ready to share its magic.
Supplies You’ll Need
Here’s what I usually have on hand when I’m ready to propagate:
- Rooting hormone: A crucial ingredient for encouraging those roots to form.
- Sharp, clean pruning shears or a knife: Cleanliness is key to preventing disease.
- Well-draining potting mix: A mix designed for succulents or cacti works wonderfully. You can also make your own by combining equal parts perlite and peat moss.
- Small pots or seed trays: Whatever suits the size of your cuttings. Make sure they have drainage holes!
- A spray bottle: For misting.
- Optional: A heat mat: This can give your cuttings a little extra boost.
Propagation Methods
While Trachyandra tortilis can be a bit slow to root, here are the methods that have worked best for me:
1. Stem Cuttings (My Favorite!)
This is generally the most reliable way I’ve found to get new plants.
- Choose a healthy stem: Look for a stem that’s at least a few inches long and has a few sets of leaves.
- Make a clean cut: Using your sharp, clean shears, cut the stem just below a leaf node. A leaf node is where a leaf attaches to the stem.
- Remove lower leaves: Gently pull off the bottom few leaves from the cutting. This will expose the part of the stem that needs to form roots.
- Dip in rooting hormone: Lightly dip the cut end of the stem into your rooting hormone powder. Tap off any excess.
- Plant the cutting: Make a small hole in your well-draining potting mix and insert the cut end of the stem. Gently firm the soil around it.
- Water lightly: Give the soil a gentle watering, just enough to make it moist but not soggy.
- Provide warmth and light: Place the pot in a bright spot that gets indirect sunlight. If you have a heat mat, this is a good time to use it under the pot.
2. Division (For Mature Plants)
If you have a mature Trachyandra tortilis that’s getting a bit crowded, you can divide it.
- Gently remove the plant from its pot: Be careful not to damage the roots.
- Inspect the root ball: Look for natural divisions where the plant has grown into separate sections.
- Carefully separate the divisions: You can use your fingers or a clean knife to gently pull or cut the plant into smaller sections. Ensure each section has some healthy roots attached.
- Repot the divisions: Plant each division in its own pot filled with your well-draining mix. Water lightly.
The “Secret Sauce” (Pro Tips)
After years of tinkering, I’ve learned a few tricks that really make a difference:
- Let your cuttings callus: Before dipping in rooting hormone and planting, let the cut end of the stem sit out in a dry, airy spot for a day or two. This forms a protective callus, which helps prevent rot and encourages better root development.
- Bottom heat makes a world of difference: Especially for stem cuttings, a gentle warmth from below (around 70-75°F or 21-24°C) can significantly speed up the rooting process. It mimics the warmth of spring soil.
- Patience is your best friend: Trachyandra tortilis are not the fastest propagators. Don’t be discouraged if you don’t see roots for several weeks, or even a couple of months. Resist the urge to constantly pull them up to check!
Aftercare & Troubleshooting
Once you see new growth emerging from your cutting or division, it’s a good sign that roots are forming! You can gently tug on the cutting to feel for resistance – that tells you roots have taken hold. Gradually introduce your new plant to more direct sunlight as it matures.
The biggest pitfall to watch out for is rot. If your cutting turns mushy or black, it’s likely suffered from too much moisture. Make sure your soil is draining exceptionally well and don’t overwater, especially in the initial stages. If a stem cutting fails, don’t despair – just try again with a fresh one!
Happy Propagating!
Growing Trachyandra tortilis from cuttings or divisions is such a rewarding experience. It allows you to multiply the unique beauty of these plants and share them with fellow plant enthusiasts. Be patient with the process, enjoy the little victories, and before you know it, you’ll have a whole collection of these delightfully twisted treasures. Happy gardening!
Resource:
https://identify.plantnet.org/k-world-flora/species/Trachyandra%20tortilis%20(Baker)%20Oberm./data