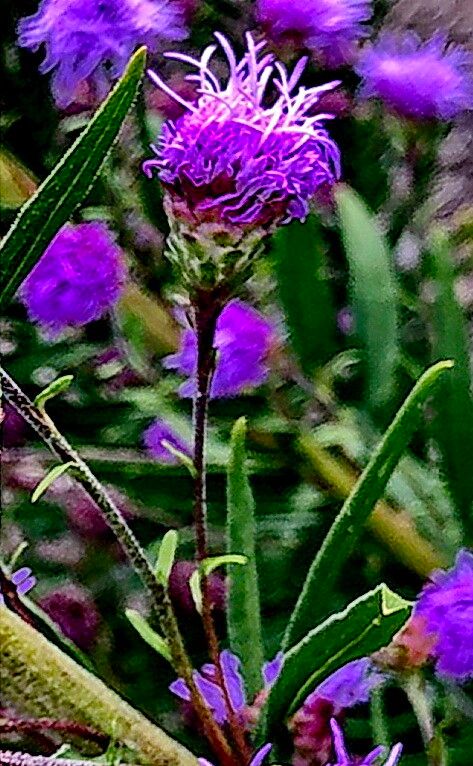
Hello, fellow garden enthusiasts! It’s so wonderful to have you here. Today, I want to chat about a plant that truly captures my heart: Liatris ligulistylis, or as many of us know it, the Meadow Blazing Star. If you love those tall spikes of fuzzy, lavender-pink flowers that bring butterflies and bees flocking, you’re in for a treat. And if you’ve ever dreamt of having more of these beauties gracing your garden, well, propagating them is a fantastic way to do just that!
Now, I know a lot of you might be a little hesitant about propagation. Don’t be! Liatris ligulistylis is actually quite a forgiving plant to work with. I’d say it’s a great choice for beginners looking to dip their toes into the world of plant multiplication. The reward of watching a tiny cutting or a division transform into a full-fledged plant is just… well, it’s pure gardening joy.
The Best Time to Start
When it comes to Liatris ligulistylis, the late winter or early spring is your golden window. Before the plant really gets going with its vigorous summer growth, or just as it’s starting to wake up, is the perfect time to attempt propagation. This allows the newly divided sections or cuttings to establish themselves during the milder weather and before the heat of summer sets in.
Supplies You’ll Need
Gathering your supplies beforehand makes the whole process much smoother. Here’s what I usually have on hand:
- Sharp pruning shears or a clean knife: For making clean cuts.
- Well-draining potting mix: A good blend of peat moss, perlite, and a little compost works wonders.
- Small pots or seed trays: With drainage holes, of course!
- Rooting hormone (optional but helpful): Especially for stem cuttings.
- A watering can with a fine rose: To water gently.
- Labels and a marker: To keep track of what you’ve planted.
- A bright, indirect light location: To keep your new plants happy.
Propagation Methods
Liatris ligulistylis can be propagated by a couple of reliable methods. I find division to be the most straightforward, especially for established plants.
Division: Sharing the Wealth
This is where you gently split up a mature clump of Liatris into smaller sections, each with its own roots and at least one growing point.
- Dig Up Gently: In late winter or early spring, carefully dig up your Liatris clump. Try to disturb the roots as little as possible.
- Clean the Roots: Gently brush off excess soil so you can see your divisions clearly.
- Divide: Using your hands, a trowel, or clean pruning shears, carefully split the clump. You’re looking for sections that have a healthy root system and a bud or a leafy shoot. If the roots are really tangled, a clean knife can help here.
- Replant Immediately: Plant each division into a pot filled with your well-draining potting mix, or directly back into the garden bed. Ensure the top of the root ball is at the same level it was before.
- Water Well: Give your new divisions a good watering to settle the soil.
Stem Cuttings: A Little More Patience
This method can give you more plants from a single parent, but it requires a bit more attention.
- Take Cuttings: In late spring or early summer, when the plant is actively growing, take 4-6 inch cuttings from healthy stems. Make your cut just below a leaf node.
- Prepare the Cuttings: Remove the lower leaves, leaving just a few at the top. If you’re using rooting hormone, dip the cut end into it now.
- Plant the Cuttings: Fill small pots with your potting mix. Make a small hole with a pencil or your finger, and insert the cut end of the stem. Gently firm the soil around it.
- Water and Cover: Water gently. You can create a mini-greenhouse effect by placing a clear plastic bag over the pot, held up by stakes or skewers so it doesn’t touch the leaves.
- Provide Light and Warmth: Place the pots in a bright location but out of direct, harsh sunlight. Bottom heat, perhaps from a seedling heat mat, can significantly speed up root development.
The “Secret Sauce” (Pro Tips)
Here are a couple of things I’ve learned over the years that really make a difference:
- Don’t Overcrowd Divisions: When you’re dividing, resist the urge to make the pieces too small. Each division needs enough stored energy in its roots and crown to get going. A piece that’s too tiny might struggle to survive.
- Air Circulation for Cuttings: If you’re doing stem cuttings and using that plastic bag cover, open the bag for a few minutes each day to allow for air circulation. This helps prevent fungal diseases from setting in, which is a common culprit for cutting failure.
Aftercare & Troubleshooting
Once your Liatris divisions or cuttings have started showing signs of life – think new leaves appearing or a gentle tug on a cutting meeting resistance (indicating roots) – you’re on the right track!
- Watering: Continue to water regularly, keeping the soil consistently moist but not waterlogged. Overwatering is the quickest way to invite root rot, which often looks like yellowing leaves that then turn mushy and black. If you see this, it’s usually a sign it’s too late, but you can try to salvage any healthy parts if you catch it early.
- Transitioning: If you used a plastic bag or covered your cuttings, gradually remove the cover over a week or two to acclimate them to normal humidity.
- Transplanting: Once your new plants have a good root system and are robust enough, you can transplant them into larger pots or their final garden location.
Happy Growing!
The journey of growing plants from your own efforts is immensely satisfying. Be patient with your new Liatris ligulistylis plants. Some might take a little longer to show progress than others, and that’s perfectly normal. Just keep them happy with good light and consistent moisture, and you’ll soon have a whole new generation of these stunning meadow stars. Happy propagating, everyone!
Resource: