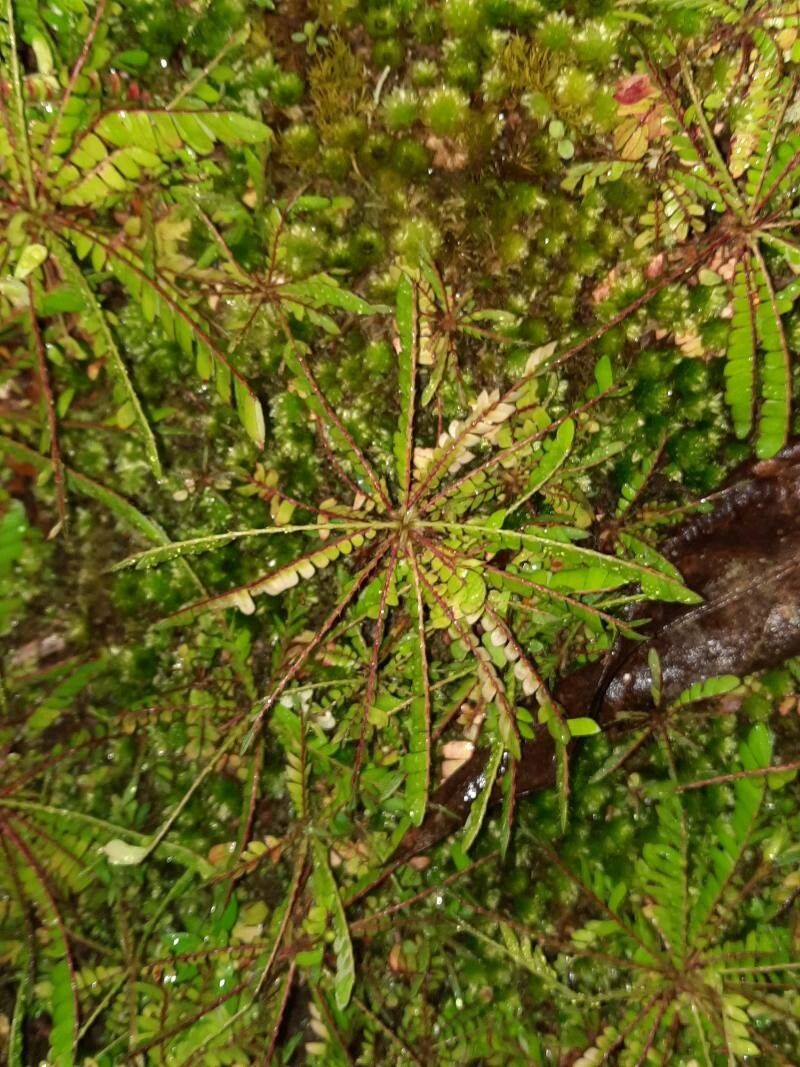
Hey there, fellow plant enthusiasts! If you’ve ever marveled at the delicate, almost magical way Biophytum sensitivum folds its leaves when touched, you know this little wonder is something special. It’s often called the “Little Tree Plant” or the “Sensitive Plant,” and for good reason. Its intricate, fern-like foliage and miniature tree structure make it a real conversation starter.
Now, I know what you might be thinking: “Is this one of those finicky plants that’s impossible to propagate?” Honestly, Biophytum sensitivum can be a tad more particular than, say, a pothos, but it’s absolutely achievable for beginners with a bit of know-how. And the reward of seeing those tiny new plants unfurl? Pure gardening joy! It’s like multiplying magic.
The Best Time to Start
For the highest success rate with Biophytum sensitivum, spring and early summer are your golden ticket. This is when the plant is in its active growth phase, meaning it’s got the energy to push out roots and establish itself more readily. Waiting until after the plant has finished its main flowering flush is also a good idea. You want healthy, vigorous parent plants to work with.
Supplies You’ll Need
Gathering your tools makes the whole process smoother. Here’s what I usually have on hand:
- Sharp pruning shears or a clean craft knife: For making clean cuts.
- Well-draining potting mix: A blend of peat moss, perlite, and a bit of orchid bark works wonders. You want something that doesn’t hold onto too much moisture.
- Small pots or propagation trays: Tiny pots are perfect for these little guys.
- Rooting hormone (optional but helpful): A powder or gel can give your cuttings a boost.
- Clear plastic bags or a humidity dome: To maintain high humidity around your cuttings.
- Watering can with a fine rose or a mister: Gentle watering is key.
- Small stakes or skewers: For keeping leaves from touching the soil surface.
Propagation Methods
Biophytum sensitivum can be propagated through a couple of methods, but stem cuttings are usually the most reliable and satisfying for getting dedicated new plants.
Stem Cuttings:
- First, select a healthy, mature stem from your Biophytum. Look for one that’s not too woody but has developed a bit.
- Using your sterilized pruning shears or knife, make a clean cut just below a leaf node. This is the little bump where a leaf emerges from the stem. Try to get a cutting that’s about 3-4 inches long and has a few sets of leaves.
- Gently remove the lower leaves from your cutting. You want to expose a bit of the stem so it can form roots. Leave at least two or three sets of leaves at the top.
- If you’re using rooting hormone, dip the cut end into it. Tap off any excess.
- Fill your small pots with your well-draining potting mix. Moisten it slightly.
- Create a small hole in the soil with a pencil or your finger. Insert the cut end of your Biophytum cutting into the hole.
- Firm the soil gently around the stem.
- Now for a critical step: lightly mist the cutting and the soil.
- Cover the pot with a clear plastic bag or place it under a humidity dome. You want to create a mini greenhouse effect. This keeps the humidity high, which is crucial for cuttings as they haven’t developed roots yet to absorb water.
- Place the pot in a warm location with bright, indirect light. Avoid direct sunlight, which can scorch the delicate leaves.
The “Secret Sauce” (Pro Tips)
Here are a few things I’ve learned over the years that really make a difference:
- Don’t let the leaves touch the water! This is so important. If the lower leaves are sitting in moist soil or water, they’re prone to rot. I often use tiny stakes or skewers to gently prop up the upper leaves so they’re not in constant contact with the soil surface when I water.
- Bottom heat is your friend. While not absolutely essential, placing your propagation pots on a gentle seedling heat mat can significantly speed up root development. The warmth encourages the plant to put energy into rooting. Just make sure it’s not too hot!
- Patience is paramount. Biophytum sensitivum can be a slow starter. Don’t be discouraged if you don’t see roots popping out in a week or two. Check for roots by gently tugging on the cutting. If there’s resistance, you’ve got roots!
Aftercare & Troubleshooting
Once you see those tell-tale signs of new growth – usually tiny new leaves unfurling at the tip – you know roots have formed. At this point, you can gradually acclimate your new plant to slightly lower humidity. Start by peeking the plastic bag open for a few hours each day.
Troubleshooting common issues:
- Rotting: If your cutting wilts and turns mushy, it’s likely due to too much moisture and not enough air circulation. Make sure your soil is draining well and that you haven’t overwatered. This is where good drainage and not letting leaves touch the soil really pay off.
- Yellowing leaves: This can sometimes indicate too much direct sun or inconsistent watering. Move it to a brighter, but still indirect, light spot and ensure the soil is consistently moist, but not waterlogged.
- No signs of life: If after several weeks there’s still no growth, it might be that the cutting wasn’t viable, the conditions weren’t right, or it simply didn’t take. Don’t be too hard on yourself; it happens. Just try again with a fresh cutting when conditions are optimal.
A Encouraging Closing
Propagating Biophytum sensitivum is a wonderful way to multiply the delicate beauty of this plant. It requires a little care and attention, but the process itself is incredibly rewarding. Remember to enjoy the journey, be patient with your little green sprouts, and soon you’ll have plenty of these miniature marvels to share! Happy propagating!
Resource:
https://identify.plantnet.org/k-world-flora/species/Biophytum%20sensitivum%20(L.)%20DC./data