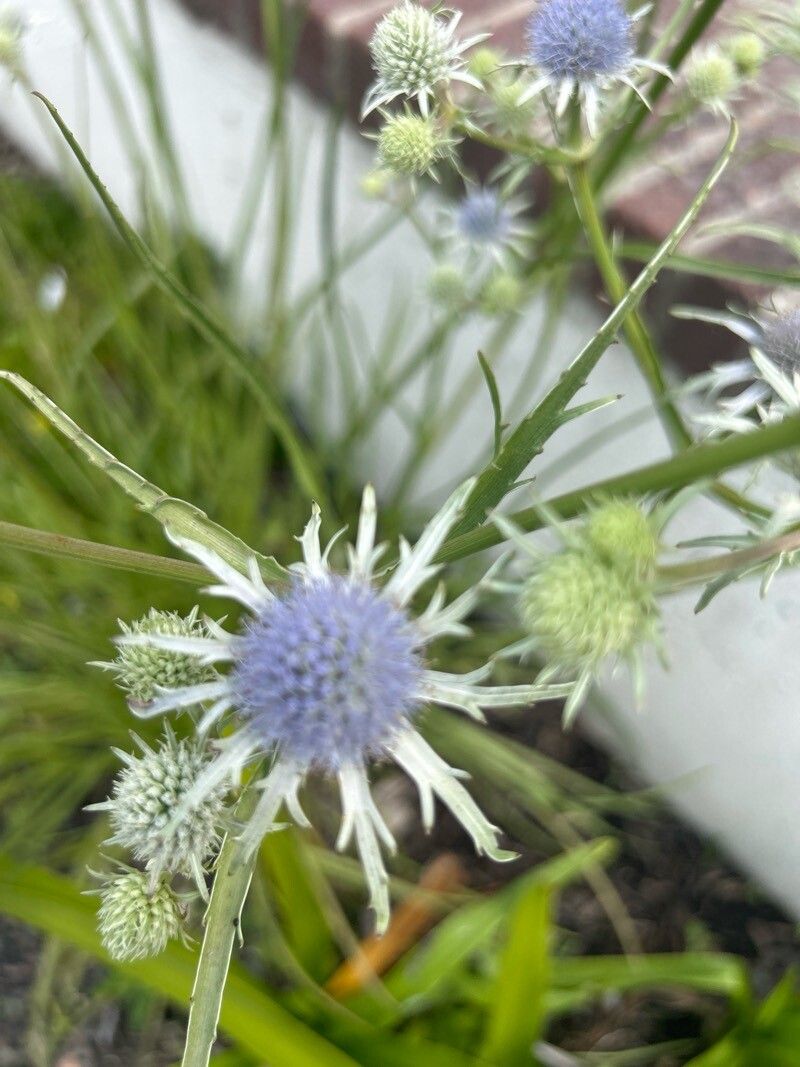
Hello fellow plant lovers! Today, we’re diving into the wonderfully spiky world of Eryngium aquaticum, commonly known as California sea holly. If you’ve ever admired its striking, almost otherworldly blue flowers and fascinating foliage, you know why it’s such a garden showstopper. Propagating these beauties can be incredibly satisfying, and while they might present a slight challenge to the absolute beginner, with a little guidance, you’ll be well on your way to more sea hollies for your garden or to share.
The Best Time to Start
For Eryngium aquaticum, the sweet spot for propagation is typically in the late spring or early summer. This is when the plant is actively growing and has plenty of energy to put into developing roots. Waiting until the plants are established and showing good vigor is key. You don’t want to try propagating from a newly planted or stressed specimen.
Supplies You’ll Need
Gathering your tools beforehand makes the whole process much smoother. Here’s what you’ll want to have on hand:
- Sharp pruning shears or a clean knife: For taking cuttings.
- Seed-starting mix or a gritty potting mix: A well-draining medium is crucial. I often use a 50/50 blend of perlite and seed-starting compost.
- Rooting hormone (optional but recommended): This can give your cuttings a significant boost.
- Small pots or seed trays with drainage holes: For your cuttings to grow in.
- Plastic bags or a propagation dome: To create a humid environment.
- Watering can with a fine rose or a spray bottle: For gentle watering.
- Labels and a permanent marker: To keep track of your endeavors!
Propagation Methods
Eryngium aquaticum is best propagated by division or stem cuttings. Let’s explore both.
Division
This is often the most straightforward method, especially for more established plants.
- Dig Up Your Plant: In late spring or early summer, carefully dig up your Eryngium aquaticum plant. Try to disturb the root ball as little as possible. If the plant is very large, you might need a garden fork to help loosen it.
- Inspect and Separate: Gently shake off excess soil to reveal the root system. You’ll be looking for distinct crowns or sections of the plant that have their own root structure.
- Divide with Care: Using your gardening knife or a spade, carefully split the root ball into smaller sections. Each section should have at least one healthy crown and a good amount of roots. If the roots are tightly intertwined, you might need to be a bit firm, but avoid tearing them unnecessarily.
- Replant Immediately: Plant each division into its new location in the garden or into pots with fresh, well-draining soil. Water them in well.
Stem Cuttings
This method is great for increasing your numbers and can be quite rewarding.
- Take Your Cuttings: Select healthy, non-flowering stems from your Eryngium aquaticum plant. Using your sharp shears, cut stems that are 4-6 inches long. Make the cut just below a leaf node (where a leaf attaches to the stem).
- Prepare the Cuttings: Remove the lower leaves from the stem, leaving only a few at the top. This reduces moisture loss and prevents leaves from rotting in the soil.
- Apply Rooting Hormone (Optional): Dip the cut end of each stem into rooting hormone powder, tapping off any excess.
- Pot Them Up: Fill small pots or seed trays with your gritty, well-draining potting mix. Make a hole in the center of the mix with a pencil or your finger.
- Insert and Water: Place the cut end of each cutting into the hole and gently firm the soil around it. Water thoroughly but gently.
- Create a Humid Environment: Cover the pots with a clear plastic bag, or place them inside a propagation dome. Ensure the leaves don’t touch the plastic. You can use stakes to hold the bag up if needed. Place the pots in a bright location, but out of direct, hot sun.
The “Secret Sauce” (Pro Tips)
Here are a couple of things I’ve learned over the years that can really make a difference:
- Don’t Drown Your Cuttings: While humidity is essential for cuttings, the soil itself should never be waterlogged. Let the top inch of soil dry out slightly between waterings. Overwatering is the quickest way to invite rot.
- Bottom Heat Works Wonders: If you’re trying stem cuttings, placing your pots on a heat mat can significantly speed up root development. The warmth encourages the plant to send out roots more readily.
Aftercare & Troubleshooting
Once your cuttings have rooted (you can test this by gently tugging on a stem – if there’s resistance, you have roots!), it’s time to treat them as young plants.
- Gradual Acclimation: Slowly remove the plastic bag or propagation dome over a few days to allow the cuttings to adjust to normal humidity.
- Consistent Moisture: Keep the soil consistently moist but not soggy.
- Transplanting: Once the roots are well-established and filling the pot, you can transplant them into slightly larger pots or their permanent garden spot.
- Watch for Rot: The biggest culprit for failure is usually rot, often caused by overwatering. If you see stems turning black and mushy, or if your cuttings simply wilt and refuse to perk up, it’s a sign of too much moisture and poor air circulation.
A Encouraging Closing
Propagating Eryngium aquaticum is a wonderful way to expand your collection and deepen your connection with these unique plants. Don’t be discouraged if your first attempt isn’t perfect. Gardening is a journey, and patience is your best tool. Enjoy the process of nurturing these prickly beauties, and celebrate every new little plant you bring to life! Happy gardening!
Resource:
https://identify.plantnet.org/k-world-flora/species/Eryngium%20aquaticum%20L./data