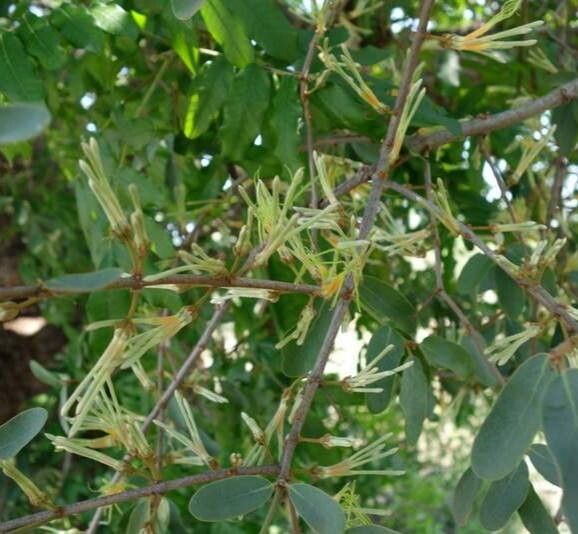
Oh, hello there! Grab a cup of your favorite brew, and let’s chat about something truly special: Erianthemum dregei. If you’ve ever seen this beauty gracing a garden or a friend’s collection, you’ll know it’s got this understated elegance. Its delicate, bell-shaped flowers and lovely foliage bring such a touch of whimsy. And the best part? You can easily fill your own space with more of these charming plants!
Now, I won’t kid you. Erianthemum dregei can be a tiny bit particular, but don’t let that scare you off. With a little understanding and some gentle guidance, propagating it is absolutely achievable, even for those of you who are just dipping your toes into the wonderful world of plant propagation. It’s a wonderfully rewarding process, watching a tiny cutting transform into a thriving new plant.
The Best Time to Start
For Erianthemum dregei, timing is everything. I find the late spring to early summer is absolutely prime time. This is when the plant is actively growing, full of energy, and much more receptive to putting out roots. It’s also when the days are getting longer and warmer, offering that lovely, consistent light and heat that cuttings adore. Waiting until your plant has just finished its main flush of growth is your sweet spot.
Supplies You’ll Need
Before we get our hands dirty, let’s gather our tools. Think of this as assembling your starter kit for plant parenthood!
- Sharp Pruning Shears or a Clean Knife: Essential for making clean cuts. Dull tools can damage the plant.
- Well-Draining Potting Mix: A good blend for us is usually 50% perlite and 50% peat moss or coco coir. This aeration is key for preventing root rot.
- Small Pots or Trays: Clean pots are a must! Small ones are perfect for cuttings, as they don’t hold excess moisture.
- Rooting Hormone (Optional but Recommended): A powder or gel can give your cuttings a helpful boost.
- Plastic Bag or Clear Dome: To create a humid environment around your cuttings.
- Watering Can with a Fine Rose: For gentle watering.
- Labels: To keep track of what you’ve propagated and when!
Propagation Methods
Erianthemum dregei is most commonly and successfully propagated through stem cuttings. It’s my go-to method, and I think you’ll find it works wonderfully.
Stem Cuttings:
- Select Healthy Stems: Look for stems that are not flowering and show good, vigorous growth. A good cutting is usually about 4-6 inches long.
- Make the Cut: Using your sharp shears or knife, make a clean cut just below a leaf node. A leaf node is where a leaf joins the stem; this is where roots are most likely to form.
- Prepare the Cutting: Gently remove the lower leaves from the stem, leaving just a few at the top. This prevents them from rotting in the soil or water.
- Apply Rooting Hormone (Optional): If you’re using rooting hormone, dip the cut end of the stem into the powder or gel. Tap off any excess.
- Plant Your Cuttings: Fill your small pots with your prepared, moist potting mix. Make a small hole with your finger or a pencil and gently insert the cut end of the stem into the soil. Firm the soil around it gently.
- Create Humidity: Water the soil lightly. Then, cover the pot with a clear plastic bag, securing it around the rim of the pot with a rubber band, or place a clear dome over it. This creates a mini-greenhouse.
- Placement is Key: Place the pots in a bright spot, but out of direct sunlight. Too much sun will scorch the delicate cuttings. A warm location is ideal.
The “Secret Sauce”
Here are a few little tricks I’ve picked up over the years that really seem to make a difference.
- Don’t Overcrowd Your Cuttings: Give each cutting a bit of breathing room. If they’re packed too tightly, they compete for light and can encourage fungal issues. I always try to give them their own little space if possible.
- Consider Bottom Heat: If you have a seedling heat mat, placing your pots on it can be a game-changer, especially in cooler homes. That gentle warmth from below really encourages root development.
- Watch the Leaves: Make sure none of the leaves are touching the soil surface directly. Even with good drainage, that’s an invitation for rot. Tuck them up slightly if needed.
Aftercare & Troubleshooting
Once your cuttings are planted, a little patience is key. You’ll want to keep the soil consistently moist but not soggy. That plastic cover or dome is your friend here, helping to maintain humidity.
After a few weeks, you should start to see some new leaf growth appearing. This is a good sign! You can also give your cutting a gentle tug; if there’s resistance, it means roots have formed. Once you see good root development, you can gradually remove the plastic cover over a few days to acclimate your new plant to normal humidity.
What if things go wrong? The most common culprit is rot. If your cutting turns black and mushy, or the leaves wilt and turn yellow without any sign of new growth, it’s likely rot. This usually happens from overwatering and poor air circulation. If you see this, discard the affected cutting to prevent it from spreading.
A Encouraging Closing
Propagating plants is like a little bit of magic, isn’t it? You’re taking a small piece of a parent plant and coaxing it to become something all its own. Don’t get discouraged if your first attempt isn’t perfect. Gardening is a journey of learning and observation, and every lesson, even the tricky ones, makes you a better plant parent. Keep experimenting, keep observing, and most importantly, enjoy the wonderful process of growing! Happy propagating!
Resource: