Hello, fellow garden lovers! I’m so excited to chat with you today about a plant that’s brought so much joy to my own garden: Eclipta prostrata, often called trailing eclipta or, in some parts of the world, “hair blackener” for its traditional uses.
Why Propagate Eclipta Prostrata?
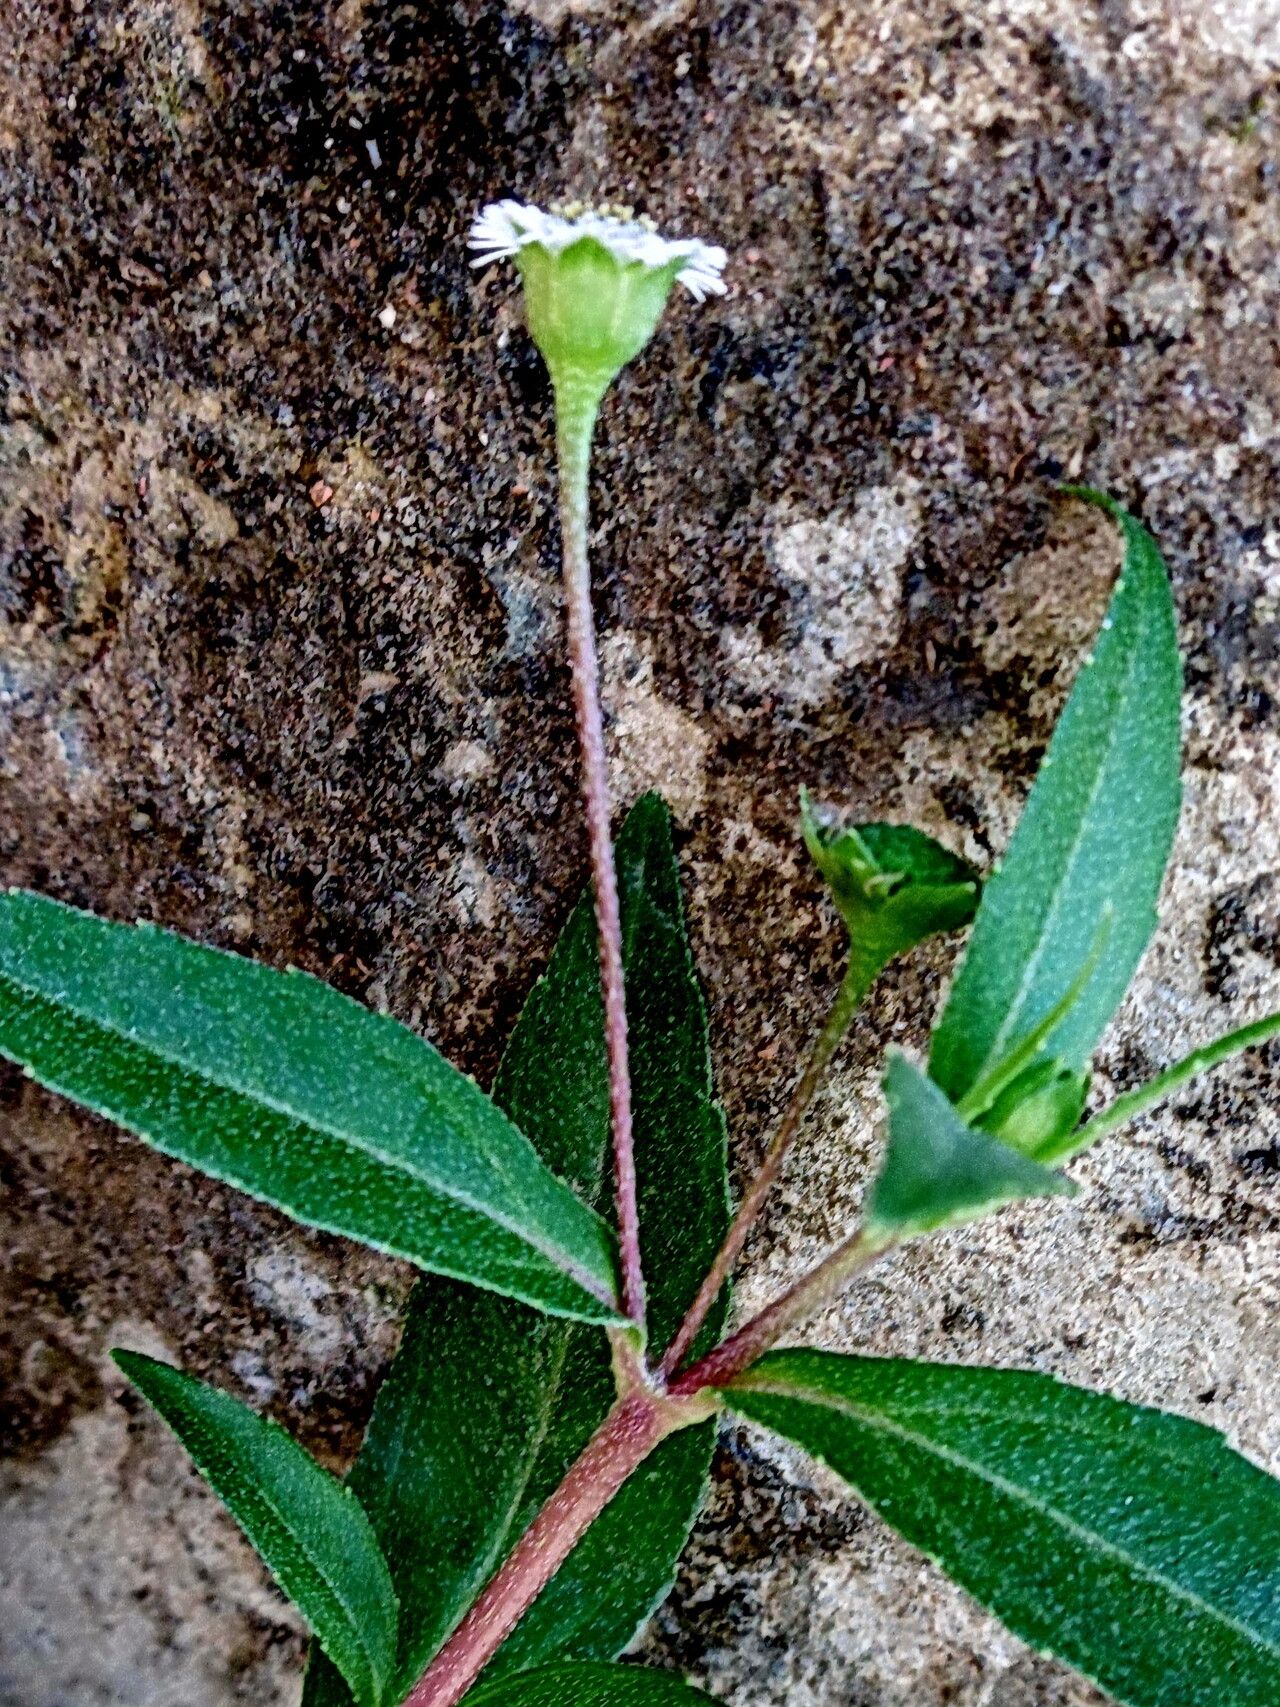
This little beauty is a real charmer. Its delicate, star-shaped white flowers, offset by its dark green, almost toothed leaves, create a lovely texture and a cascade of blooms that lasts for ages, especially in warmer climates. Propagating it is wonderfully rewarding. You get to watch new life emerge from a tiny piece of an existing plant, and it’s surprisingly successful! For beginners, I’d say this plant is quite forgiving. You’ll likely have a good success rate, which is always a confidence booster.
The Best Time to Start
The sweet spot for propagating Eclipta prostrata is during its active growing season. For most of us, this means spring and summer. When the plant is actively producing new shoots, it’s brimming with the energy needed to root and establish itself quickly. You can take cuttings from healthy, non-flowering stems.
Supplies You’ll Need
Gathering your supplies makes the whole process much smoother. Here’s what I always have on hand:
- Sharp pruning shears or a clean knife: For making clean cuts.
- Rooting hormone (optional but recommended): A little dip can speed up root development.
- Well-draining potting mix: Something like a seed-starting mix or a blend of peat moss and perlite works well.
- Small pots or trays: For your new baby plants.
- Watering can or spray bottle: For gentle watering.
- Clear plastic bags or domes: To create a humid environment.
- Labels: To keep track of your efforts!
Propagation Methods
There are a couple of wonderfully effective ways to get more Eclipta prostrata plants.
Stem Cuttings
This is my go-to method for Eclipta. It’s simple and yields fantastic results.
- Select your cutting: Find a healthy, green stem that’s not flowering. Aim for a piece about 4-6 inches long.
- Make the cut: Using your clean shears or knife, make a clean cut just below a leaf node (where a leaf attaches to the stem). This is where roots are most likely to form.
- Prepare the cutting: Gently remove the lower leaves, leaving just a couple of sets at the top. This prevents them from rotting in the soil.
- Apply rooting hormone (optional): Dip the cut end into rooting hormone, tapping off any excess.
- Plant the cutting: Stick the cut end about an inch deep into your prepared potting mix. Gently firm the soil around it.
- Create humidity: Water the soil lightly, then cover the pot with a clear plastic bag or dome. This creates a mini-greenhouse effect, keeping humidity high. Secure it loosely with a rubber band.
- Placement: Place the pot in a bright location, but out of direct, harsh sunlight.
Water Propagation
This is a fascinating method to watch unfold! Some gardeners prefer this as it allows you to see the roots forming.
- Take your cutting: Follow steps 1 and 2 from the stem cutting method.
- Remove lower leaves: Just like before, remove the leaves that would be submerged in water.
- Place in water: Put the cutting in a glass or jar of clean water. Make sure that no leaves are touching the water. The water level should cover the leaf nodes where you removed the leaves.
- Change water regularly: Change the water every few days to keep it fresh and prevent bacterial growth.
- Placement: Again, keep it in bright, indirect light.
The “Secret Sauce” (Pro Tips)
After years of gardening, you pick up a few tricks that make a difference. Here are a couple of my favorites for Eclipta:
- Bottom Heat is Your Friend: If you’re propagating in a cooler environment, using a seedling heat mat under your pots can significantly speed up root development. It mimics the warmth of spring and tells the plant, “Hey, it’s time to grow!”
- Don’t Overwater, Just Keep it Moist: This is crucial, especially for stem cuttings. The soil should feel consistently damp but not soggy. Overwatering is the fastest way to invite rot. Think of it as a gentle hug for the cutting, not a drowning.
Aftercare & Troubleshooting
Once you see signs of new leaf growth or feel some resistance when gently tugging on your cutting, it’s a good sign that roots have formed!
- Acclimatize: If you used a plastic bag, gradually remove it over a few days to let the new plant get used to less humidity.
- Potting Up: Once the roots are well-established (you might see them peeking out of the drainage holes), you can carefully pot your new plant into its own container with regular potting soil.
- Signs of Trouble: The most common issue is rot. If your cutting turns mushy, black, or smells bad, it’s probably rotted. This is usually due to too much moisture and not enough air circulation. If you see this, unfortunately, it’s usually best to discard it and start again. Don’t be discouraged!
Happy Gardening!
Propagating Eclipta prostrata is such a satisfying endeavor. Be patient with your cuttings – sometimes it takes a little longer than you expect. Enjoy the process, celebrate every tiny new leaf, and soon you’ll have a garden full of these lovely little bloomers. Happy propagating!
Resource:
https://identify.plantnet.org/k-world-flora/species/Eclipta%20prostrata%20(L.)%20L./data