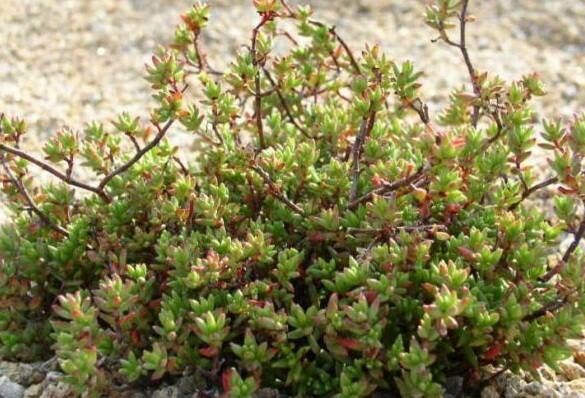
Hello wonderful gardeners! Today, we’re diving into the delightful world of Crassula biplanata, sometimes affectionately called the “flat-leaf jade.” I’ve had the pleasure of sharing my garden with these beauties for two decades, and I can tell you, propagating them is a truly rewarding experience. You know, it’s like a little bit of magic happening right before your eyes. And the best part? If you’re just starting out with succulents, you’ll be happy to hear that Crassula biplanata is wonderfully forgiving. It’s a great one for beginners!
The Best Time to Start
When it comes to giving your Crassula biplanata cuttings the best chance to thrive, spring and early summer are your golden ticket. This is when the plant is gearing up for its most vigorous growth. You’ll be working with healthy, actively growing stems and leaves, which have the most energy to put into developing roots. Think of it as giving them the perfect sunbeam and a good drink after a long winter nap.
Supplies You’ll Need
Gathering your tools makes the whole process smoother. Here’s what I usually have on hand:
- Well-draining potting mix: A cactus or succulent mix is ideal. You can also make your own by combining equal parts potting soil, coarse sand, and perlite.
- Sharp pruning shears or a clean knife: For making clean cuts that heal well.
- Small pots or trays: For your cuttings. Terracotta pots are great because they breathe.
- Rooting hormone (optional but helpful): Available at most garden centers. It gives your cuttings an extra boost.
- Spray bottle: For lightly misting.
- Labels: To keep track of what you’ve propagated and when!
Propagation Methods
Crassula biplanata is quite generous, offering a couple of easy ways to multiply.
Stem Cuttings:
This is my go-to method for Crassula biplanata. It’s straightforward and usually yields fantastic results.
- Select a healthy stem: Look for a stem that’s at least 3-4 inches long and appears strong and vibrant.
- Make a clean cut: Using your sharp shears or knife, make a clean cut just above a leaf node (where a leaf attaches to the stem).
- Remove lower leaves: Gently pull off the bottom couple of leaves. This exposes the stem and helps prevent rot when you plant it.
- Let it callous: This is a crucial step! Leave the cut end of the stem exposed to the air for 2-7 days, depending on humidity. It needs to form a dry scab, or callous, over the cut. This prevents rot when it hits the soil.
- Plant the cutting: Once calloused, you can dip the cut end in rooting hormone (if using) and then gently insert it about an inch deep into your well-draining potting mix.
- Water sparingly: Give the soil a light watering. You want it to be slightly moist, not soggy.
Leaf Propagation:
While stem cuttings are generally more reliable for Crassula biplanata, you can try propagating from leaves. It’s a bit slower, but seeing a new plant emerge from a single leaf is a marvel!
- Gently detach a leaf: Twist or gently pull a healthy, mature leaf from the stem. Try to get the entire base of the leaf.
- Allow it to callous: Just like with stem cuttings, let the leaf sit out for 2-7 days until the cut end has calloused over.
- Lay on top of soil: Place the calloused leaf on top of your well-draining potting mix, with the calloused end just touching the soil surface. Don’t bury it.
- Mist lightly: Lightly mist the soil surface every few days, just enough to keep it from drying out completely.
The “Secret Sauce” (Pro Tips)
Over the years, I’ve picked up a few tricks that seem to make a world of difference.
- Patience with the “callousing” step is key! I can’t stress this enough. Skipping this step is the most common reason for rot. Give it the time it needs to dry out properly.
- If you’re doing stem cuttings, don’t pack the soil too tightly around the base. The stem needs a little air circulation to encourage root growth and prevent it from getting suffocated.
- For both methods, a touch of bottom heat can be a game-changer, especially if your space is a bit cooler. Placing your pots on a seedling heat mat on a low setting really speeds things up. Just a gentle warmth, not scorching heat!
Aftercare & Troubleshooting
Once your cuttings have taken root – you’ll usually see new growth appearing in a few weeks – you can start treating them more like established plants.
- Gradually increase watering: As they grow, water them a bit more thoroughly, but still allow the soil to dry out completely between waterings.
- Introduce to more light: Slowly acclimate them to brighter light. Avoid direct, harsh sun for the first month or so after they’ve rooted.
The biggest challenge you’ll likely face is rot. If you see your cutting turning mushy or black, it’s a clear sign of too much moisture. If it’s a stem cutting, you might be able to salvage it by cutting off the rotten part (above the rot) and starting the callousing process again. If it’s a leaf that’s gone south, it’s usually best to toss it and try again. Don’t get discouraged; it happens to all of us!
Happy Propagating!
See? Nothing scary about it at all! Propagating Crassula biplanata is a wonderful way to expand your collection or share these lovely plants with friends. Be patient, observe your little charges, and enjoy the process of coaxing new life from a single stem or leaf. You’ve got this, and I can’t wait to hear about your successes!
Resource:
https://identify.plantnet.org/k-world-flora/species/Crassula%20biplanata%20Haw./data