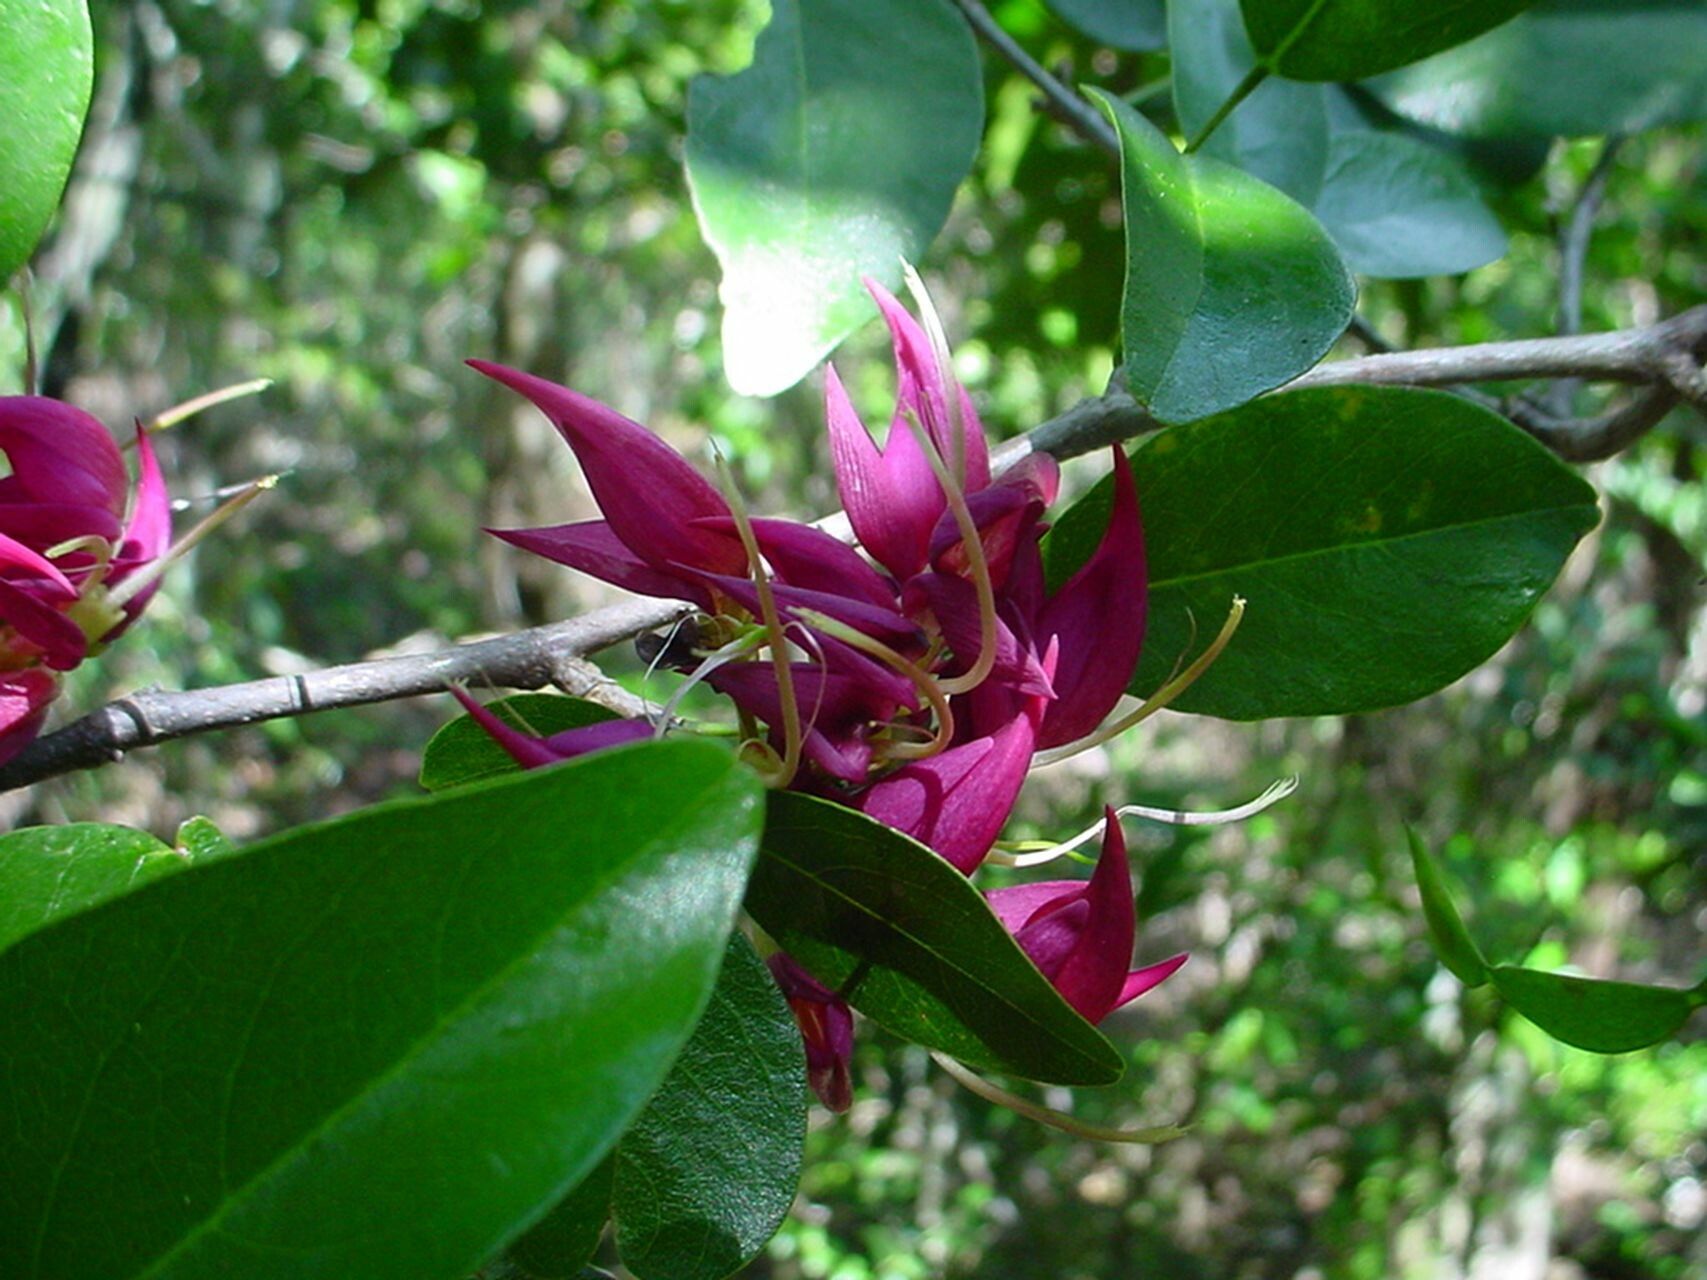
Oh, Arthroclianthus balansae! What a treat you are to have in the garden. Those delicate, orchid-like blooms are just breathtaking, aren’t they? And the way they unfurl, little whispers of color, makes you feel like you’ve stumbled upon a secret. Propagating this beauty is one of those truly rewarding gardening joys. It’s not the absolute easiest plant to start from scratch for a total beginner, but with a little bit of care and attention, you absolutely can do it. Think of it as a lovely summer project that keeps on giving.
The Best Time to Start
For the highest success rate with Arthroclianthus balansae, I always aim for late spring to early summer. This is when the plant is really in its active growing phase. New growth is vigorous, and the energy levels are high, making it more likely for cuttings to root. Waiting until after the initial flush of spring growth has matured a bit is key.
Supplies You’ll Need
Here’s what I like to have on hand:
- Sharp, clean pruning shears or a razor blade: You want a clean cut to prevent disease.
- A well-draining potting mix: I often use a blend of equal parts peat moss or coco coir, perlite, and coarse sand. Some people even add a bit of orchid bark for extra aeration.
- Small pots or seedling trays: Five-inch or six-inch pots are usually perfect.
- Rooting hormone (optional but helpful): A powdered hormone can give your cuttings a real boost.
- A spray bottle: For keeping humidity levels up.
- A tray or shallow dish: If you opt for water propagation.
- Label stakes: To remember what you planted and when!
Propagation Methods
I find that taking stem cuttings is generally the most successful way to propagate Arthroclianthus balansae.
- Select Your Cuttings: Look for healthy, non-flowering stems that are at least 4-6 inches long. Ideally, these should be from the current season’s growth and have at least two sets of leaves.
- Make the Cut: Using your sharp pruning shears or razor blade, make a clean cut just below a leaf node (that little bump where a leaf attaches to the stem). This is where the magic happens, where roots are most likely to form.
- Prepare the Cutting: Gently remove the lower leaves from the cutting, leaving about two or three sets of leaves at the top. If the leaves are very large, you can even cut them in half horizontally to reduce water loss.
- Apply Rooting Hormone (Optional): If you’re using rooting hormone, lightly dip the cut end of the stem into the powder, tapping off any excess.
- Plant Your Cuttings: Fill your pots with the prepared potting mix. Make a hole in the center of the soil with your finger or a pencil. Insert the cutting into the hole, ensuring that the leaf nodes you removed are buried in the soil. Gently firm the soil around the stem.
- Water Gently: Water the soil thoroughly but gently, so you don’t dislodge the cutting. Let any excess water drain away.
- Provide Humidity: Cover the pot loosely with a plastic bag or a clear dome to create a humid environment. Make sure the leaves don’t touch the plastic. You can prop up the bag with a few stakes if needed. Place the pot in a bright spot out of direct sunlight.
Alternatively, water propagation can work for Arthroclianthus balansae, especially for those smaller, more delicate shoots.
- Prepare Cuttings: Follow steps 1-3 above for preparing your stem cuttings.
- Place in Water: Take a clean jar or glass and fill it with fresh, room-temperature water. Submerge the lower, leafless portion of the cutting in the water, making sure no leaves are sitting in the water. This is crucial to prevent rot.
- Change Water Regularly: Change the water every 2-3 days to keep it fresh and oxygenated.
- Positioning: Place the jar in bright, indirect light.
- Planting: Once you see small, healthy roots developing, which can take a few weeks, gently pot them into your well-draining soil mix.
The “Secret Sauce” (Pro Tips)
Here are a couple of things I’ve learned over the years that really make a difference:
- Bottom Heat is Your Friend: Arthroclianthus balansae absolutely loves a bit of gentle warmth from below. Sticking your pots on a heated propagation mat set to a low temperature (around 70-75°F or 21-24°C) can significantly speed up root development and increase your success rate.
- Don’t Rush the Process: I know it’s tempting to check for roots constantly, but try to resist! Let the cuttings sit undisturbed for at least 4-6 weeks. Gentleness is key when checking for root development; a slight tug will tell you if roots have formed.
Aftercare & Troubleshooting
Once you see new leaf growth on your cutting, that’s a strong indicator that roots have formed!
- Acclimate Slowly: If you’ve used a plastic cover, start by removing it for a few hours each day, gradually increasing the time until the cutting is accustomed to normal humidity.
- Continue Watering: Keep the soil consistently moist but not soggy. Water when the top inch of soil feels dry.
- Avoid Fertilizing Too Soon: Wait until your new plant is well-established and showing good growth before introducing a diluted liquid fertilizer.
The most common issue you might encounter is rot. If your cutting turns mushy or black, it’s usually a sign of too much moisture and not enough air circulation getting to the base. If this happens, try to salvage any healthy portions to start new cuttings.
A Little Patience Goes a Long Way
There you have it! Propagating Arthroclianthus balansae is a delightful journey. Don’t be discouraged if your first attempt isn’t perfect. Gardening is all about learning and adapting. Enjoy the process of nurture, and soon you’ll have your very own collection of these exquisite blooms to share (or keep all to yourself!). Happy gardening!
Resource:
https://identify.plantnet.org/k-world-flora/species/Arthroclianthus%20balansae%20Schindl./data