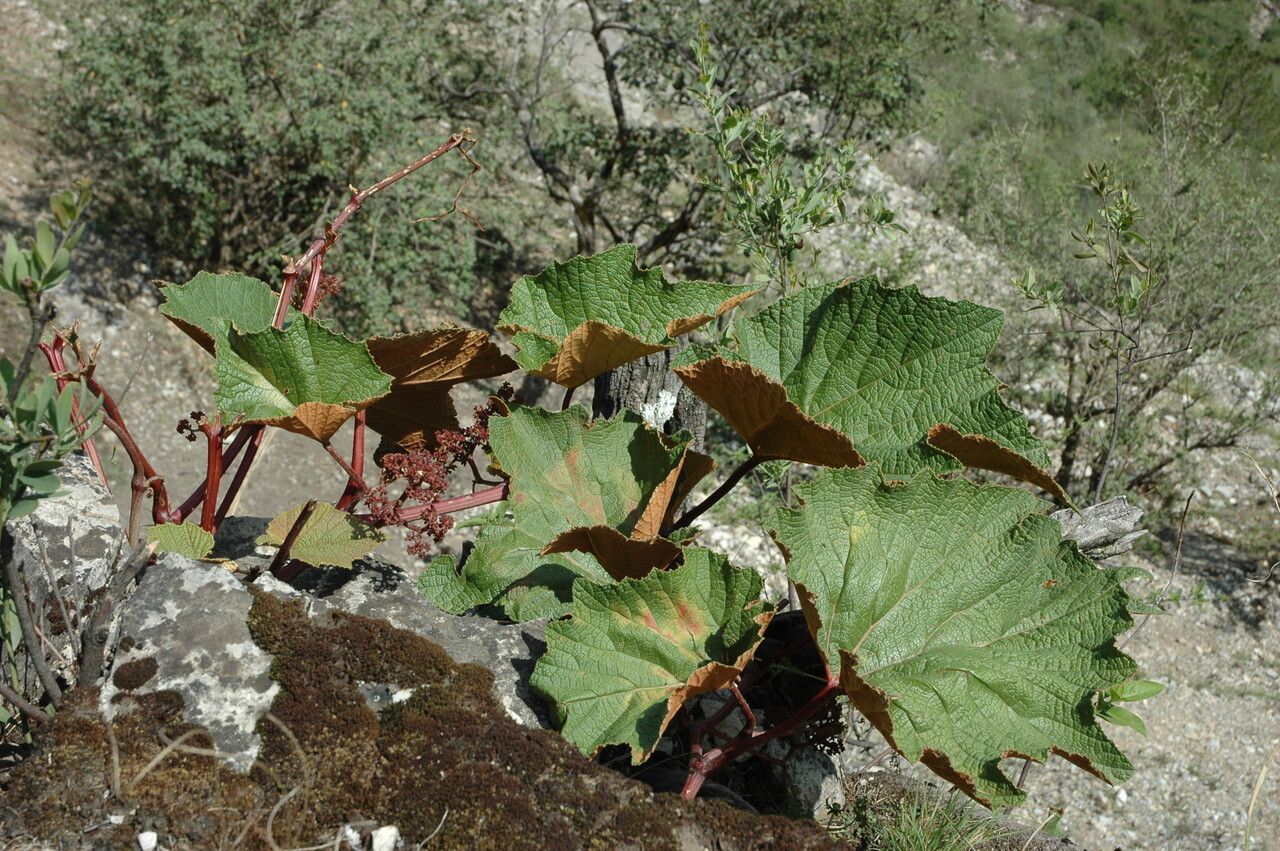
Oh, Ampelocissus rugosa! What a treat for the senses it is. That lush, deeply veined foliage, often with a lovely bronzy or reddish underside, drapes and cascades so beautifully. It has this wonderful wild grace that makes any space feel instantly more alive and a little bit jungly. And the best part? It’s surprisingly rewarding to grow from cuttings. If you’re a beginner looking to dip your toes into propagation, this one is a fantastic and forgiving friend.
The Best Time to Start
My favorite time to take cuttings of Ampelocissus rugosa is late spring or early summer. You’re looking for new growth that’s started to firm up a bit, often called “semi-hardwood.” This means it’s not so floppy and tender that it will shrivel, but it hasn’t gotten tough and woody yet, so it’s still got that youthful vigor to root readily.
Supplies You’ll Need
Gathering your tools beforehand makes the whole process smooth sailing. Here’s what you’ll want:
- Sharp Pruning Shears or Knife: Clean cuts are crucial for healthy rooting.
- Potting Mix: A light, well-draining mix is key. I like a blend of equal parts peat moss or coco coir and perlite or coarse sand.
- Small Pots or Propagation Trays: Choose something with drainage holes!
- Rooting Hormone (Optional but Recommended): This gives your cuttings a little extra boost. Look for one with IBA.
- Plastic Bags or Clear Domes: To create a humid environment for your cuttings.
- Water: For watering and potentially for water propagation.
- Gloves: If you have sensitive skin or just prefer them.
Propagation Methods
I’ve had the most success with two main methods for Ampelocissus rugosa: stem cuttings and water propagation.
1. Stem Cuttings (My Usual Go-To!)
This is where the magic happens.
- Take Your Cuttings: Select healthy, non-flowering stems from your mature plant. Look for sections with at least two or three leaf nodes. Using your sharp shears, make a clean cut just below a node. Aim for cuttings that are about 4-6 inches long.
- Prepare the Cuttings: Gently remove the lower leaves, leaving just one or two at the very top. If the top leaves are huge, you can even cut them in half horizontally to reduce water loss.
- Apply Rooting Hormone (If Using): Dip the cut end of the stem into your rooting hormone, tapping off any excess.
- Plant Your Cuttings: Fill your small pots with your prepared potting mix. Make a small hole with your finger or a pencil, and gently insert the cutting, ensuring at least one node is buried in the soil. Firm the soil around it.
- Water and Cover: Water the soil thoroughly until it drains from the bottom of the pot. Then, place the pot inside a clear plastic bag or cover it with a clear dome to create a mini-greenhouse. Poke a few holes in the bag for a little air circulation.
2. Water Propagation (Super Simple!)
This method is so satisfying to watch.
- Prepare Your Cuttings: Follow the same steps as above for selecting and preparing your cuttings.
- Place in Water: Fill a clean jar or glass with fresh water. Remove all leaves that would sit below the waterline – this is super important to prevent rot.
- Position Your Jar: Place the jar in a bright spot, but out of direct, harsh sunlight.
- Change Water Regularly: Change the water every few days to keep it fresh and prevent bacterial growth. You’ll start to see tiny white roots emerge from the nodes in a few weeks.
The “Secret Sauce” (Pro Tips)
These little things make a big difference!
- Bottom Heat is Your Friend: If you’re using stem cuttings, placing your pots on a gentle heating mat can significantly speed up root development. It mimics the warmth of spring soil and gives those roots a little nudge.
- Don’t Let Those Leaves Drip! Whether in soil or water, if any part of the leaves is touching the propagation medium (soil or water), it’s an invitation for rot. Keep them elevated!
- Cleanliness is Next to Greenness: Always use clean tools and containers. This minimizes the risk of introducing diseases that can quickly doom your precious cuttings.
Aftercare & Troubleshooting
Once you see roots pushing out of the drainage holes or a good amount of root growth in your water jar, it’s time to transition.
- For Soil Cuttings: Carefully remove the plastic bag or dome and gradually introduce the new plant to normal room humidity over a week or so. Water when the top inch of soil feels dry.
- For Water Cuttings: Once the roots are about an inch or two long, you can carefully transplant them into pots with your well-draining potting mix. Treat them gently as their root systems are still delicate. Water well after planting.
Now, what if things go wrong? The most common culprit is rot. This looks like mushy, black stems or leaves. It’s usually a sign of too much moisture, not enough air circulation, or a dirty propagation environment. If you see rot, sadly, that cutting is likely lost. But don’t despair! Just try again with fresh material and pay close attention to those “secret sauce” tips. Another sign of failure is a cutting that just shrivels and dries up. This often means it’s losing too much water, so ensure that humidity dome is effective and check soil moisture regularly.
A Little Patience Goes a Long Way
Propagating Ampelocissus rugosa is such a joyful way to multiply your green treasures. It’s a process that teaches patience and observation. Don’t be discouraged if your first few attempts aren’t perfect. Every cutting you nurture is a lesson learned, and soon enough, you’ll have a whole collection of these stunning vines to share and enjoy. Happy propagating!
Resource:
https://identify.plantnet.org/k-world-flora/species/Ampelocissus%20rugosa%20(Wall.)%20Planch./data