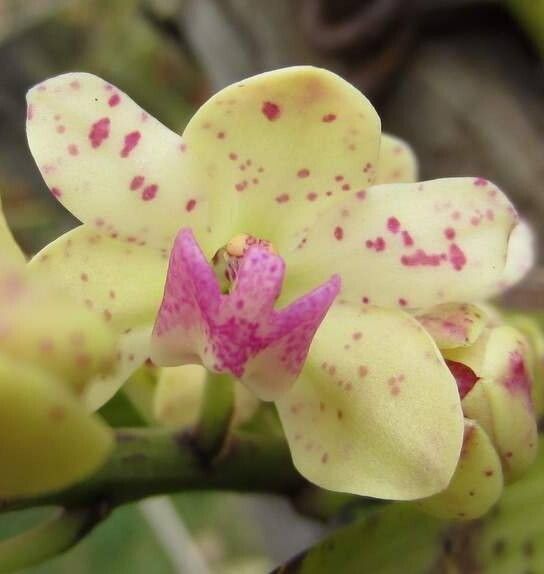
Oh, hello there! Grab your mug, let’s chat about something truly special: Rhynchostylis retusa, also known as the foxtail orchid. If you’ve ever seen one of these beauties in full bloom, you know what I mean. Those long, arching spikes of fragrant, delicate flowers are simply breathtaking! For me, as a gardener who’s had my hands in the soil for two decades, coaxing a new plant to life from a piece of an old one is one of the most satisfying experiences. Rhynchostylis retusa is considered a bit of a project for absolute beginners, but with a little patience and these tips, I promise you can do it!
The Best Time to Start
Honestly, the sweet spot for propagating Rhynchostylis retusa is usually when the plant is actively growing. Think late spring or early summer, after the main blooming period has passed. You’re looking for a healthy, vigorous plant that has just finished putting on its show. This gives the cuttings plenty of energy to put into growing roots.
Supplies You’ll Need
Here’s a little roundup of what will make this process smoother:
- Sharp, sterile pruning shears or a clean knife: We want to make clean cuts, not tear anything. Sterilizing prevents the spread of any nasties.
- Orchid bark mix: A fast-draining mix is crucial. You can buy specific orchid bark, or a good blend of fir bark, perlite, and a bit of charcoal.
- Small pots or rooting containers: Clean, tiny pots are perfect. If you’re doing water propagation, clean glass jars work well.
- Rooting hormone (optional but helpful): This can give your cuttings a good kickstart.
- Water: Clean, room-temperature water is best. If you have very hard tap water, consider using filtered or rainwater.
- Sphagnum moss (optional, for some methods): Good quality, long-fibered sphagnum can work wonderfully.
- A tray or shallow dish: To catch any excess water if you’re potting up.
Propagation Methods
Let’s dive into how we get these special orchids started. I find a couple of methods work best for Rhynchostylis retusa.
1. Division: The Gentlest Approach
This is probably the easiest method if your plant is already mature and has multiple growths.
- Wait until the plant is done flowering. You want to avoid stressing it during its prime blooming time.
- Gently remove the entire plant from its pot. You might need to loosen the edges with a knife if it’s tightly bound.
- Gently tease apart the roots. If they are severely entangled, you might need to carefully unpot and rinse some of the old potting medium away to see what you’re doing.
- Your goal is to separate the plant into sections, each with at least two or three healthy pseudobulbs and a good portion of roots.
- Inspect the separated divisions for any signs of rot or disease. Trim away any damaged roots or leaves.
- Pot each division into its own small pot using your fast-draining orchid mix. Ensure the base of the plant is at the surface of the media, not buried too deeply.
- Do not water immediately. Let the cuts callus over for a day or two. Then, you can lightly water.
2. Stem Cuttings: For the Adventurous
This method is a bit more involved but can be very rewarding if you have a large, healthy plant.
- On a healthy, mature stem, locate a section that has at least two or three leaf nodes. Nodes are those little bumps where leaves emerge.
- Using your sterilized shears, make a clean cut just below a node. You’ll want to take a cutting that’s about 3-5 inches long.
- Remove the lowest leaf from the cutting, exposing the node.
- Dip the cut end into rooting hormone, tapping off any excess.
- Now, you have two options:
- Water Propagation: Place the cut end in a small glass of clean water. Crucially, ensure absolutely no leaves are submerged. Leaves sitting in water will rot, and that’s a quick way to fail. Change the water every few days.
- Potting Mix: You can also stick the cut end into a small pot filled with your orchid bark mix. Keep the mix slightly moist but not soggy.
The “Secret Sauce” (Pro Tips)
After years of trial and error, I’ve learned a few things that really make a difference.
- The “Air Layering” Trick: Before you even consider cutting, I sometimes do a little “air layering.” I’ll wrap a moist ball of sphagnum moss around a healthy node while it’s still attached to the mother plant. Secure it with plastic wrap. Once roots start to emerge from the moss, then I’ll cut the stem below the roots and pot it up. It’s like giving the cutting a head start with its own roots already forming!
- Don’t Rush the Water Change: When water propagating, resist the urge to change the water daily. Letting it sit for a few days can actually encourage better root development, as long as it stays clean. Just check for cloudiness or any funky smells.
Aftercare & Troubleshooting
Once those precious roots start to appear, your job isn’t quite done, but it’s getting exciting!
- For water-propagated cuttings: Once you see roots that are about an inch long, it’s time to gently pot them into your orchid bark mix. Handle them with extreme care to avoid damaging those new roots.
- For potted cuttings: Continue to keep the medium lightly moist and humid. You can mist the leaves occasionally, but always aim for good air circulation.
- Light: Place your new plants in bright, indirect light. Think a shaded window or a spot with filtered sun.
- Troubleshooting: The most common issue you’ll face is rot. If you see mushy, dark stems or leaves, or if your cutting smells foul, it’s likely rot. This usually happens from too much moisture and poor air circulation. If you catch it early, you might be able to trim away the rotted parts and try again, but often it’s a sign the cutting isn’t going to make it. Another sign of failure is if the cuttings simply wither away without any new growth – this can be due to lack of moisture or an unfavorable environment.
A Little Patience Goes a Long Way
Propagating orchids can feel like a slow dance, but that’s part of the charm. Don’t get discouraged if your first attempt isn’t a roaring success. Every plant and every environment is a little different. Just keep observing, keep trying, and most importantly, enjoy the journey of nurturing new life. You’ve got this!
Resource:
https://identify.plantnet.org/k-world-flora/species/Rhynchostylis%20retusa%20(L.)%20Blume/data