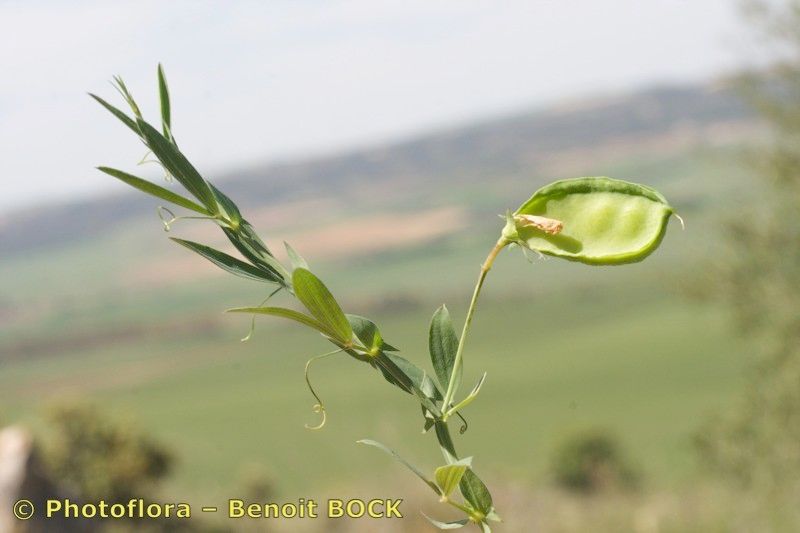
Oh, Lathyrus amphicarpos! If you haven’t met this charming fellow yet, get ready. Often called the “groundnut pea” or “self-seeding everlasting pea,” it’s a bit of a horticultural unsung hero. My first encounter was years ago, and I was immediately smitten by its delicate, almost whimsical blooms and its generous, sprawling habit. It truly brings a touch of wild elegance to any garden corner.
The most magical part? Propagating Lathyrus amphicarpos is like unlocking a little piece of garden magic. It’s rewarding to multiply these beauties, and honestly, it’s not a terribly difficult plant to get started with. Even if you’re just dipping your toes into propagation, you’ll likely find success here.
The Best Time to Start
For Lathyrus amphicarpos, the sweet spot for propagation is mid-spring to early summer. This is when the plant is actively growing and has plenty of energy. You want to be working with healthy, young stems that are pliable and haven’t yet started to flower or set seed. Think of it as catching the plant at its peak vigor!
Supplies You’ll Need
Here’s what I always have on hand:
- Sharp pruning shears or a clean, sharp knife: Essential for clean cuts.
- Rooting hormone (powder or gel): Not strictly mandatory, but it gives your cuttings a real boost.
- Potting mix: A well-draining mix is key. I usually use a blend of peat moss or coco coir with perlite or coarse sand. About a 2:1 ratio works wonders.
- Small pots or trays: Clean containers with drainage holes are a must.
- Plastic bags or a propagation dome: To create a humid environment.
- Watering can or spray bottle: For gentle watering.
Propagation Methods
While Lathyrus amphicarpos can self-seed readily, if you want to be more deliberate, stem cuttings are a fantastic and reliable method.
Stem Cuttings
- Select your stems: Look for healthy, non-flowering stems about 4-6 inches long.
- Make the cut: Using your clean shears or knife, take a cutting just below a leaf node (where a leaf attaches to the stem). This is where roots are most likely to form.
- Prepare the cutting: Gently remove the leaves from the bottom half of the cutting. You can leave one or two sets of leaves at the top, but trim them in half if they are large. This reduces water loss.
- Dip in rooting hormone: Lightly dip the cut end into your rooting hormone. Tap off any excess.
- Pot them up: Fill your small pots with your prepared potting mix. Make a small hole in the center of each pot with your finger or a pencil.
- Insert the cuttings: Place the prepared cuttings into the holes, ensuring at least one leaf node is buried in the soil. Gently firm the soil around the base of each cutting.
- Water gently: Water thoroughly but carefully, so you don’t dislodge the cuttings.
- Create humidity: Cover the pots with a plastic bag or place them under a propagation dome. This traps moisture and creates a mini-greenhouse. Make sure the leaves don’t touch the plastic, if possible.
- Find a bright spot: Place the pots in a bright location that receives indirect sunlight. Avoid direct, scorching sun.
The “Secret Sauce” (Pro Tips)
- Bottom Heat is Your Friend: If you can, place your pots on a warm propagation mat. This gentle bottom heat encourages root development much faster than ambient room temperature alone. It’s a game-changer for rooting cuttings!
- Don’t Drench, Mist Regularly: While you want the cuttings to stay moist, you don’t want them sitting in soggy soil. Mist them gently every day or two if the soil surface looks dry, and if they’re under plastic, the condensation will help maintain humidity.
- Patience with the Pea: Lathyrus amphicarpos can sometimes be a bit slow to root. Don’t get discouraged if you don’t see growth immediately. Give them at least 3-4 weeks, and sometimes up to 6 weeks, before deciding they haven’t taken.
Aftercare & Troubleshooting
Once your cuttings have developed a good root system – you can often tell when you see new leaf growth or gently tug on a cutting and feel resistance – it’s time for the next step.
- Acclimate them: Slowly remove the plastic cover over a few days to help the new plants adjust to lower humidity.
- Potting up: Once they are sturdy, you can carefully transplant them into slightly larger pots with good quality potting soil.
- Watering: Water consistently, but allow the top inch of soil to dry out between waterings.
- Watch for rot: The most common sign of failure is rot. This happens if the soil is too wet and there isn’t enough air circulation. If you see your cuttings turn black and mushy, it’s a sign of overwatering. Remove them immediately to prevent it from spreading. Fungal issues can also arise, often indicated by fuzzy white growth on the soil surface. Good drainage and avoiding waterlogged conditions are your best defense.
A Encouraging Closing
Propagating Lathyrus amphicarpos is a journey, and like any good gardening endeavor, it rewards patience and observation. Don’t be afraid to experiment! You’ll learn so much with each little cutting you try to root. Enjoy the process of nurturing these new plants into being. Happy gardening!
Resource:
https://identify.plantnet.org/k-world-flora/species/Lathyrus%20amphicarpos%20L./data