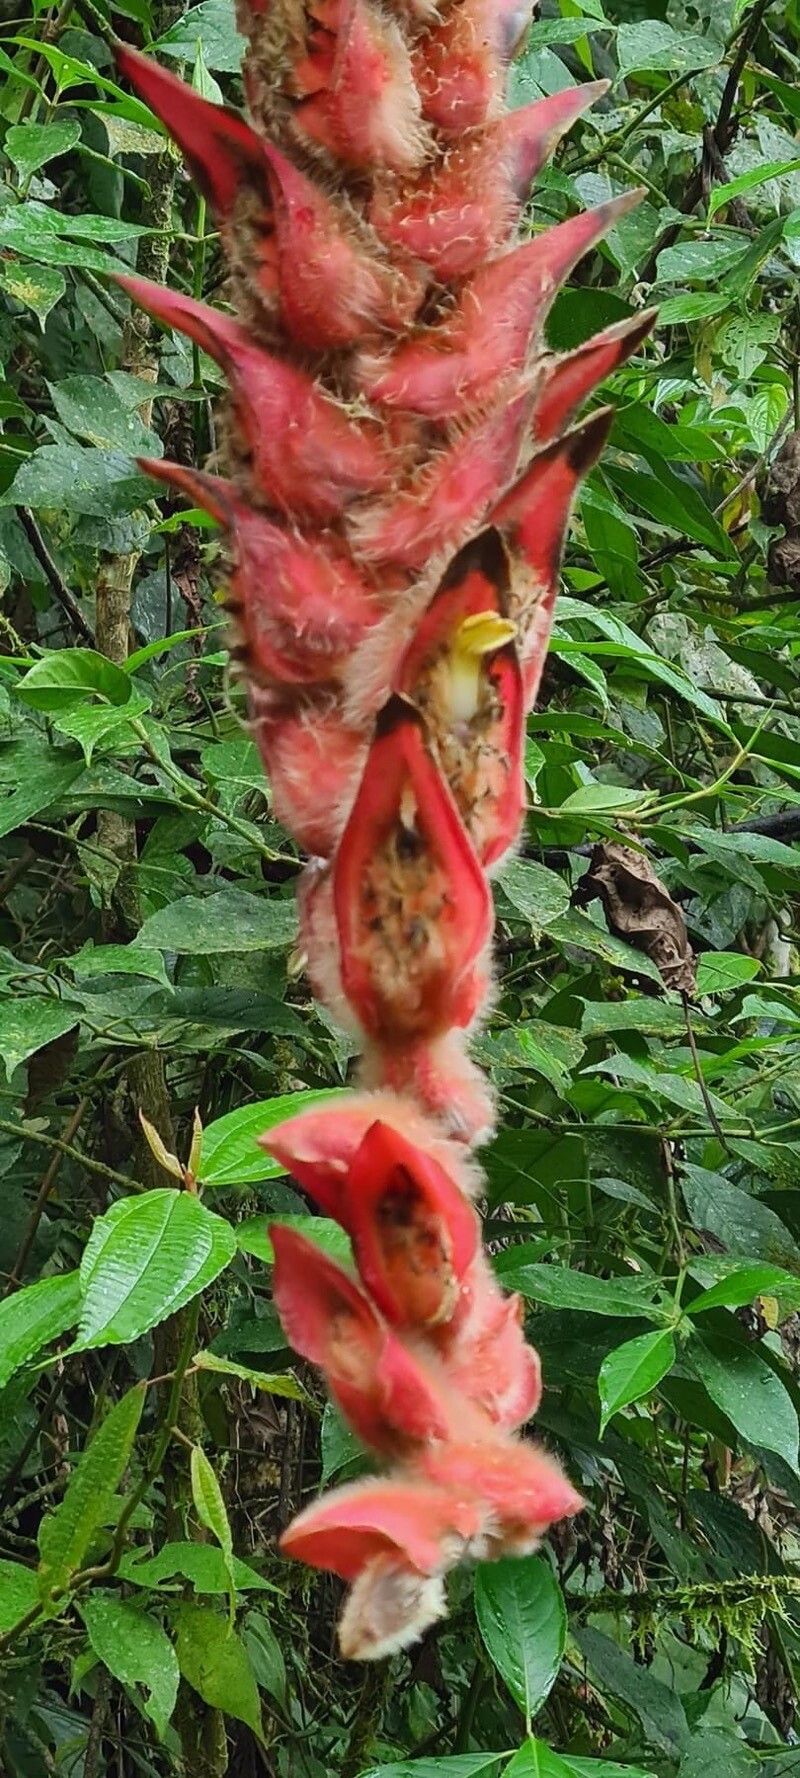
Oh, Heliconia danielsiana! If you’ve ever seen one of these beauties gracing a tropical garden, you’ve likely been captivated by its vibrant, almost otherworldly bracts. It’s like nature decided to paint with the most joyful colors. And the best part? You can bring that exuberance into your own patch of earth through propagation. It’s a truly rewarding feeling to coax a new life from an existing plant. Now, for a heads-up: Heliconia danielsiana can be a bit of a diva when it comes to propagation, so while it’s not impossible for beginners, it’s probably best to get your feet wet with something a little simpler first. Think of it as a lovely project to tackle once you’ve built your confidence.
The Best Time to Start
When it comes to Heliconia, timing is everything. You’ll have the most success if you propagate during the active growing season. For most of us, this means late spring or early summer. The plant is full of energy then, and its stems and roots are primed for new growth. Avoid attempting propagation when the plant is dormant or stressed, like during a harsh winter or a heatwave.
Supplies You’ll Need
Gathering your tools ahead of time makes the process so much smoother. Here’s what I always have on hand:
- Sharp pruning shears or a clean knife: Essential for making clean cuts.
- Potting mix: A well-draining mix is crucial. I like to use a blend of perlite, peat moss, and a bit of coarse sand. Some coco coir mixed in is also great for retaining moisture without getting waterlogged.
- Small pots or trays: For your new cuttings or divisions. Ensure they have drainage holes!
- Rooting hormone (optional, but recommended): This can give your cuttings a much-needed boost. Look for one specifically for woody or herbaceous plants.
- Plastic bag or clear propagating dome: To maintain humidity.
- Watering can or spray bottle: For gentle watering.
- Labels: Don’t forget to label your propagated plants!
Propagation Methods
Heliconia danielsiana is most successfully propagated through division. This is the method that usually yields the best results without too much fuss.
Division:
- Choose your plant: Select a mature, healthy Heliconia plant that has produced new shoots, often called “pups” or rhizomes, growing from the base.
- Gently excavate: Carefully dig around the base of the Heliconia, trying not to damage the rhizomes or existing roots. You can also gently pull the entire plant out of its pot or from the ground if it’s easier for you to access the rhizomes.
- Identify the divisions: Look for sections of the rhizome that have their own developed roots and at least one new shoot. You’re essentially looking for natural breaks where you can separate a piece of the parent plant.
- Make the cut (or break): Using your sharp pruning shears or knife, carefully separate a division from the main rhizome. Ensure each division has a good portion of roots attached. If it’s a particularly strong division, it might even snap away cleanly.
- Prepare the division: If the division has any damaged leaves or old, dying foliage, trim it back. This helps the plant conserve energy for root development.
- Pot it up: Plant each division in its own pot filled with your well-draining potting mix. The top of the rhizome should be just at or slightly below the soil surface.
- Water gently: Give the newly potted division a good, gentle watering to help settle the soil.
For Heliconia danielsiana, stem cuttings can be tricky and often have a lower success rate. Division is generally the way to go.
The “Secret Sauce” (Pro Tips)
Here are a couple of little tricks I’ve learned over the years that can really make a difference:
- Don’t overwater, but keep it humid: While you want the soil to be consistently moist, it should never be soggy. Soggy soil is a recipe for rot. This is where that plastic bag or dome comes in handy, trapping humidity without letting the soil turn into a swamp.
- Sunshine, but not direct sun, for a while: Once potted, place your new division in a bright spot with indirect sunlight. Too much direct sun can scorch its delicate new growth. As it establishes and shows signs of new leaves unfurling, you can gradually introduce it to more light.
Aftercare & Troubleshooting
Once your division is potted up, the real watching game begins!
- Keep it consistently moist: Continue to water when the top inch of soil feels dry. The enclosed environment will help, but you’ll still need to check.
- Look for signs of life: The first good sign is new leaf growth emerging. This can take anywhere from a few weeks to a couple of months, so patience is key!
- Troubleshooting rot: The biggest enemy here is rot. If you notice your cutting becoming mushy, discolored, or developing black spots, it’s likely rotting. This often means too much moisture and not enough air circulation. If you catch it early, you might be able to trim away the rotted parts, repot in fresh, dry mix, and try again, but sadly, it can be hard to save.
A Encouraging Closing
Propagating Heliconia danielsiana is a journey, and like any good gardening adventure, it requires a bit of patience and a lot of love. Don’t be discouraged if your first attempt isn’t a roaring success. Each plant teaches us something new. Just keep nurturing those divisions, observe them closely, and enjoy the process of bringing more of that amazing tropical beauty into your world. Happy propagating!
Resource:
https://identify.plantnet.org/k-world-flora/species/Heliconia%20danielsiana%20W.J.Kress/data