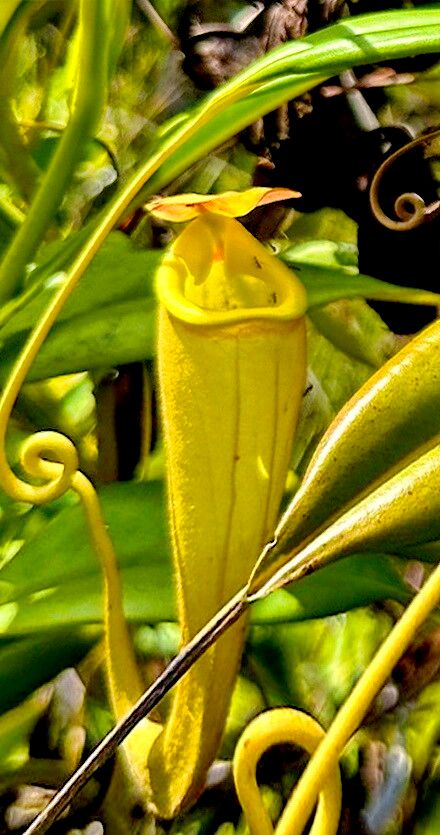
Oh, Nepenthes madagascariensis! What a fascinating plant. I’ve spent a good chunk of my gardening life enchanted by these natural wonders, and I can tell you, coaxing new life from them is one of the most satisfying things you can do. Their unique pitchers, designed to trap and digest insects, are just mesmerizing, aren’t they? They bring a touch of the wild and wonderful right into your home or greenhouse.
Now, about propagation. For Nepenthes madagascariensis, I wouldn’t say it’s a beginner’s absolute first outing into plant propagation, but it’s certainly achievable with a little care and attention. It’s more of an enthusiastic intermediate project, and the reward is absolutely worth the effort!
The Best Time to Start
Timing is everything in the garden, and it’s definitely true for our pitcher plants. The sweet spot for propagating Nepenthes madagascariensis is generally during their active growing season. This is typically in the late spring and summer months. You’ll see most growth then, and your cuttings will have the energy to root and establish themselves before any cooler weather sets in. Look for plants that are vigorous and healthy, not stressed out or dormant.
Supplies You’ll Need
Before you dive in, let’s get our toolkit ready. Having everything on hand makes the process smooth sailing:
- Sharp Pruning Shears or a Clean Knife: Sterilize them before use to prevent disease. I like a good bypass pruner for clean cuts.
- Sphagnum Moss: Long-fibered sphagnum is your best friend here. It holds moisture beautifully and encourages root growth.
- Perlite: For aeration in your potting mixes.
- Peat Moss: Another staple for that slightly acidic mix Nepenthes love.
- Small Pots or Seedling Trays: Clean ones, of course!
- Clear Plastic Bags or a Propagator Lid: To create a humid microclimate. A plastic dome over a tray works wonders.
- Rooting Hormone (Optional but Recommended): A powdered or gel type designed for cuttings.
- Patience! This is the most important tool, really.
Propagation Methods
We’ll focus on the most reliable method for Nepenthes madagascariensis: Stem Cuttings. This is how I’ve had the most consistent success.
Stem Cuttings:
- Select Your Mother Plant: Find a healthy, mature Nepenthes madagascariensis plant. Look for stems that have at least 2-3 leaves and, ideally, a node (the bump on the stem where a leaf attaches).
- Make the Cut: Using your sterilized shears or knife, carefully take a cutting at least 4-6 inches long. Aim to make your cut just below a leaf node. This is where new roots will emerge. If you can get a cutting that includes a developing or mature pitcher, even better – it’s a sign of a vigorous stem!
- Prepare the Cutting: Gently remove any lower leaves, especially those that would be below the soil line or would sit in water. You want to expose at least one or two leaf nodes. If your cutting has a very large pitcher, you might consider carefully trimming it down a bit to reduce water loss, but it’s not always necessary.
- Apply Rooting Hormone (Optional): Dip the cut end of the stem into rooting hormone, tapping off any excess. This isn’t strictly necessary for all Nepenthes, but it can significantly speed up the rooting process.
- Prepare Your Medium: I like a mix of 50% long-fibered sphagnum moss and 50% perlite for cuttings. You can also use a mix of peat moss and perlite. Make sure your medium is thoroughly moistened but not waterlogged.
- Plant the Cutting: Create a small hole in your medium with your finger or a pencil. Insert the cut end of your stem cutting into the hole, ensuring at least one node is buried. Gently firm the medium around the cutting to ensure good contact.
- Create a Humid Environment: Place your pot into a clear plastic bag and seal it, or cover your tray with a propagator lid. This traps in moisture and creates the high humidity that Nepenthes cuttings crave. Place this in a brightly lit spot but out of direct, harsh sunlight.
- Wait for Roots: This is where patience truly pays off. In a warm, humid environment, you should start to see signs of rooting within 4-8 weeks. You can gently tug on the cutting – if there’s resistance, roots are forming! You might also see new leaf growth, which is another good sign.
The “Secret Sauce” (Pro Tips)
Over the years, I’ve picked up a few tricks that seem to make a big difference. They might seem small, but they really help nudge things along:
- Bottom Heat is Your Friend: Nepenthes madagascariensis just loves warmth at its roots. If you can, place your pots on a heat mat set to around 75-80°F (24-27°C). This encourages root development much faster than just ambient room temperature.
- Don’t Over-Water, But Keep it Consistently Damp: This is a delicate balance. You want the sphagnum or peat mix to be consistently moist, not soggy. If it dries out, your cutting stressed. If it’s too wet, you risk rot. I often check by feeling the weight of the pot – a lighter pot means it’s drying out.
- Airflow, But Not Too Much: While humidity is key, stagnant air can invite fungal issues. Occasionally open the plastic bag or propagator lid for a few minutes each day to allow for fresh air exchange. It’s a gentle way to avoid problems without drying out your cutting too quickly.
Aftercare & Troubleshooting
Once you see that beautiful new growth – perhaps a tiny pitcher forming or a new leaf unfurling – congratulations! You’ve done it!
- Gradually Acclimate: Once roots are well-established, start gradually introducing the new plant to lower humidity. Open the bag or propagator lid for longer periods each day over a week or two.
- Transition to a Potting Mix: When the new plant is showing good, consistent growth, you can transplant it into a Nepenthes-specific potting mix (usually a blend of peat, perlite, and sphagnum). The key is excellent drainage and aeration.
- Watering: Water only when the top inch of the mix starts to feel dry. Use distilled water, rainwater, or reverse osmosis water – tap water can harm these sensitive plants.
- Light: Provide bright, indirect light. Too much direct sun can scorch the leaves.
- Troubleshooting: Rot: The most common setback is rot. If your cutting turns black and mushy, it’s usually a sign of too much moisture and poor airflow. If this happens, unfortunately, that cutting is likely lost, but don’t despair! You can try again, focusing on that balance of moisture and ventilation. Another sign of trouble can be wilted leaves before rooting occurs; this often means it’s drying out too quickly, so boost that humidity.
A Little Encouragement
Propagating Nepenthes madagascariensis is a journey, and like any good journey, there might be a few bumps along the way. But don’t let that discourage you! Each attempt teaches you something new. Be patient, observe your plant closely, and enjoy the slow magic of watching new life emerge. Happy propagating!
Resource:
https://identify.plantnet.org/k-world-flora/species/Nepenthes%20madagascariensis%20Poir./data