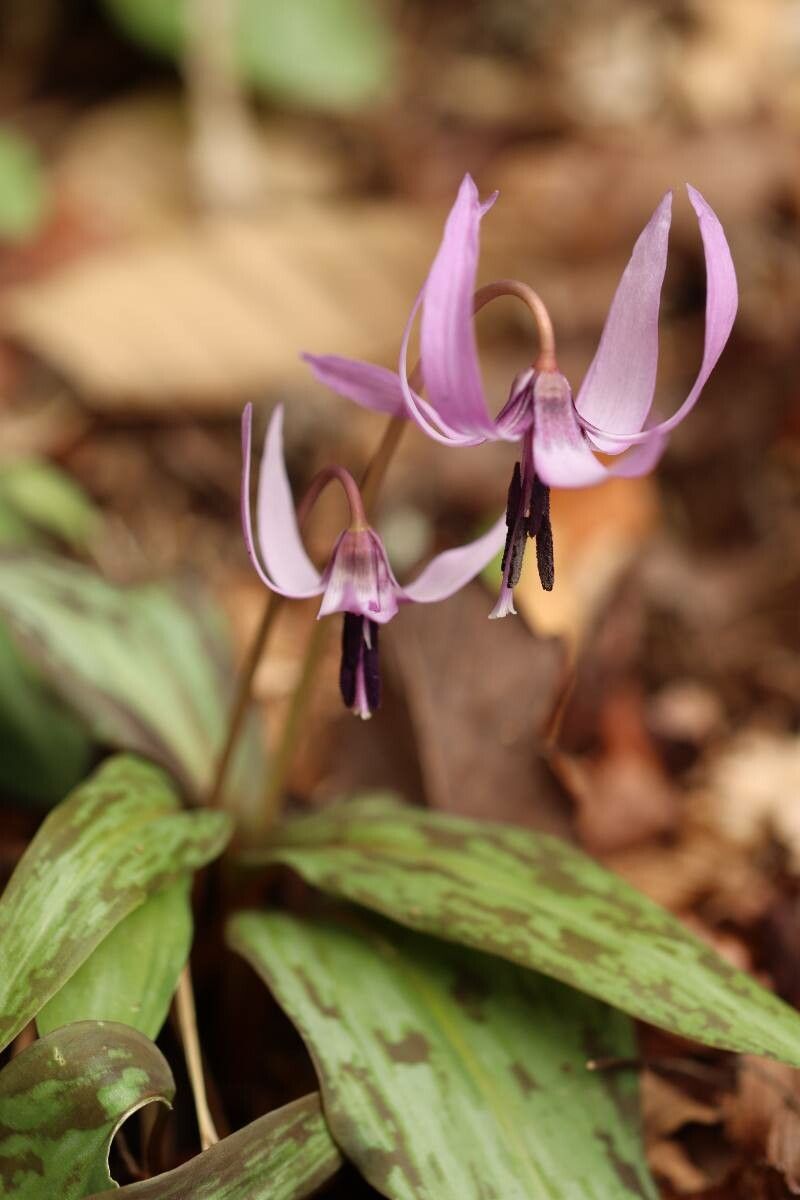
Ah, Erythronium japonicum! You know those darling little “dogtooth violets,” with their exquisite recurved petals and beautiful mottled leaves? They truly have a way of stealing your heart. If you’ve ever admired their delicate beauty in a shady woodland corner, you might be thinking, “Could I grow more of these?” The answer is a resounding yes, and the reward of nurturing your own patch of these woodland gems is something truly special. Now, to be upfront, Erythronium japonicum isn’t quite a ‘stick it in water and watch it go’ kind of plant. It has its little quirks, but with a bit of tailored attention, it’s a deeply satisfying endeavor for those willing to learn.
The Best Time to Start
For these woodland beauties, timing is everything. You’ll find the most success when you divide established clumps right after they’ve finished flowering and the foliage begins to yellow. This usually happens in late spring to early summer. At this point, the bulbs are storing energy for their next growing season, and separating them then gives them the best chance to establish themselves without too much stress. Trying to do it while they’re in full leafy glory can shock the plant.
Supplies You’ll Need
Here’s what you’ll want to have on hand for our propagation adventure:
- Sharp, clean trowel or spade: For gently lifting the clumps.
- Well-rotted compost or leaf mold: This is crucial for mimicking their natural woodland environment.
- Perlite or coarse sand: To improve drainage, which Erythronium absolutely adores.
- A good quality, free-draining potting mix: A blend of your compost, leaf mold, and some perlite is perfect.
- Gardening gloves: For happy hands!
- A watering can with a fine rose attachment: To avoid disturbing delicate new plantings.
- Labels and a permanent marker: To keep track of what you’ve done and when.
Propagation Methods
We’re primarily going to focus on division, as this is the most straightforward and successful method for Erythronium japonicum.
Division: Bringing Forth New Life
- Assess your plant: Look for a clump that’s starting to look a bit crowded or has multiplied over the years. As mentioned, wait until the leaves are yellowing and starting to die back naturally.
- Gently excavate: Using your trowel, carefully loosen the soil around the clump. I like to start a little distance away from the main plant and work my way in, trying not to disturb the roots too much. Lift the entire clump out of the ground with as much of its original soil attached as possible.
- Separate with care: Once the clump is out, gently tease apart the bulbs. You’ll often find they are connected by rhizomatous growth or have smaller offsets clinging to the main bulb. If they come apart easily, great! If they’re a bit stubborn, don’t force it. You can often see natural breaking points. Aim to leave at least one healthy eye (the growing tip) on each division.
- Inspect the bulbs: Take a moment to look at your divisions. Are they firm and healthy-looking? Discard any that are soft, mushy, or show signs of rot or pest damage.
- Replant immediately: This is key! Erythronium bulbs don’t like to dry out. Find a suitable spot in your garden that mimics their natural habitat – partially shaded, with moist, well-draining soil. If you’re preparing a new bed, mix in plenty of that compost and leaf mold.
- Planting depth: Plant the bulbs about 3-4 inches deep, with the pointed end facing upwards. Space them about 4-6 inches apart, depending on the size of your divisions.
- Water it in: Water gently but thoroughly using your fine rose attachment. This helps settle the soil around the bulbs.
- Mulch: A light layer of mulch – shredded leaves or a bit of compost – will help retain moisture and keep weeds down.
The “Secret Sauce” (Pro Tips)
Here are a few things I’ve learned over the years that make a difference:
- Mimic the forest floor: Your Erythronium will thank you for amending their planting spot with plenty of leaf mold or well-rotted compost. This enriches the soil and helps retain just the right amount of moisture, like the natural duff of a woodland.
- Don’t disturb them if you don’t have to: Erythronium can be a bit sensitive to being moved. Only divide them when clumps become crowded or when you want to propagate. They’ll establish themselves much better if they’re left undisturbed for a good few years.
- Think drainage, drainage, drainage: I cannot stress this enough. These bulbs hate sitting in soggy soil. Even if you have clay soil, really work in that perlite or coarse sand when you’re preparing the planting area for divisions.
Aftercare & Troubleshooting
Once your divisions are planted, let them be! The key to success now is providing the right conditions. They’ll likely disappear as the leaves die back, storing energy underground.
Signs of Trouble:
The most common issue you might encounter is rot. If you dig up a bulb and it’s mushy and smells foul, it’s usually a sign that the soil was too wet and lacked adequate drainage. This is why our emphasis on that free-draining mix is so important. You might also notice that a division just doesn’t come up the following spring. This could be due to the division being too small, compromised, or simply not getting enough energy stored to make it. Don’t get discouraged if not every single one makes it; nature has its own way!
A Encouraging Closing
Growing Erythronium japonicum from divisions is a journey of patience and observation. It’s about understanding their delicate needs and celebrating each tiny success. Be gentle, trust the process, and before you know it, you’ll be rewarded with more of these enchanting woodland beauties gracing your garden. Happy gardening!
Resource:
https://identify.plantnet.org/k-world-flora/species/Erythronium%20japonicum%20Decne./data