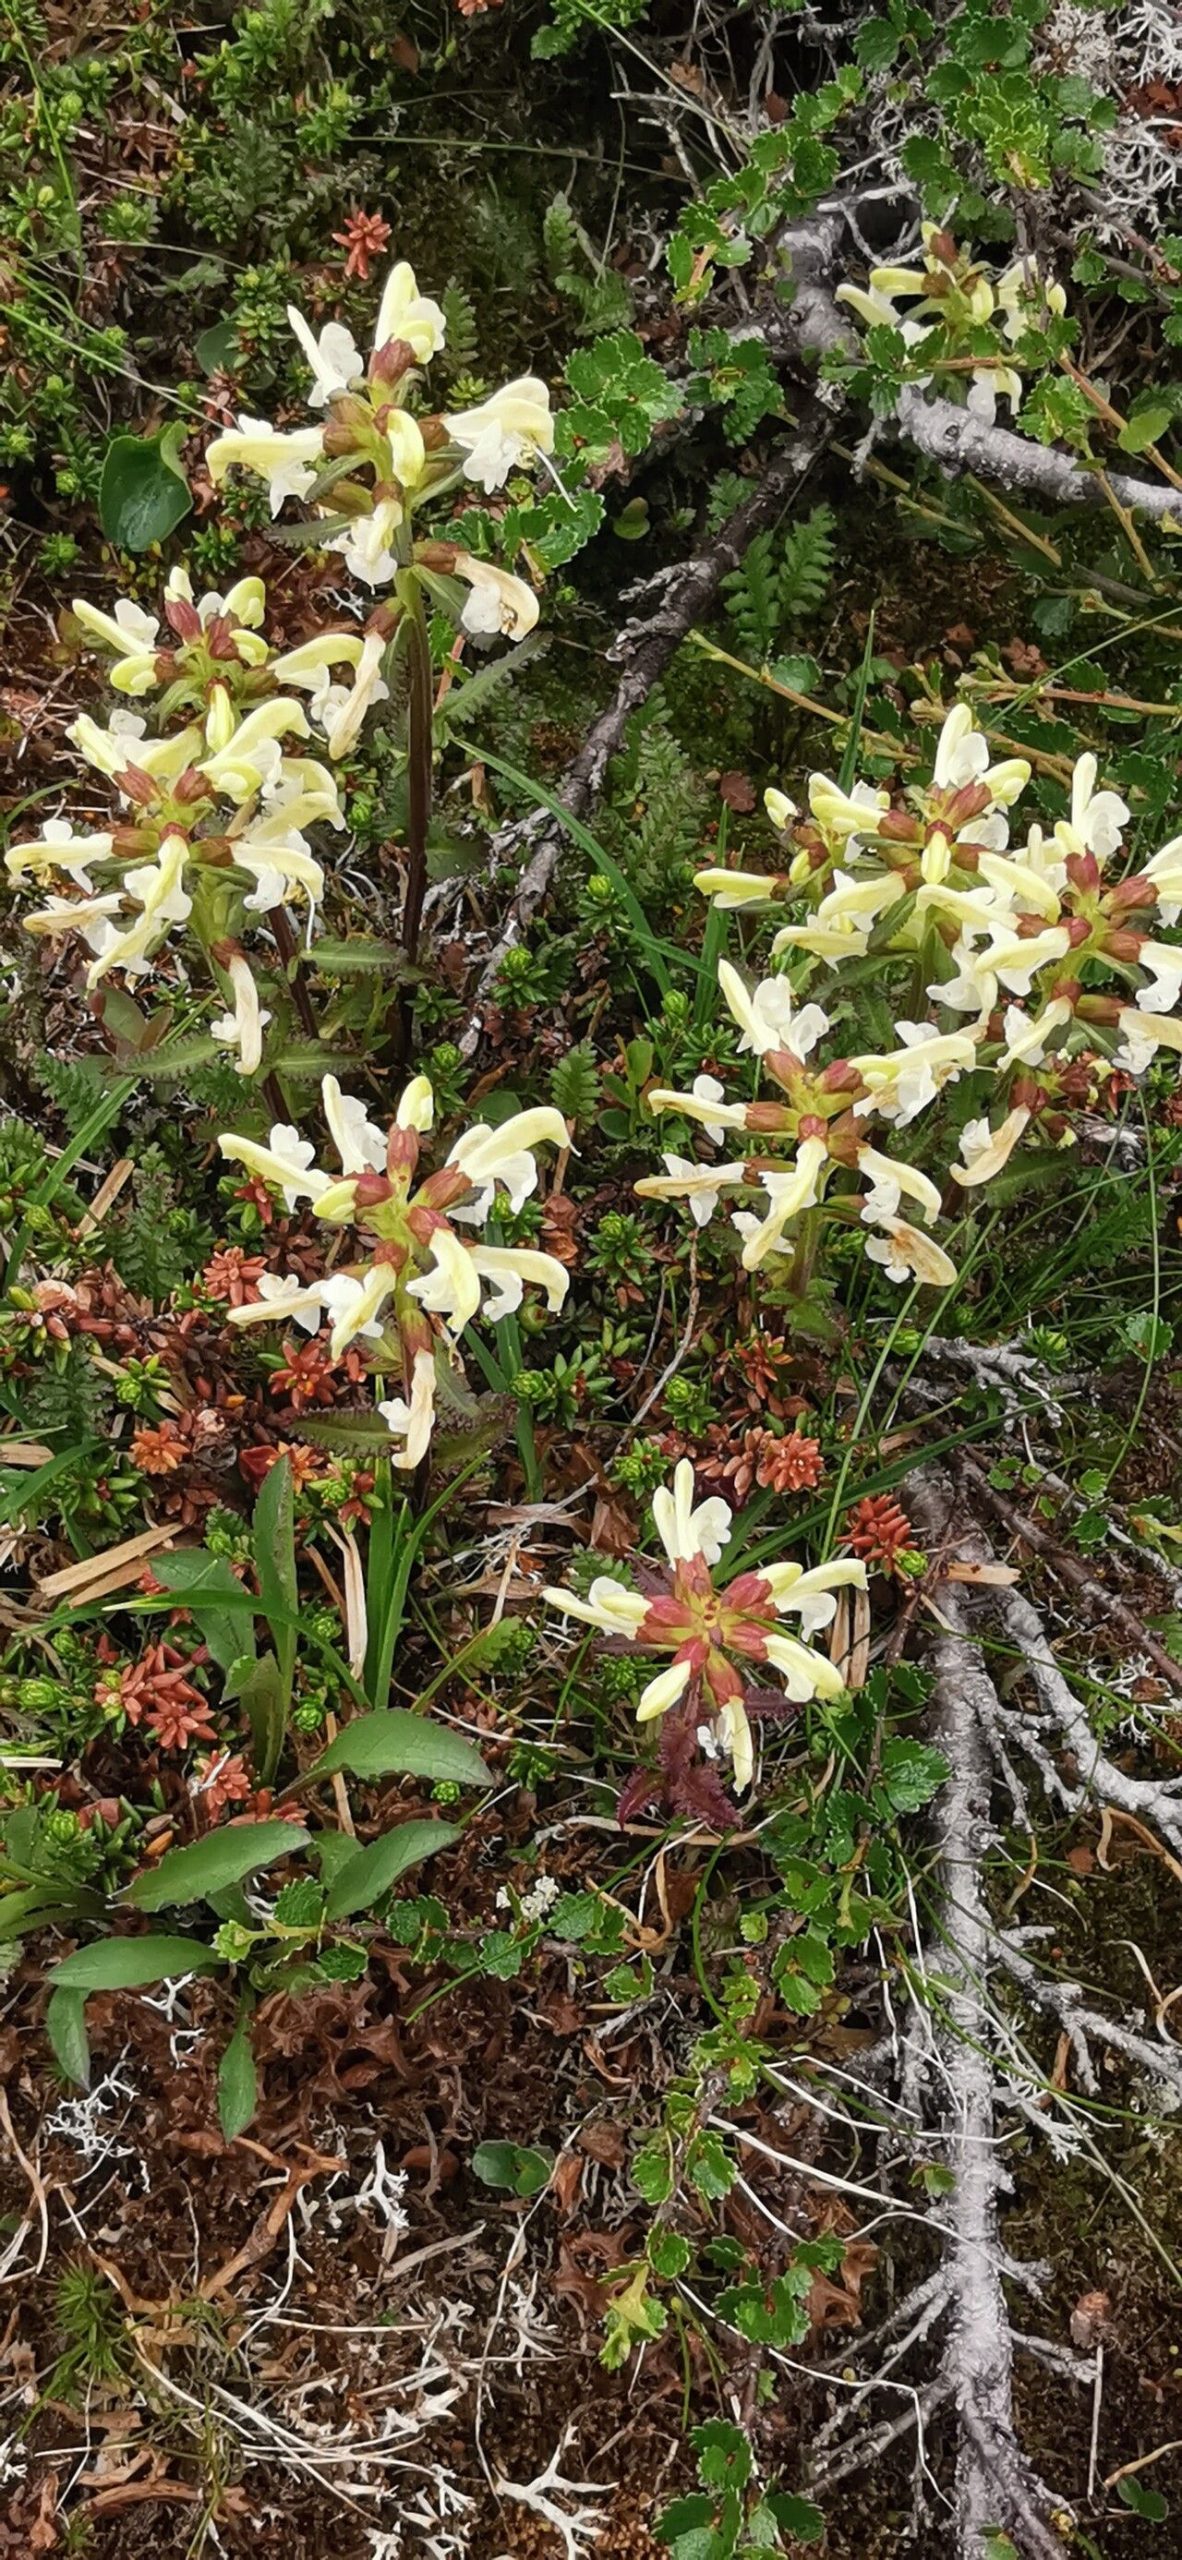
Hello, fellow garden enthusiasts! I’m so excited to chat with you today about a plant that has truly captured my heart over the years: Pedicularis lapponica, or as it’s sometimes called, Lousewort. It’s a strikingly beautiful plant with its intricately lobed leaves and unique, often brightly colored, flower spikes. Growing Pedicularis lapponica from seed or cuttings is incredibly rewarding, a way to extend that beauty and share it with others. Now, to be upfront with you, Pedicularis lapponica isn’t always the easiest plant to get going, especially for absolute beginners trying their hand at propagation. It has a bit of a reputation, but with a little patience and the right approach, you’ll be celebrating success!
The Best Time to Start
Timing is everything, isn’t it? For Pedicularis lapponica, the absolute best time to begin propagation is in late spring to early summer. This is when the plant is actively growing and has plenty of energy to put into developing new roots. If you’re working with seed, you’ll want to sow them as soon as you can get them – usually in early spring, but some varieties benefit from a period of cold stratification.
Supplies You’ll Need
Gathering your tools beforehand makes the process so much smoother. Here’s what I find essential:
- Sterile potting mix: A well-draining blend is crucial. I often use a mix of peat moss, perlite, and a bit of fine bark. For Pedicularis, a slightly acidic leaning blend can be beneficial.
- Small pots or seed trays: Cleanliness is key to preventing disease.
- Sharp pruning shears or a clean knife: For taking cuttings. Make sure they are sterilized with rubbing alcohol before each use.
- Rooting hormone (optional but recommended): A powder or gel can significantly boost your success rate, especially for stem cuttings.
- Watering can with a fine rose spray: Gentle watering prevents disturbing delicate seedlings or cuttings.
- Plastic bags or a propagation dome: To maintain humidity for cuttings.
- Labels: To keep track of what you’ve planted and when!
- Bottom heat mat (optional but helpful): Especially for seed germination or if your propagation area is on the cooler side.
Propagation Methods
While Pedicularis lapponica can be a bit finicky, here are the methods I’ve had the most success with:
1. Stem Cuttings: The Most Common Route
This is often the most reliable method for propagating established plants.
- Select your stems: Choose healthy, non-flowering shoots from your Pedicularis lapponica in late spring or early summer. Look for stems that are firm but not woody. Ideally, they should be about 4-6 inches long.
- Make the cut: Using your sterilized pruners or knife, make a clean cut just below a leaf node. A leaf node is where a leaf attaches to the stem. This is where the magic happens for root formation.
- Prepare the cutting: Gently remove the lower leaves from the cutting, leaving just a few at the top. This prevents them from rotting in the soil and encourages root development.
- Apply rooting hormone: Dip the cut end of the stem into your rooting hormone, tapping off any excess.
- Plant the cutting: Fill your clean pots with your sterile potting mix. Make a small hole with a pencil or your finger and insert the cutting, ensuring the leaf nodes are buried. Gently firm the soil around the base of the cutting.
- Water gently: Water the soil thoroughly but gently using your spray can.
- Create a humid environment: Cover the pot with a plastic bag (propped up with sticks so it doesn’t touch the leaves) or place it inside a propagation dome. This will trap moisture and create the high humidity cuttings need.
- Place in bright, indirect light: Find a spot that receives bright light but no direct sun, which can scorch the delicate cuttings.
2. Division: For Established Clumps
If you have a mature Pedicularis lapponica that has formed a clump, division is a great way to propagate it.
- When to divide: The best time for division is in early spring, just as new growth begins to emerge, or in early autumn after flowering has finished.
- Gently excavate: Carefully dig around the base of the plant and lift the entire clump. You want to minimize disturbing the root system.
- Separate the divisions: Gently tease apart the clump. You’re looking for naturally occurring sections, each with healthy roots and at least one or two shoots. If the roots are very tangled, you might need to use a clean knife to separate them, but be as gentle as possible.
- Replant immediately: Pot up your new divisions in well-draining soil, watering them in thoroughly.
3. Seed Propagation: For the Patient Gardener
Pedicularis lapponica seeds can be a bit tricky. They often require cold, moist stratification to germinate.
- Prepare the seeds: Mix your seeds with a little bit of sterile, damp sand or vermiculite in a plastic bag.
- Stratify: Place the bag in the refrigerator for 6-8 weeks. Check periodically to ensure the sand remains moist.
- Sow them: In early spring, sow the stratified seeds on the surface of your sterile seed-starting mix. Don’t bury them too deeply; they need light to germinate.
- Maintain moisture and light: Keep the soil consistently moist (but not waterlogged) and provide bright, indirect light. Germination can be slow and sporadic, so please be patient!
The “Secret Sauce” (Pro Tips)
Here are a few things I’ve learned over the years that can make a big difference:
- Don’t let leaves touch the water: For cuttings suspended in water (though I generally prefer soil propagation for Pedicularis), make sure no leaves are submerged. Any submerged foliage will quickly rot and can infect the entire cutting.
- Embrace bottom heat: For both seed germination and Pedicularis stem cuttings, a gentle bottom heat (around 70-75°F or 21-24°C) can significantly accelerate root development and improve success rates. Many propagation mats are readily available.
- Think “hemi-parasitic”: While not strictly a propagation tip, remember that many Pedicularis species are hemi-parasitic, meaning they have a relationship with the roots of certain host plants. While you don’t necessarily need to provide a host plant for cuttings or seedlings to get started, understanding their needs for future growth can be helpful. This often means well-drained soil and avoiding overly rich, waterlogged conditions.
Aftercare & Troubleshooting
Once you see signs of new growth or feel a gentle tug on your cuttings, it’s a sign of roots!
- Acclimatize gradually: If you’ve used a plastic bag or dome, start by opening it for increasing periods each day to allow the new plant to adjust to normal humidity levels.
- Continue with gentle watering: Keep the soil consistently moist but avoid overwatering. Allow the top inch of soil to dry slightly before watering again.
- Feed lightly: Once your new plants are established and showing good steady growth, you can begin a very diluted liquid fertilizer every 4-6 weeks.
- Watch for rot: The most common sign of failure is rot, which often appears as a mushy, black stem at the soil line. This is usually a sign of overwatering or poor air circulation. If you see this, sadly, that cutting is likely lost.
- Wilting can be a sign of distress: If a cutting wilts, it could be due to dryness, but also too much heat or insufficient light. Assess the conditions carefully.
A Encouraging Closing
Propagating Pedicularis lapponica is a journey, and like any good garden project, it requires a bit of patience and a lot of love. Don’t be discouraged if your first attempts aren’t perfect. Every gardener has had their share of… well, let’s just say learning experiences! Celebrate those small victories – the first tiny root, the unfurling of a new leaf. Enjoy the process of coaxing new life into being. Happy gardening!
Resource:
https://identify.plantnet.org/k-world-flora/species/Pedicularis%20lapponica%20L./data