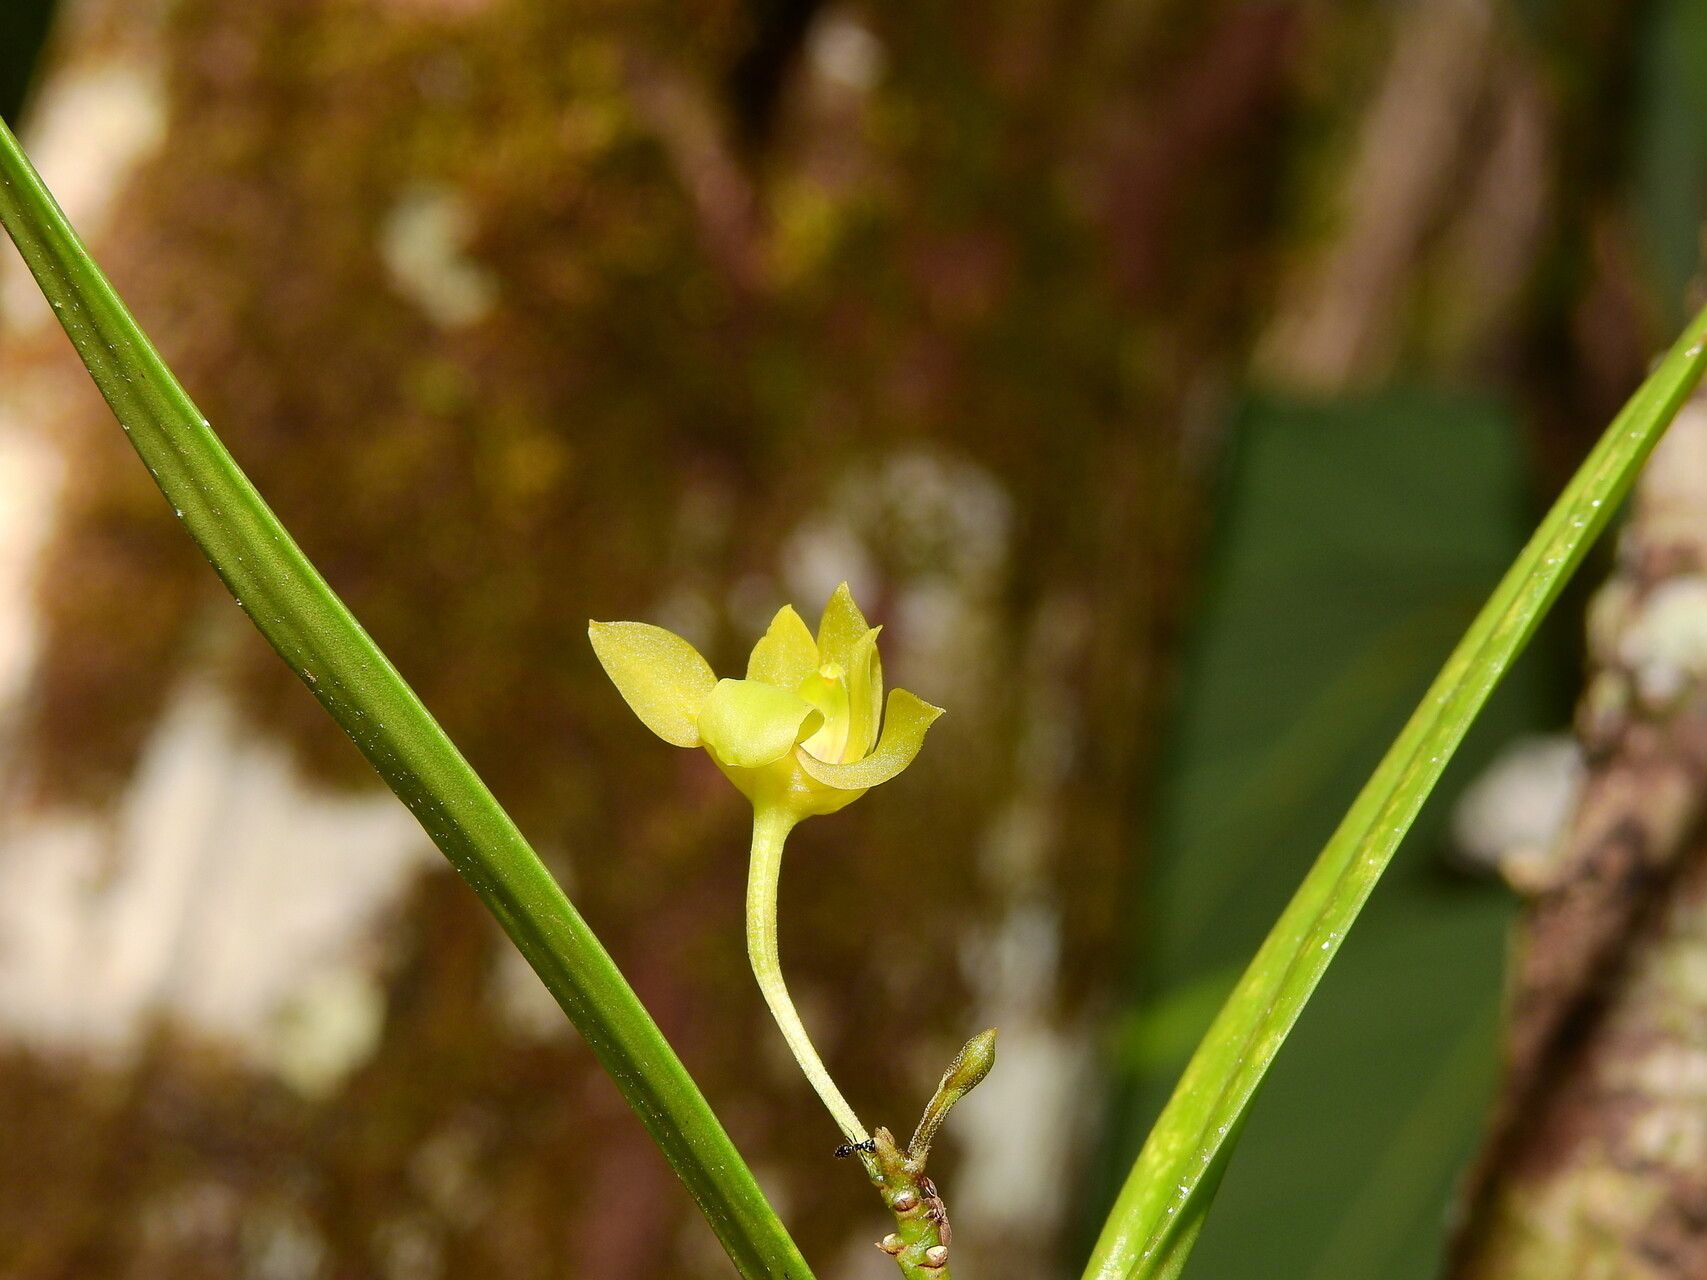
Hello, fellow plant lovers! Today, we’re diving into the wonderful world of Orleanesia amazonica. If you’ve ever seen this beauty with its striking foliage and wondered, “How can I get more of these?”, you’re in the right place. Propagating these plants can be incredibly satisfying, giving you the joy of filling your home with more greenery or sharing these treasures with friends. Now, I’ll be honest, Orleanesia amazonica can be a little finicky, so it’s not always a beginner’s first foray into propagation. But with a little patience and the right approach, I’m confident you can master it!
The Best Time to Start
For the highest likelihood of success with Orleanesia amazonica, I always recommend starting during its active growing season. This is typically in the spring and early summer. The plant has more energy then to put into root development. You’ll know it’s time when you see new leaves unfurling and a general sense of vigor from your parent plant. Trying to propagate when it’s dormant will, in my experience, lead to more frustration than results.
Supplies You’ll Need
Gathering your tools beforehand makes the whole process smoother. Here’s what I usually have on hand:
- Sharp, clean pruning shears or a knife: Essential for making clean cuts. A dull tool can crush stems and invite disease.
- Rooting hormone (optional but helpful): I find it gives cuttings a real boost, especially for plants that can be a bit slower to root. Look for one with IBA.
- Well-draining potting mix: A good blend of potting soil, perlite, and orchid bark is my go-to. You want it airy so water doesn’t sit.
- Small pots or trays: Choose ones with drainage holes!
- Clear plastic bags or a propagation dome: To create a humid environment for your cuttings.
- Water: For water propagation or lightly moistening soil.
- Labels: So you don’t forget what you’ve propagated!
Propagation Methods
While there are a couple of ways to go, I’ve found stem cuttings to be the most reliable method for Orleanesia amazonica.
Stem Cuttings: A Step-by-Step Guide
- Select a healthy stem: Look for a mature, non-flowering stem that’s at least 4-6 inches long. It should feel firm, not woody or overly soft.
- Make the cut: Using your clean shears or knife, make a cut just below a leaf node. This is where roots will most likely emerge.
- Prepare the cutting: Gently remove the lower leaves from the cutting, leaving just a few at the top. This reduces water loss and prevents leaves from rotting when buried or submerged.
- Apply rooting hormone (optional): Dip the cut end into your rooting hormone, tapping off any excess.
- Plant the cutting: Gently insert the prepared cutting into your well-draining potting mix. You can make a small hole with your finger or a pencil to avoid scraping off the rooting hormone. Make sure at least one leaf node is buried. Firm the soil gently around the stem.
- Water lightly: Water the soil just enough to moisten it. Don’t drench it!
Water Propagation (An Alternative)
If you prefer, you can try water propagation. Follow steps 1-3 above. Then, simply place the cutting in a jar of clean water, ensuring the leaf nodes are submerged but the leaves themselves are above the water. Change the water every few days to keep it fresh. Once you see a good root system developing, you can transplant it into soil.
The “Secret Sauce” (Pro Tips)
Here are a few little tricks I’ve picked up over the years that can make a difference:
- Humidity is King: Orleanesia amazonica loves a humid environment, especially when it’s trying to root. After planting your cuttings, tent a clear plastic bag loosely over the pot or place it inside a propagation dome. This traps moisture and creates that steamy greenhouse effect. Just remember to open it for ventilation for an hour or so every couple of days to prevent mold.
- Warmth Encourages Roots: I’ve noticed cuttings root much faster and more reliably when they have a bit of bottom heat. If you have a heat mat specifically designed for plants, placing your pots on it can really speed things up. It acts like a warm soil bath for your budding roots.
- Don’t Rush the Transplant: Even if the roots look a decent length in water, wait until they are at least an inch or two long before moving them to soil. For cuttings in soil, be patient! I often give mine at least 4-6 weeks, sometimes longer, before I try to gently tug on them to feel for resistance.
Aftercare & Troubleshooting
Once your cuttings have developed a healthy root system, it’s time for a little more attention.
- Gradual Acclimation: If you’ve been using a humidity dome or bag, gradually acclimate your new plant to lower humidity. Start by opening the bag for longer periods, then remove it entirely.
- Watering: Water when the top inch of soil feels dry. Avoid overwatering, which is the most common culprit for rot. Yellowing leaves, especially at the base of the stem, can be a sign of too much moisture.
- Light: Place your newly rooted plant in bright, indirect light. Direct sun can scorch its delicate new growth.
The main thing to watch out for is rot. This usually looks like mushy, brown stems or leaves. If you see this, unfortunately, the cutting is likely lost. Remove it immediately to prevent it from affecting any other cuttings. Sometimes, even with the best care, things just don’t take. Don’t let it discourage you!
A Little Patience Goes a Long Way
Propagating plants is a journey, and Orleanesia amazonica certainly teaches you patience. Celebrate every tiny green shoot and every emerging root you see. The satisfaction of nurturing a new plant from a simple cutting is truly one of gardening’s greatest joys. So, grab your tools, find a healthy stem, and enjoy the process! Happy propagating!
Resource:
https://identify.plantnet.org/k-world-flora/species/Orleanesia%20amazonica%20Barb.Rodr./data