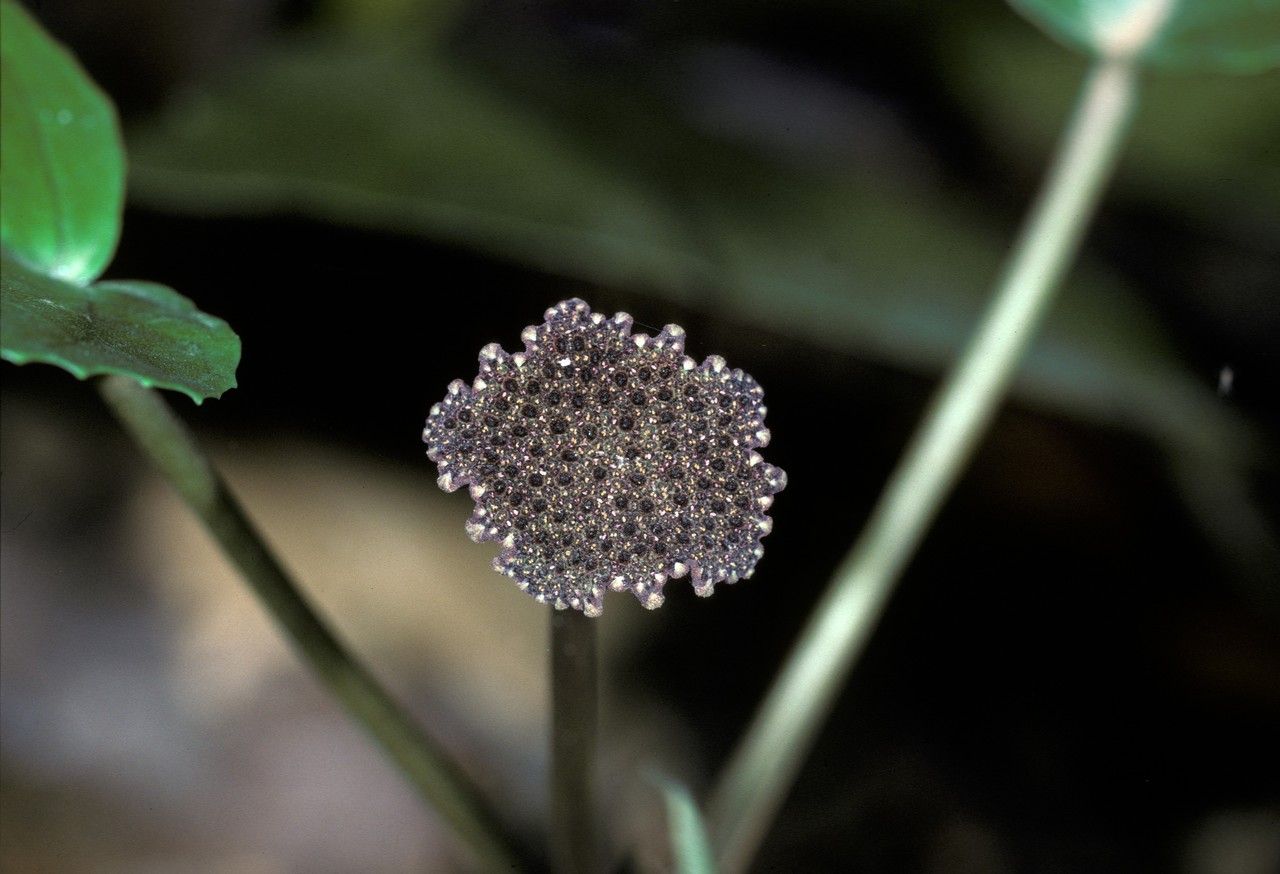
Oh, Dorstenia indica! What a wonderfully quirky and rewarding plant to have in your collection. Its unusual, fractal-like foliage and the fascinating saucer-shaped flowers (called hypanthodia, if you’re curious!) make it a real conversation starter. And the best part? Propagating it is absolutely achievable, and I’m always thrilled when a new baby plant sprouts for me. It’s my little horticultural victory! While it’s not quite as foolproof as propagating a Pothos, I’d say it’s moderately easy, especially if you follow a few key steps. You’ve got this!
The Best Time to Start
For Dorstenia indica, the sweet spot for propagation is definitely during its active growing season. This generally means spring and summer. You want to see vigorous new growth on your parent plant. Trying to propagate when it’s resting or stressed is an uphill battle. So, keep an eye on your plant, and when it’s really putting on a show of new leaves and stems, that’s your cue!
Supplies You’ll Need
Gathering your tools beforehand makes the whole process so much smoother. Here’s what I usually have on hand:
- Sharp Pruning Shears or a Craft Knife: Cleanliness is key for preventing disease.
- A Well-Draining Potting Mix: I like to use a blend of equal parts perlite, coco coir, and a bit of coarse sand. You can also buy a good cactus or succulent mix and really amp up the drainage with extra perlite.
- Rooting Hormone (Optional but Recommended): This gives your cuttings a little boost, and a powder or gel both work well.
- Small Pots or Seed Trays: Whatever you have that can hold your cuttings and allow for good air circulation.
- Watering Can with a Fine Rose or a Spray Bottle: Gentle watering is crucial.
- Labels and a Marker: So you don’t forget what you’ve propagated!
Propagation Methods
Dorstenia indica can be propagated in a couple of ways, but my favorite, and often the most successful for me, is by stem cuttings.
Stem Cuttings:
- Select a Healthy Stem: Look for a piece of stem that’s at least 3-4 inches long and has a few leaves on it. Avoid any that look old, woody, or have any signs of pest or disease.
- Make the Cut: Using your sterilized shears or knife, make a clean cut just below a leaf node. This is where the roots will eventually emerge. You can even take a few cuttings from one healthy plant.
- Let it Callus (Important!): This is a crucial step to prevent rot. Place your cuttings in a dry, airy spot for 24-48 hours until the cut end has dried and formed a scab or callus.
- Apply Rooting Hormone (Optional): If you’re using rooting hormone, dip the callused end into the powder or gel, tapping off any excess.
- Plant Your Cuttings: Gently insert the callused end of the cutting into your prepared, slightly moist potting mix. I like to make a small hole with a pencil first to avoid rubbing off the rooting hormone. Make sure at least one leaf node is buried in the soil.
- Water Lightly: Water very gently. You don’t want to disturb the cutting. The soil should be damp, not soggy.
The other common method is division, but this is really best done when you have a mature plant that has started to form multiple offsets at its base. You’d carefully remove the plant from its pot, gently tease apart the rooted sections, and repot them individually. But for a beginner, stem cuttings are usually the way to go.
The “Secret Sauce” (Pro Tips)
Here are a few little tricks I’ve picked up that have really boosted my propagation success with Dorstenia indica:
- Bottom Heat is Your Friend: Dorstenia indica, like many succulents and caudiciforms, loves a little warmth to encourage root development. Placing your pots on a heat mat set to a low temperature (around 70-75°F or 21-24°C) can make a huge difference. Make sure it’s a gentle warmth, not scorching heat.
- Don’t Overwater, Ever! This is probably the biggest mistake people make with succulents. Your cuttings should be kept in bright, indirect light and the soil should only be watered when it feels almost dry to the touch. A good rule of thumb is to mist the surface lightly every few days, or water very sparingly from the bottom if they start to look a bit thirsty.
- Air Circulation is Key: While you want to maintain some humidity for the cuttings, you don’t want them sitting in stagnant, damp air. Ensure the area where you’re propagating has good air movement. If your pots are covered with a dome, prop it open a bit.
Aftercare & Troubleshooting
Once you start to see new growth appearing, that’s a great sign the roots are developing! You can gently tug on a cutting to feel for resistance, or if you’re brave, you can carefully peek at the bottom of the pot.
- Transition Slowly: When roots have formed, you can start watering a little more normally, allowing the top inch or so of soil to dry out between waterings. Keep it in bright, indirect light.
- Watch for Rot: The most common problem is rot, which will usually manifest as the cutting turning mushy and dark, often starting at the cut end. If you see this, unfortunately, that cutting is likely lost. Always remove affected material immediately to prevent it from spreading.
- Wilting or Shriveling: If your cuttings are wilting but not mushy, it’s usually a sign they haven’t rooted yet and are using up their stored water. Don’t give up! Keep them in appropriate conditions and be patient.
Happy Propagating!
Propagating plants is such a rewarding part of this hobby. It’s about patience, observation, and a little bit of horticultural magic. Don’t be discouraged if a few cuttings don’t make it – it happens to us all! Just keep trying, learn from each experience, and soon you’ll have a little Dorstenia indica nursery of your own. Enjoy the journey!
Resource:
https://identify.plantnet.org/k-world-flora/species/Dorstenia%20indica%20Wight/data