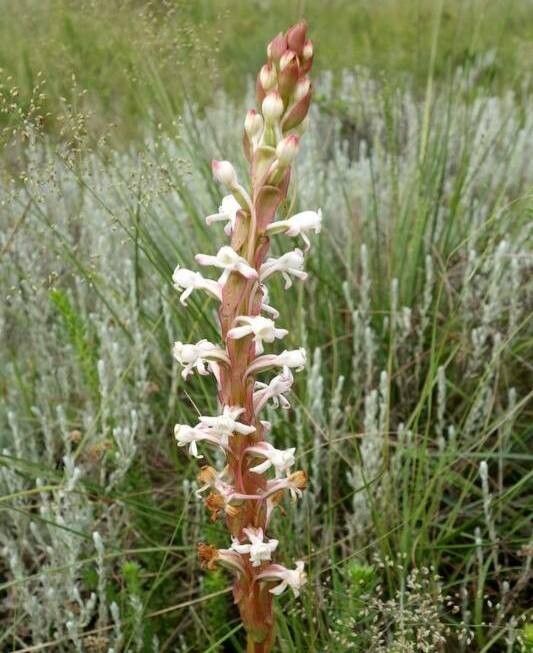
Hey there, fellow garden enthusiasts! It’s so nice to have you stop by. Today, I want to talk about a plant that’s really captured my heart over the years: Satyrium amoenum. If you haven’t encountered this beauty, imagine delicate, orchid-like flowers in vibrant shades, often appearing with a delightful fragrance to boot. Watching these little miracles unfurl is truly one of gardening’s greatest joys. And the best part? You can create more of this magic yourself!
Now, is Satyrium amoenum a walk in the park for a brand-new gardener? I’d say it’s more of a rewarding challenge. It’s not one of those plants that practically propagates itself, but with a little understanding and patience, you’ll be amazed at what you can achieve. It’s a journey worth embarking on, and I’m here to guide you every step of the way.
The Best Time to Start
For Satyrium amoenum, the sweet spot for propagation is generally late spring to early summer, right after the plant has finished its main flowering period. This is when the plant has built up energy stores and is actively growing, making it more receptive to taking root. You’re essentially working with a plant that’s in its robust, energetic phase.
Supplies You’ll Need
Gathering your tools beforehand makes the whole process much smoother. Here’s what I always have on hand:
- Sharp, sterile pruning shears or a sharp knife: Cleanliness is crucial to prevent disease.
- Well-draining potting mix: A good blend for epiphytic orchids or a similar airy mix works wonders. I often use a mix of orchid bark, perlite, and a bit of sphagnum moss.
- Small pots or seed trays: Clean and with drainage holes, of course.
- Rooting hormone (optional but recommended): A powder or gel can give your cuttings a helpful boost.
- Clear plastic bags or a propagation dome: To create a humid environment.
- Watering can with a fine rose attachment: For gentle watering.
- Labels: To keep track of your experiments!
Propagation Methods
While Satyrium amoenum can be a bit finicky, the most reliable method is usually through division of tubers. These orchids store energy in fleshy underground tubers, and dividing them is like giving the parent plant a little rejuvenation while creating new life.
Dividing Tubers:
- Gently unpot the mature plant. Try to be as delicate as possible with the roots. If the tubers are tightly bound, you might need to gently tease them apart.
- Identify healthy sections. Look for tubers that have at least one viable growth bud or eye. Sometimes you’ll see these as small bumps or dormant shoots.
- Carefully separate the tubers. Use your clean knife or shears to slice through any connecting rhizomes or roots, ensuring each division has a good portion of tuber and ideally a growth point.
- Allow the cut surfaces to air dry for a day or two. This helps to callous over any wounds and reduces the risk of rot.
- Pot up your divisions. Plant each section in its own small pot filled with your airy, well-draining potting mix. Ensure the tuber is just covered with the mix, and the growth bud is facing upwards.
- Water sparingly. Give them a light watering to settle the mix, but avoid waterlogging.
The “Secret Sauce” (Pro Tips)
Here are a few things I’ve learned over the years that often make all the difference:
- Don’t overwater division newbies! This is probably the biggest killer of new Satyrium divisions. They have stored energy in their tubers, so they don’t need much moisture initially. Wait until you see signs of new growth before increasing watering.
- Bottom heat can be a game-changer. If you have a seedling heat mat, placing your potted divisions on it can encourage root development. Just make sure the temperature doesn’t get too hot – a gentle warmth is all they need.
- Patience is truly a virtue. Satyrium amoenum can be slow to show obvious signs of life after division. Don’t panic if you don’t see a new shoot appear within a few weeks. Keep them in a bright, warm spot with good air circulation, and they’ll usually surprise you when they’re ready!
Aftercare & Troubleshooting
Once you see those first brave little green shoots emerging, it’s time for continued care. Gradually increase watering as the new growth develops, but always allow the potting mix to dry out slightly between waterings. Keep them in a bright, but not intensely sunny, location.
The most common sign of trouble is rot. If your tuber sections are mushy or have a foul smell, that’s usually a sign of overwatering and fungal or bacterial issues. In this case, it’s often best to discard the affected material to prevent it from spreading. Prevention is key, so always ensure good air circulation and avoid soggy conditions.
A Little Encouragement
And there you have it! Propagating Satyrium amoenum is a wonderful way to multiply the beauty in your garden. Remember to be gentle, observant, and most importantly, enjoy the process of nurturing something new into existence. Happy gardening!
Resource:
https://identify.plantnet.org/k-world-flora/species/Satyrium%20amoenum%20(Thouars)%20A.Rich./data