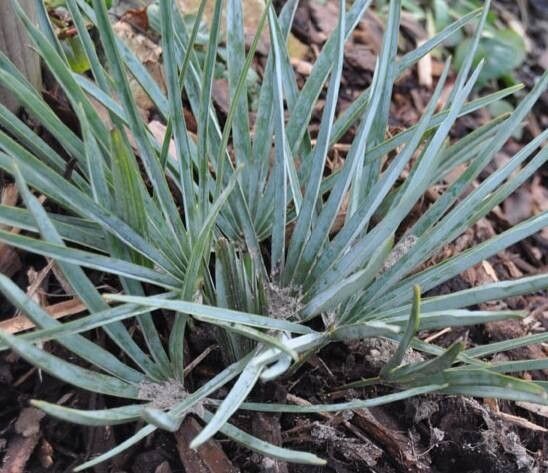
Hello, fellow plant lovers! If you’re anything like me, you’ve probably fallen head over heels for the sheer elegance of Copernicia prunifera. Those beautiful, fan-shaped leaves, the way they seem to hold a bit of desert sunshine – it’s no wonder they capture our hearts. And the truly wonderful thing? You can create more of this magic! Propagating Copernicia prunifera is a deeply rewarding experience, a chance to watch new life emerge from a piece of your existing treasure. Now, I won’t sugarcoat it – this palm can be a tad on the finicky side for absolute beginners. But with a little patience and these tried-and-true methods, you’ll be well on your way.
The Best Time to Start
For the absolute best chance of success, I find late spring to early summer is your golden window. This is when the plant is in its most vigorous growth phase, energized by longer days and warmer temperatures. It’s much more likely to root and establish itself during this period than when it’s dormant. You’re essentially working with the plant’s natural rhythm.
Supplies You’ll Need
Before you dive in, gather your tools. Having everything ready makes the process so much smoother.
- Rooting Hormone: A good quality striking powder is essential. Look for one with an indole-butyric acid (IBA) formulation.
- Sharp Pruning Shears or a Clean Knife: To make clean cuts. Sterilize them with rubbing alcohol first!
- Well-Draining Potting Mix: This is crucial. I love a mix of coarse sand, perlite, and a good quality peat-free compost. For palms, I often add a little extra perlite to ensure excellent drainage.
- Small Pots or Propagation Trays: Clean, with drainage holes, of course.
- Clear Plastic Bag or Dome: To create a humid microclimate.
- Watering Can with a Fine Rose: For gentle watering.
- Optional: Heating Mat: This can significantly speed up root development.
Propagation Methods
While Copernicia prunifera isn’t readily propagated by seed for most home growers due to germination challenges, we can focus on a more reliable method: stem cuttings.
Stem Cuttings
This is my go-to for multiplying this beautiful palm.
- Select Your Cutting: Look for a healthy, mature stem that has at least one, ideally two, healthy leaves attached. It should not be woody and hard, but more flexible.
- Make the Cut: Using your sterilized pruning shears or knife, make a clean cut, leaving about an inch of stem below the leaf stalk. Remove any damaged or yellowing leaves.
- Treat with Rooting Hormone: Dip the cut end of the stem into your rooting hormone powder. Ensure it’s evenly coated. Gently tap off any excess.
- Plant the Cutting: Fill your small pot with your well-draining potting mix. Make a small hole in the center with your finger or a pencil. Insert the treated stem end into the hole, ensuring the base of the leaf stalk is just slightly below the soil surface. Gently firm the soil around it.
- Create Humidity: Water the soil gently until it’s moist but not waterlogged. Then, cover the pot with a clear plastic bag, making sure it doesn’t touch the leaves. You can use stakes to prop it up if needed. Alternatively, use a propagation dome.
- Provide Light and Warmth: Place the pot in a bright location, but out of direct, harsh sunlight. A spot that gets bright, indirect light is perfect. If you have a heating mat, place the pot on it for bottom warmth, which can really encourage root formation.
The “Secret Sauce” (Pro Tips)
Here are a couple of little tricks I’ve learned over the years that can make a big difference:
- Don’t Let Those Leaves Touch the Water (If You Were Thinking of Water Propagation): While some palms do well in water, Copernicia prunifera is particularly prone to rot if the leaves are submerged. When you’re checking moisture levels, be extremely careful to only wet the soil, not let the foliage sit in standing water.
- The Power of a Good Seal: That plastic bag or dome isn’t just for show. It’s creating a mini-greenhouse effect, trapping moisture and humidity. Check it daily for condensation and open it for a few minutes each day to allow for air exchange and prevent fungal issues.
Aftercare & Troubleshooting
Once your cutting has been in its humid little home for a few weeks, you might start to see signs of new growth. This is a great indicator that roots are forming!
- Gradual Acclimatization: When you see new leaves unfurling, it’s time to start gradually acclimatizing your new plant to normal room humidity. Over a week or two, start opening the plastic bag or dome for longer periods each day. Eventually, you can remove it.
- Watering: Continue to keep the soil consistently moist but never soggy. Water when the top inch of soil feels dry to the touch.
- Troubleshooting: If your cutting starts to turn yellow and mushy, that’s often a sign of rot, usually from too much moisture and poor air circulation. Unfortunately, once rot sets in, it can be hard to save. If you see no signs of life after several months, it’s possible the cutting didn’t take. Don’t be discouraged! Sometimes lightning doesn’t strike twice, but you can always try again.
A Bit of Encouragement
Propagating any plant is a journey, and Copernicia prunifera asks for a little extra care, but the reward of seeing a new little palm sprout up is immense. Be patient with the process. Enjoy the mystery of it all, and celebrate every little sign of progress. Happy propagating!
Resource: