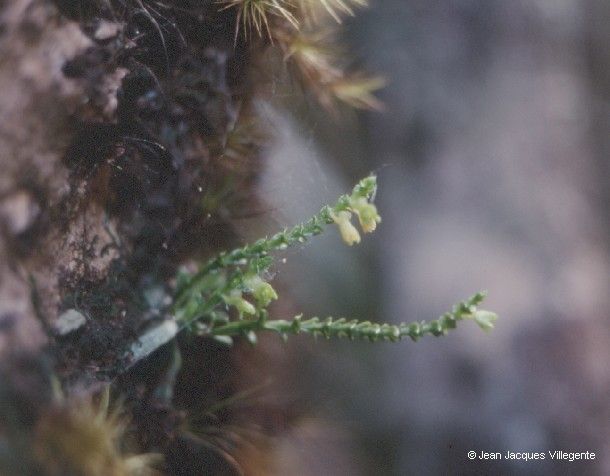
Hey there, fellow plant lovers! I’m so excited to chat with you today about a truly fascinating orchid: Taeniophyllum graptolitum. If you haven’t encountered this one before, imagine a plant that looks more like a tangle of green roots than traditional leaves. It’s a moon orchid, and it’s absolutely captivating with its almost alien appearance.
Propagating Taeniophyllum graptolitum is super rewarding. Watching those tiny roots emerge and develop into a whole new plant is just chef’s kiss. Now, I’ll be honest, this isn’t the easiest plant for absolute beginners to propagate. It’s a bit more of a specialist, but with a little patience and the right approach, you absolutely can have success. Think of it as a delightful challenge!
The Best Time to Start
Generally, the best time to think about propagating Taeniophyllum graptolitum is during its active growing season. For most of these little guys, that means spring and summer. You want to see good, healthy growth on your parent plant. If it’s looking a bit tired, give it some TLC and wait until it’s perked up before you start dividing or taking cuttings.
Supplies You’ll Need
Here’s what I always have on hand:
- Sharp, sterile pruning shears or a clean razor blade. Sterilization is key to preventing infections. A quick dip in rubbing alcohol or a flame (let it cool!) works wonders.
- A well-draining orchid mix. I like a blend of medium-grade bark, perlite, and a touch of sphagnum moss. You want good airflow.
- Small pots or propagation trays. These don’t need to be fancy. Old yogurt containers with drainage holes work fine!
- Rooting hormone (optional, but recommended). This can give those cuttings a helpful boost.
- A spray bottle. For gentle misting.
- Tweezers (optional). For handling tiny plantlets.
Propagation Methods
The most common and successful way to propagate Taeniophyllum graptolitum is through division. Since these orchids grow in flattened mats or clumps, you’re essentially just separating sections of the existing plant.
Here’s how I do it:
- Gently remove the plant from its pot. If it’s mounted, carefully loosen it first.
- Inspect the root system. Look for natural breaks or sections of the plant that seem to be growing independently. You’re looking for a clump of roots with a healthy growth point.
- Using your sterile shears or razor blade, carefully cut the plant into sections. Make sure each section has a good amount of healthy, green roots and at least one visible growth bud (often a tiny bump where new growth will emerge). It’s better to have a bit more root than not enough.
- Allow the cut surfaces to callous over. This is super important for preventing rot. I usually leave my divisions in a dry, airy spot for at least a day, and sometimes up to two or three days, until the cut end looks a bit dry and sealed.
- Pot up your new divisions. Place them in your prepared orchid mix. I like to position them so the growth point is just at the surface of the mix, not buried. The roots should be gently tucked in.
The “Secret Sauce” (Pro Tips)
- Don’t overwater after division! This is the biggest killer. New divisions don’t have established roots to take up a lot of water. They’re susceptible to rot. Water very sparingly for the first week or two, just enough to keep the mix slightly damp, and then gradually increase. Good airflow is your best friend here.
- Consider gentle humidity trays. While you don’t want to soak them, a bit of ambient humidity can help encourage root growth. Placing the pots on a tray filled with pebbles and a little water (making sure the pot isn’t sitting in the water) can create a microclimate.
- Bottom heat can be a game-changer. If you have a heat mat, placing your newly potted divisions on it can really speed up root development. Keep it on a low setting – you’re looking for gently warm, not hot.
Aftercare & Troubleshooting
Once your divisions are potted and have had a chance to settle, continue regular, but not excessive, watering. Allow the potting mix to dry out slightly between waterings. Mist the roots occasionally if the air is very dry. You might see some initial leaf drop or browning as the plant adjusts, and that’s okay. The real goal is to see new root growth and eventually, new foliar growth.
The most common sign of trouble is rot. If you see mushy, black roots, or the base of the plant turns black and soft, it’s a strong indicator of too much moisture. Unfortunately, if rot sets in deeply, it can be hard to save. If you catch it early, you can try trimming away the rotted parts with sterile tools and repotting in fresh, dry mix.
A Little Patience Goes a Long Way
Propagating Taeniophyllum graptolitum takes time and observation. Don’t get discouraged if you don’t see instant results. Be patient, enjoy the process of learning about your plant, and celebrate every new root or tiny leaf you spot. Happy growing!
Resource:
https://identify.plantnet.org/k-world-flora/species/Taeniophyllum%20graptolitum%20N.Hallé/data