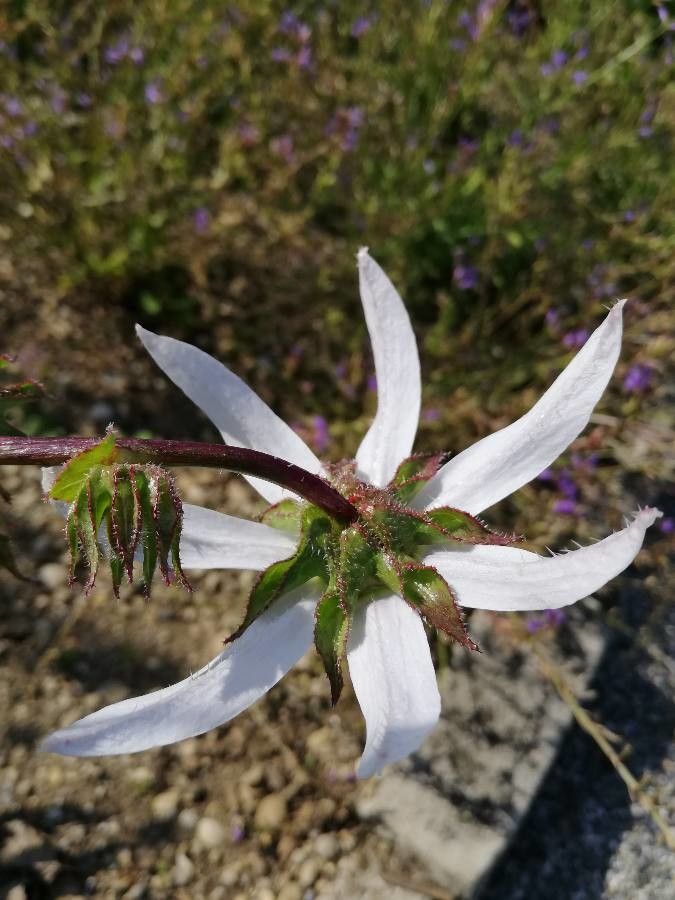
Ah, Michauxia tchihatcheffii! If you’re drawn to its unique, star-shaped blooms that shimmer like pale moonlight against architectural foliage, you’re in for a treat. This beauty, a native of Turkey, brings an elegance to the garden that’s hard to match. Propagating it, while not the absolute easiest plant for a complete beginner, is certainly achievable with a little care and patience. The reward of seeing those tiny seedlings or cuttings unfurl their first true leaves is incredibly satisfying. It’s like giving life, really.
The Best Time to Start
For Michauxia tchihatcheffii, I find late spring to early summer is your sweet spot. This is when the plant is actively growing, brimming with energy, and most receptive to new beginnings. Waiting until after the main flush of spring growth has started to mature a bit usually gives you the best material to work with.
Supplies You’ll Need
Here’s what I always have on hand when I’m propagating this lovely plant:
- Sharp, clean pruning shears or a sharp knife: For making clean cuts.
- Rooting hormone: A powder or gel can really give cuttings a boost.
- Well-draining potting mix: A good blend usually includes peat moss, perlite, and a bit of coarse sand. I often use a mix formulated for succulents or cacti, as they appreciate excellent drainage.
- Small pots or trays with drainage holes: Keep them clean!
- Plastic bags or a propagation dome: To create a humid environment.
- Watering can with a fine rose: For gentle watering.
Propagation Methods
Michauxia tchihatcheffii can be propagated quite successfully from stem cuttings. Here’s how I tackle it:
- Select Your Cuttings: Look for healthy, non-flowering stems from your established plant. You want actively growing wood, not old woody bits. Aim for cuttings that are about 4-6 inches long.
- Make the Cut: Using your clean shears or knife, make a clean cut just below a leaf node (where a leaf attaches to the stem). This is where the plant’s magic hormones are concentrated.
- Prepare the Cutting: Gently remove the lower leaves to expose at least an inch of stem. If the remaining leaves are very large, you can even reduce them by half to prevent excessive water loss.
- Apply Rooting Hormone: Dip the cut end of the stem into your rooting hormone, ensuring it’s coated. Tap off any excess.
- Plant the Cuttings: Fill your small pots with your well-draining mix. Make a small hole in the center with your finger or a pencil. Carefully insert the cutting into the hole, ensuring the nodes where you removed the leaves are below the soil surface. Gently firm the soil around the cutting.
- Create a Humid Environment: Water lightly from the bottom or with your fine rose watering can until the soil is moist but not soggy. Then, cover the pot with a plastic bag or propagation dome. This traps humidity, which is crucial for cuttings to root.
- Placement: Place the pots in a bright location, but out of direct sunlight. Too much sun will scorch delicate cuttings.
The “Secret Sauce” (Pro Tips)
- Bottom Heat is Your Friend: If you have a heat mat, even a gentle one, placing your pots on it can significantly speed up root development. Michauxia seems to absolutely love that warmth.
- Don’t Drown Them: While humidity is key, waterlogged soil is the fastest way to rot your cuttings. Let the top layer of soil dry out slightly between waterings. It’s better to be a bit dry than too wet.
- Be Patient with Leaves: If you’re doing water propagation (though I don’t find it works as well for Michauxia as cuttings in soil), ensure absolutely no leaves are submerged in the water. They will rot and contaminate the water, harming the cutting.
Aftercare & Troubleshooting
Once you start seeing new leaf growth on your cuttings, that’s a fantastic sign! It usually means roots are forming. Gradually acclimate your new plants to normal humidity by opening the plastic bag or dome for increasingly longer periods over a week or two. Continue to water gently.
The most common pitfall? Rot. If your cutting turns limp, mushy, and black, it’s likely succumbed to rot. This is usually due to too much moisture in the soil or a lack of air circulation. If you see signs of rot, remove infected cuttings immediately to prevent it from spreading. If your cuttings simply fail to root and shrivel, it could be due to poor cuttings, lack of humidity, or being placed in too harsh a location. Don’t get discouraged if some don’t make it!
A Encouraging Closing
Gardening is a journey of learning, and propagation is one of its most rewarding chapters. Be patient with your Michauxia tchihatcheffii cuttings. Nature works at its own pace, and sometimes, the waiting is part of the magic. Enjoy the process, and soon you’ll have more of these stunning plants to share or enjoy in your own garden. Happy propagating!
Resource: