Hello there, fellow garden enthusiasts! It’s such a joy to connect with you again today, cup of coffee in hand, ready to talk about a truly delightful plant: Urospermum dalechampii.
Embracing the Charm of Urospermum dalechampii
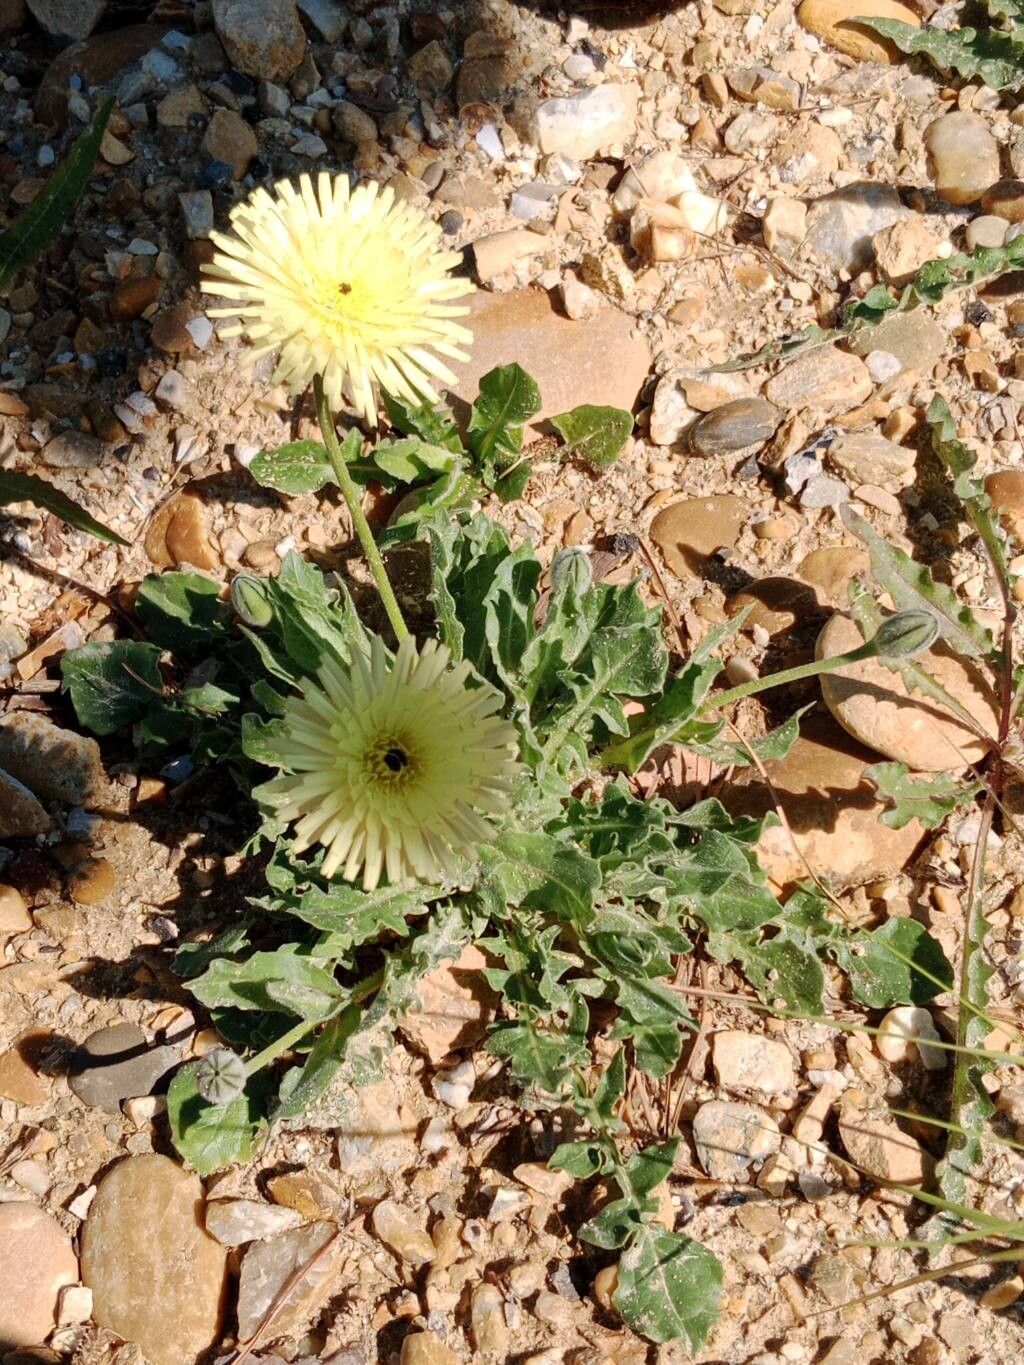
I’ve always been drawn to the cheerful, daisy-like blooms of Urospermum dalechampii. They bring such a sunny disposition to any garden border, and their unique, spiky seed heads offer interest long after the flowers fade. Propagating this beauty is incredibly rewarding. You get to watch new life emerge from your efforts, and soon you’ll have more of these charming plants to share with friends or fill every sunny nook in your own garden. For beginners, I’d say Urospermum dalechampii is moderately easy to propagate. It’s not as foolproof as, say, a spider plant, but with a little care and attention, you’ll find great success.
When is the Green Light for Propagation?
The sweet spot for propagating Urospermum dalechampii is definitely late spring to early summer. This is when the plant is in active growth and has plenty of energy to put into developing new roots. You’re looking for stems that are firm but not yet woody. Think of it as taking cuttings from a plant that’s just hitting its stride.
Your Propagation Toolkit
Before we dive in, let’s make sure you have everything you need. It’s always best to be prepared!
- Clean, sharp pruning shears or a sharp knife: We want to make clean cuts to minimize damage.
- Potting mix: A well-draining mix is crucial. I like to use a blend of half peat moss and half perlite, or a commercial seed-starting mix.
- Small pots or seed trays: Clean containers are a must to prevent disease.
- Rooting hormone (optional but recommended): This can give your cuttings a helpful boost. Look for a powder or gel.
- Watering can with a fine rose or a spray bottle: Gentle watering is key.
- Plastic bag or a clear dome lid: To create a humid environment.
Bringing New Life to Urospermum dalechampii
The most straightforward way to propagate Urospermum dalechampii in my experience is through stem cuttings. It’s a reliable method that usually yields good results.
- Select Your Cuttings: Choose healthy, non-flowering stems that are about 4-6 inches long. Make a clean cut just below a leaf node (where a leaf attaches to the stem). This is where the magic happens for root development.
- Prepare the Cuttings: Gently remove the lower leaves from your cuttings, leaving just the top 2-3 sets. This prevents them from rotting in the soil and encourages the plant to focus energy on roots.
- Apply Rooting Hormone (if using): Dip the cut end of each stem into the rooting hormone, tapping off any excess.
- Plant Your Cuttings: Fill your cleaned pots or trays with your prepared potting mix. Make a small hole in the soil with your finger or a pencil. Insert the cut end of a cutting into the hole, making sure the leaves aren’t touching the soil surface. Gently firm the soil around the stem.
- Water Gently: Water the soil thoroughly but gently. You want it to be moist but not waterlogged.
- Create a Humid Environment: Cover the pots loosely with a plastic bag or place them under a clear dome lid. This traps humidity, which is vital for cuttings to root, as it reduces water loss through the leaves. Place them in a bright spot, but avoid direct, hot sunlight, which can scorch the tender cuttings.
My “Secret Sauce” for Success
Over the years, I’ve picked up a few little tricks that seem to make all the difference.
- Bottom Heat is Your Friend: If you have access to a propagation mat or can place your pots on a warm windowsill (without direct sun), gentle bottom heat can significantly speed up the rooting process. It mimics the warmth of spring soil and really encourages those roots to get going.
- Don’t Be Afraid to Mist: Even with a plastic bag, regular misting of the cuttings and the inside of the bag is a good idea, especially in drier climates. It helps maintain that crucial high humidity without making the soil soggy.
- Patience is a Virtue (and a Gardener’s Tool): This is a big one! Don’t be tempted to pull up your cuttings too soon to check for roots. It can take anywhere from 3 to 6 weeks, sometimes even longer, for them to establish. Trust the process!
Aftercare and Navigating Those Tricky Moments
Once you start to see new growth on your cuttings, it’s a good sign that roots are forming! You can then gradually acclimate them to normal conditions by opening the plastic bag or dome for increasing periods over a week or so.
Now, what if things don’t go as planned? The most common culprit for failure is rot. If your cuttings turn mushy, develop dark spots, or just look generally sad and waterlogged, it’s usually a sign of too much moisture and not enough air circulation. Make sure your soil drains well and that you’re not overwatering. If you see rot, sadly, that cutting is probably a loss, but don’t get discouraged! Learn from it, adjust your watering, and try again.
Go Forth and Propagate!
Watching a new plant emerge from a tiny cutting is one of the most satisfying parts of gardening. Urospermum dalechampii is a wonderful subject to practice on. Be patient with yourself, enjoy the process of nurturing these little beginnings, and before you know it, you’ll have a garden full of these delightful blooms. Happy propagating!
Resource: