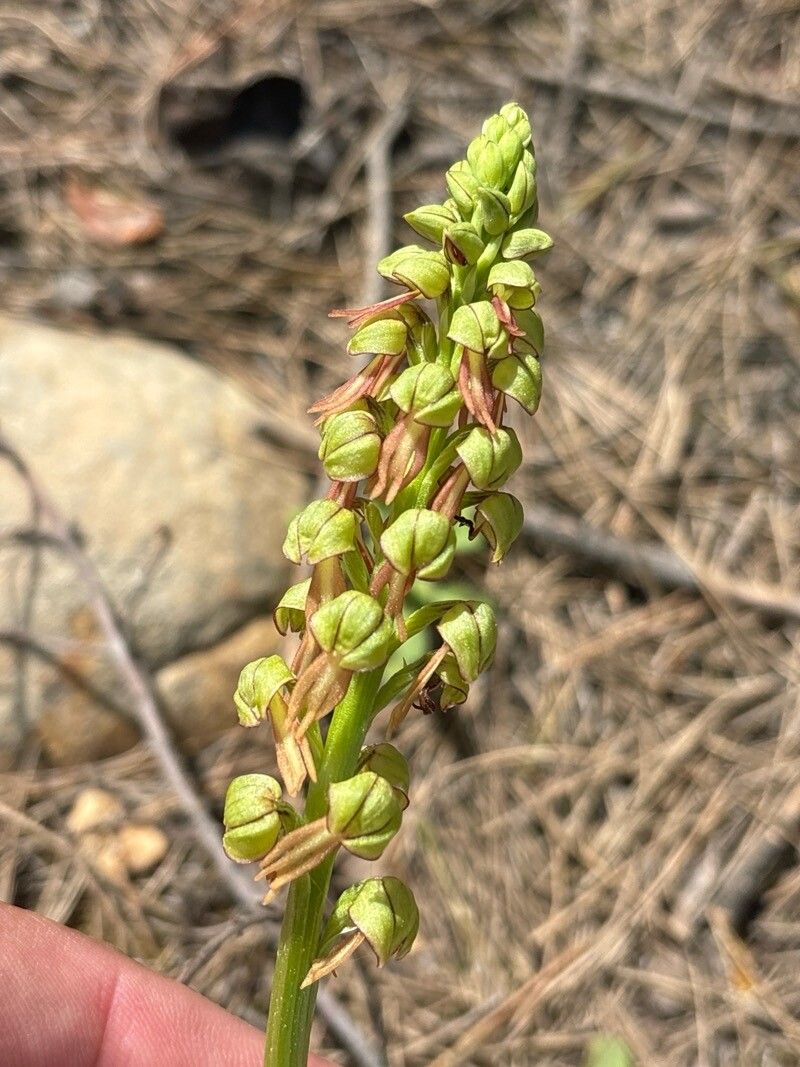
Hello, fellow plant lovers! It’s so lovely to have you here. Today, we’re diving into the world of a truly unique orchid: Orchis anthropophora. You might know it as the Spider Orchid or the Man Orchid, and trust me, its charm is undeniable. Its delicate, almost humanoid-shaped flowers are a real conversation starter in any garden.
Propagating this beauty isn’t just about making more plants; it’s about connecting with nature on a deeper level, watching life spring from your own efforts. While orchids can sometimes feel intimidating, Orchis anthropophora is surprisingly forgiving, especially if you know a few tricks. I’d say it’s a good choice for those ready to dip their toes into orchid propagation.
The Best Time to Start
The prime time to propagate Orchis anthropophora is generally after flowering has finished, usually in late spring or early summer. This is when the plant has put all its energy into a magnificent display and is ready to focus on growth. You’ll want to look for new pseudobulbs or healthy leaf growth before you begin.
Supplies You’ll Need
You don’t need a whole greenhouse full of fancy equipment. Here’s what I keep handy:
- Sharp, sterilized pruning shears or a clean knife: Essential for clean cuts.
- Well-draining orchid potting mix: A blend of bark, perlite, and sphagnum moss is ideal. You can also buy specific mixes for terrestrial orchids.
- Seedling pots or small containers: Something with drainage holes is non-negotiable.
- Horticultural charcoal: A little sprinkled on cuts helps prevent fungal infections.
- Optional: Rooting hormone: While not always necessary for Orchis anthropophora, it can give a little boost.
- A clean spray bottle: For gentle misting.
Propagation Methods
For Orchis anthropophora, the most reliable method is division. These orchids naturally form clumps as they grow, and separating these clumps is the way to go.
Here’s how I do it:
- Gently remove the plant from its pot. Ease it out carefully. If it’s stuck, you might need to loosen the outer edges of the soil.
- Inspect the root ball. You’re looking for distinct sections where new growth is emerging from older structures, often marked by new pseudobulbs. Each section should have its own healthy roots.
- Using your clean shears or knife, carefully separate the clumps. Aim for divisions that have at least two or three healthy pseudobulbs and a good root system. If you encounter resistance, don’t force it. You can gently tease the roots apart.
- Dust any cut surfaces with horticultural charcoal. This is a crucial step to prevent rot.
- Pot up the divisions. Place each new plant into its own pot with fresh, well-draining orchid mix. Make sure the pseudobulbs are sitting at the surface of the mix, not buried too deeply.
The “Secret Sauce” (Pro Tips)
Over the years, I’ve learned a few things that make all the difference:
- Don’t rush the watering after division. Wait a day or two before giving your newly potted sections their first drink. This allows any minor nicks or cuts on the roots to callus over, greatly reducing the risk of rot.
- Mimic their natural habitat with good air circulation. Orchids, especially terrestrial ones, need air around their roots. Avoid over-potting and ensure your pots have plenty of drainage. Good airflow discourages fungal growth.
- Be patient with root development. New roots can take weeks, even months, to become visible. Resist the urge to constantly lift and inspect. Trust the process and focus on consistent, but not excessive, care.
Aftercare & Troubleshooting
Once your Orchis anthropophora divisions are potted up, treat them gently. Water them only when the potting mix is starting to feel dry. A good way to check is to lift the pot; a lighter pot means it’s time for a drink. Mist the leaves occasionally, especially in drier conditions, but avoid letting water sit in the crown of the pseudobulbs.
The biggest challenge you might face is rot. You’ll notice this if the pseudobulbs or leaves start to turn soft and mushy, often with a dark, watery appearance. If you see this, act fast. Gently remove the affected parts with your sterilized tool and repot into fresh, dry mix. Ensure the area is well-ventilated. Rot is almost always a sign of overwatering or poor drainage.
A Encouraging Closing
Propagating Orchis anthropophora is a journey, not a race. Embrace the learning curve, be gentle with your new charges, and celebrate every tiny sign of progress. Watching a new plant emerge is one of the most rewarding experiences in gardening. So, get your hands dirty, be patient, and enjoy the magic unfold!
Resource:
https://identify.plantnet.org/k-world-flora/species/Orchis%20anthropophora%20(L.)%20All./data