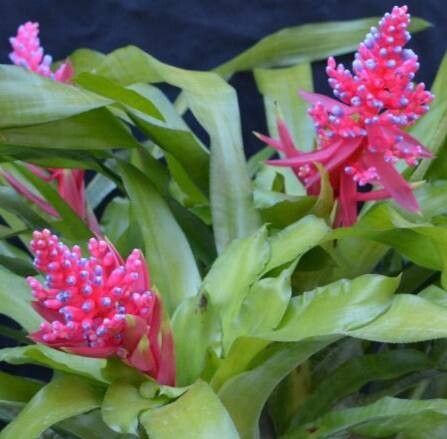
Hello fellow plant lovers! Today, we’re diving into the wonderful world of Aechmea andersonii, a bromeliad that really brings a smile to my face. Its striking architectural form and the promise of vibrant blooms make it a real showstopper. Best of all, propagating this beauty is a fantastic way to multiply your collection and share the joy with friends. If you’re new to the plant world, don’t worry! While Aechmea andersonii isn’t the absolute easiest bromeliad to start with, it’s certainly approachable enough for a keen beginner, especially with a little guidance.
The Best Time to Start
When it comes to getting brand new Aechmea andersonii plants going, spring and early summer are your best friends. This is when the plant is actively growing, and it has the energy reserves to put into producing pups. I find that waiting until the mother plant has finished blooming and has started to produce offsets (those little babies that pop up around the base) is the sweet spot.
Supplies You’ll Need
Before we get our hands dirty, let’s gather our tools:
- Sharp pruning shears or a clean knife: For making clean cuts that heal well.
- A well-draining potting mix: I like a blend of orchid bark, perlite, and a bit of peat moss. You want good aeration!
- Small pots or propagation trays: Whatever suits the size of your pups.
- Rooting hormone (optional but recommended): This really gives your new cuttings a boost.
- Watering can or spray bottle: For gentle watering.
- A place with bright, indirect light: Think of a windowsill that gets morning sun but is shaded from the harsh afternoon rays.
Propagation Methods
The most common and successful way to propagate Aechmea andersonii is through pups, these are miniature versions that grow from the base of the parent plant.
- Identifying the Pups: Look for small, leafy shoots emerging from the soil level or even from the sides of the mother plant. They’ll usually have their own tiny root systems developing.
- The Gentle Separation: Wait until the pups are a decent size – at least a quarter of the size of the mother plant is a good indicator. Using your clean pruning shears or knife, carefully cut the pup away from the mother plant. Try to get as close to the base of the pup as possible, making sure to include any roots that have already formed. If the pup is very small, you might need to wait a little longer.
- Letting it Callous: This is a crucial step! Once you’ve separated the pup, let it sit out in a dry, airy spot for a day or two. This allows the cut surface to dry and form a callous. This prevents rot when you plant it.
- Planting Your New Arrival: Fill your small pot with your well-draining potting mix. You can dip the cut end of the pup into rooting hormone if you’re using it, tapping off any excess. Then, gently push the base of the pup into the soil. You don’t need to bury it deeply; just enough for it to stand upright.
The “Secret Sauce” (Pro Tips)
Here are a few tricks I’ve learned over the years that really make a difference:
- Don’t Overwater Immediately: After planting your pup, resist the urge to drench it. A light watering or even just misting the soil is enough. The pup is more likely to rot from too much moisture in these early stages.
- Bottom Heat is Your Friend: Bromeliads just love warmth. Placing your pots on a seedling heat mat can significantly speed up root development. It mimics the warm soil they’d find in their natural environment.
- Patience with the Mother: Sometimes, the mother plant will send up more pups after the initial bloom. Don’t be too quick to remove them. Let them grow a bit larger on the mother plant; they’ll be stronger when you eventually separate them.
Aftercare & Troubleshooting
Once your pup is planted, keep it in that bright, indirect light. Water sparingly, allowing the soil to dry out slightly between waterings. You’ll know your pup is happy when you see new leaf growth emerging from the center.
The most common problem you might face is rot. If your pup looks mushy, turns black, or smells off, it’s likely rotted. This is usually a sign of overwatering or insufficient callous time. If you catch it early, you might be able to cut away the rotten parts and try again with less moisture.
A Encouraging Closing
Propagating Aechmea andersonii is a wonderfully rewarding journey. It takes a little patience, a gentle touch, and a keen eye, but the thrill of watching a tiny pup grow into a magnificent plant is truly special. So, go ahead, dig in, and enjoy the process of nurturing your new green babies!
Resource:
https://identify.plantnet.org/k-world-flora/species/Aechmea%20andersonii%20H.Luther%20&%20Leme/data