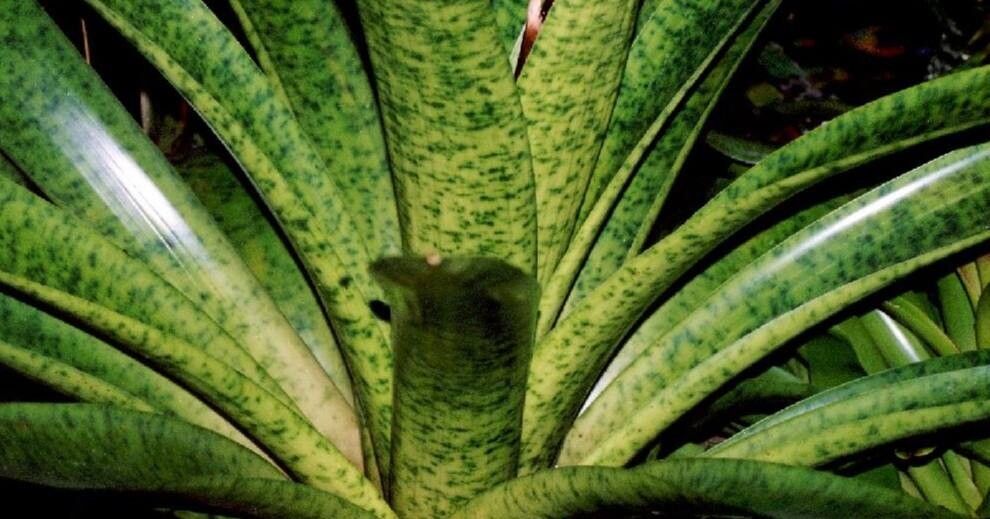
Hello there, fellow plant lovers! Today, we’re diving into the wonderful world of Werauhia kupperiana. If you’ve ever admired the striking architectural beauty of this bromeliad, with its elegant, upright rosettes of foliage and unique charm, you’re not alone. Getting more of these beauties to grace your home or garden is a truly satisfying endeavor. While Werauhia kupperiana isn’t the most finicky plant to propagate, it does have its own little secrets, which is exactly what we’ll uncover together. Don’t worry, even if you’re just starting your propagation journey, I’m here to guide you every step of the way.
The Best Time to Start
Generally, my experience tells me that late spring through early summer is the sweet spot for propagating Werauhia kupperiana. This is when the plant is actively growing after its winter rest and has plenty of energy to put into developing new roots. Look for pups (those adorable little baby plants that emerge from the base of the mother plant) that are at least a quarter of the size of the parent. Starting with slightly larger pups gives them a better head start.
Supplies You’ll Need
Here’s what I always have on hand when I’m ready to get propagating:
- Sharp, clean pruning shears or a serrated knife: For precise cuts. Sterilize them with rubbing alcohol to prevent disease.
- Well-draining potting mix: I prefer a mix made with orchid bark, perlite, and a bit of coco coir. You can also find commercial bromeliad mixes. The key is excellent drainage!
- Small pots or trays: Enough to house your new propagations. Terracotta pots are great because they allow the soil to dry out a bit faster.
- Rooting hormone (optional but recommended): A powder or gel specifically for stimulating root growth.
- Watering can or spray bottle: For gentle watering.
- (Optional) A heat mat: This can significantly speed up root development for some plants.
Propagation Methods
The most reliable and common way to propagate Werauhia kupperiana is through division of pups. Other methods are possible for bromeliads, but pups are usually the most vigorous and easiest to work with for this particular species.
Dividing Pups:
- Gently remove the mother plant from its pot. If it’s quite large, you might do this a few days before to allow the soil to dry out a bit, making it easier to handle.
- Inspect the base of the mother plant. You’ll see where the pups have emerged, often with their own tiny root systems.
- Carefully locate the connection point between the pup and the mother plant.
- Using your sharpest pruning shears or knife, make a clean cut as close to the mother plant as possible, ensuring you sever any root connections. Try to get as many of the pup’s own roots as you can.
- If the pup has very few or no roots, don’t despair! You can still pot it up, and it will likely develop roots given a little encouragement.
- Allow the cut surface to callus over. This is crucial to prevent rot. Place the separated pups in a dry, airy spot for a day or two until the cut ends look a bit dry and hardened.
- Prepare your pots. Fill them with your well-draining potting mix.
- (Optional) Dip the callused end of the pup in rooting hormone. Tap off any excess.
- Plant the pup. Create a small hole in the center of the pot and place the pup in it, gently firming the soil around its base. The base of the pup should be at or slightly above the soil line.
- Water very lightly. You want the soil to be just barely moist. The goal is to avoid waterlogging at this stage.
The “Secret Sauce” (Pro Tips)
- Don’t drown your pups! Bromeliads, Werauhia kupperiana included, are susceptible to rot if their roots sit in soggy soil. When you first pot them, water sparingly. It’s better to err on the side of slightly too dry than too wet. You can always add more water later, but you can’t take it away if you overdo it initially.
- Embrace the humidity, but avoid waterlogged leaves. While bromeliads appreciate humidity, letting water sit in the central rosette for extended periods can lead to rot. After watering, gently tilt the pot to allow any excess water to drain out from the cup.
- Bottom heat is your friend. If you have a heat mat, placing your potted pups on it can dramatically speed up root development. Think of it as giving them a warm, cozy environment to encourage those roots to grow.
Aftercare & Troubleshooting
Once your pup is happily potted and has had a day or two to settle, place it in a bright spot, but out of direct, harsh sunlight. Too much sun can scorch the young leaves. Keep the soil lightly moist – not wet. You can test this by sticking your finger about an inch into the soil. If it feels dry, it’s time for a very light watering.
Signs of success include new leaf growth emerging from the center of the rosette, and you might even feel a bit of resistance when you gently tug on the pup if it’s starting to root.
On the flip side, if the leaves start to yellow and mushy, or the base of the plant becomes black and soft, it’s a strong indicator of rot. This is usually due to overwatering. If you catch it early, you can try to remove the rotted parts, repot in fresh, dry mix, and be much more sparing with water. Sadly, severe rot can be fatal, which is why good drainage and careful watering are paramount.
A Bit of Patience Goes A Long Way
Propagating plants is all about patience and observation. Don’t be discouraged if your first attempt isn’t perfect. Every plant is an opportunity to learn and grow alongside it. Enjoy the process of nurturing these new little Werauhia kupperiana plants and celebrating their progress. Happy propagating!
Resource: