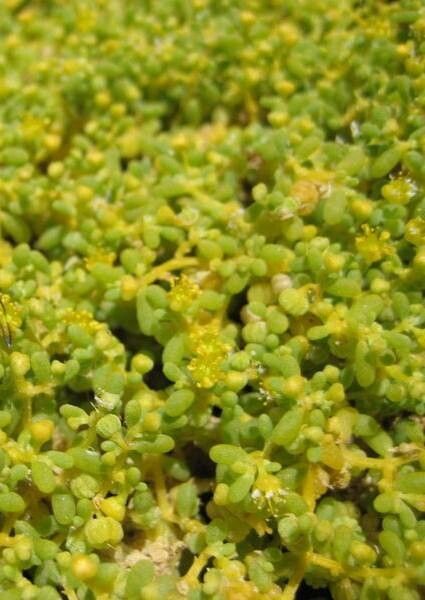
Oh, hello there! Grab a cup of your favorite brew, and let’s chat about something truly special: Zygophyllum simplex. If you’re looking for a plant that’s tough, fascinating, and surprisingly adaptable, you’ve found a winner. Its unique, succulent-like foliage has a silvery sheen that catches the light beautifully, and it brings a touch of the arid landscape right into your home. And the best part? Sharing this beauty with others by propagating it is incredibly rewarding. Don’t worry if you’re new to this; propagating Zygophyllum simplex is actually quite approachable.
The Best Time to Start
For the highest success rate with your Zygophyllum simplex propagation, aim for late spring or early summer. This is when the plant is actively growing and has plenty of energy to invest in forming new roots. You’re looking for stems that are firm and vigorous, not the very tips which are often too soft, nor older, woody sections. Think of it as “just right” – a happy medium.
Supplies You’ll Need
Gathering your supplies beforehand makes the whole process smoother. Here’s a little checklist to get you started:
- Sharp Pruning Shears or a Clean Knife: Essential for making clean cuts.
- Rooting Hormone (Optional but Recommended): This can give your cuttings a real boost. Look for a powder or gel form.
- Well-Draining Potting Mix: This is crucial! A cactus and succulent mix is perfect, or you can create your own by combining equal parts potting soil, perlite, and coarse sand.
- Small Pots or Seed Trays: Clean and with drainage holes, of course.
- Watering Can or Spray Bottle: For gentle watering.
- Clear Plastic Bag or Dome: To create a humid environment for your cuttings.
- Labels and a Pen: To keep track of your precious new plants.
Propagation Methods
I find the easiest and most successful way to propagate Zygophyllum simplex is through stem cuttings. It’s straightforward and gives you a great chance at success.
- Take Your Cuttings: Using your sharp shears or knife, select a healthy stem and cut a section about 4-6 inches long. Make your cut just below a leaf node (where a leaf attaches to the stem). This is where roots are most likely to form.
- Prepare the Cuttings: Gently remove the lower leaves from the cutting, leaving about 2-3 leaves at the top. This reduces moisture loss. If your leaves are particularly small, you can leave more on.
- Apply Rooting Hormone (Optional): Dip the cut end of the stem into your rooting hormone, tapping off any excess.
- Plant the Cuttings: Fill your small pots or trays with the well-draining potting mix. Make a small hole in the center of the soil with your finger or a pencil. Insert the cut end of the Zygophyllum simplex cutting into the hole, ensuring at least one leaf node is buried under the soil. Gently firm the soil around the base of the cutting.
- Water Gently: Water the soil thoroughly but gently. You want the soil to be moist, but not waterlogged. A spray bottle can be great for this initial watering to avoid disturbing the cuttings.
- Create Humidity: Place the pots inside a clear plastic bag or cover them with a clear dome. This will create a humid microclimate that encourages rooting. Make sure the leaves do not touch the sides of the bag as this can lead to rot.
The “Secret Sauce”
Here are a couple of little tricks I’ve learned over the years that can make a real difference:
- Let Them Callous: After you take your cuttings, I like to let them sit out on a counter for a day or two (in a dry, indirect light spot). This allows the cut end to dry out and form a protective “callous.” This step can significantly reduce the risk of rot when you plant them.
- Bottom Heat is Your Friend: If you happen to have a propagation mat, placing your potted cuttings on it can be a game-changer. Consistent, gentle bottom heat encourages root development much faster than just ambient room temperature.
Aftercare & Troubleshooting
Once your cuttings are planted and misted, place them in a bright spot that gets indirect sunlight. Direct sun can scorch those tender new cuttings. Keep the humidity high by leaving the plastic bag or dome on, but check regularly for ventilation. Open the bag or dome for a few minutes each day to allow for air circulation and prevent fungal issues.
You’ll know your cuttings are rooting when you see new growth starting to emerge from the top or gentle resistance when you give a tiny tug on the stem. This can take anywhere from 3-8 weeks, so be patient! Once they have a good root system, you can slowly acclimate them to the open air by gradually increasing the time the bag or dome is off. Then, transplant them into their own small pots.
The most common problem you might encounter is rot. If you see your cutting turning mushy or black at the soil line, it’s usually a sign of too much moisture and not enough air circulation. Unfortunately, these usually can’t be saved, so it’s better to discard them and try again, focusing on that well-draining mix and not overwatering.
A Encouraging Closing
Propagating Zygophyllum simplex is a wonderful way to multiply your enjoyment of this unique plant. It’s a process that teaches patience and observation. Don’t get discouraged if your first few attempts aren’t perfect; that’s all part of the learning curve! Just enjoy the journey of coaxing new life from your favorite plants. Happy gardening!
Resource:
https://identify.plantnet.org/k-world-flora/species/Zygophyllum%20simplex%20L./data