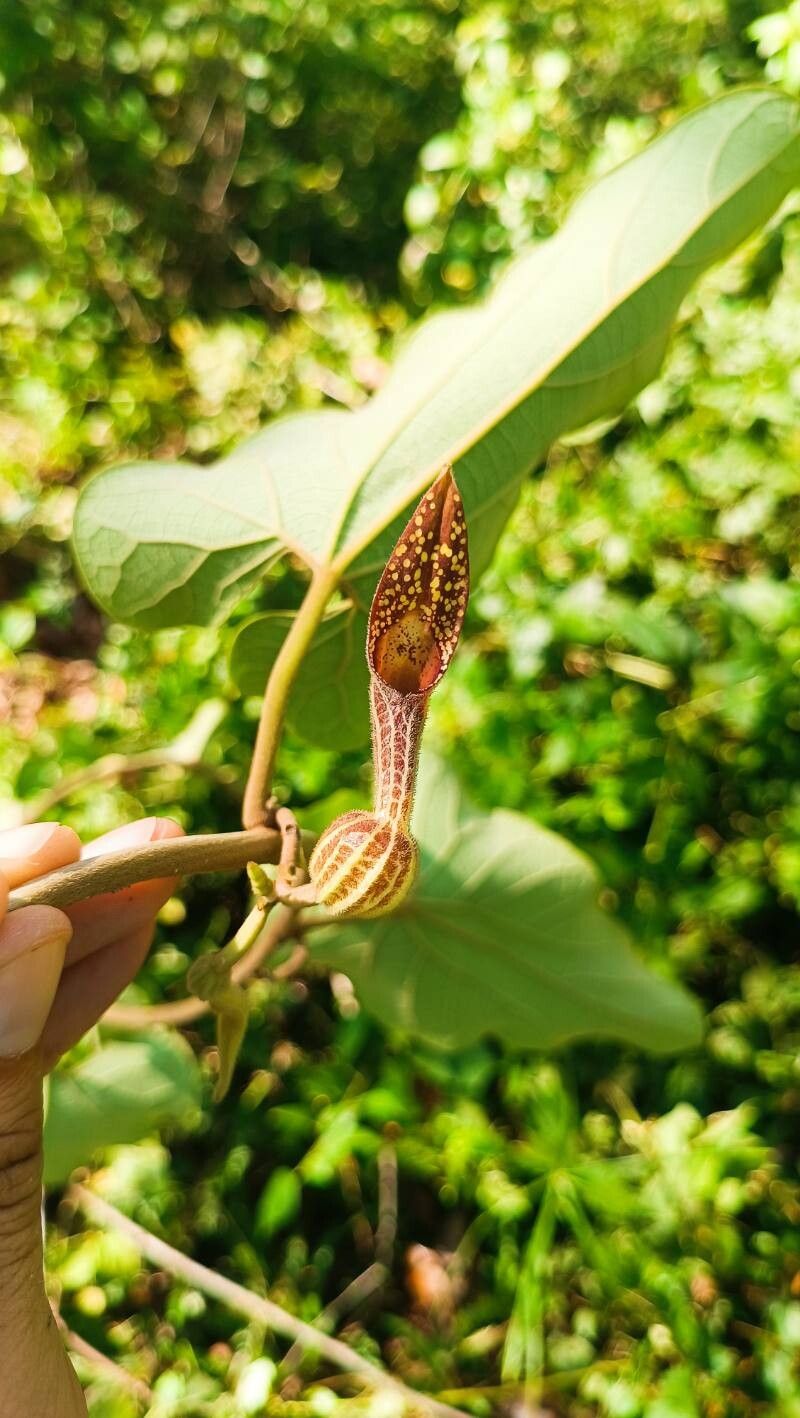
Oh, hello there! Come on in, grab a mug, and let’s chat about something truly special: Aristolochia constricta. You know, the one with those wonderfully strange, trumpet-shaped flowers? They have a way of grabbing your attention, don’t they? And there’s such a deep satisfaction in coaxing a new life from just a snip of the parent plant. If you’re looking for a propagation project that’s a little out of the ordinary, this could be it! While it’s not quite beginner-level, don’t let that scare you. With a little care and attention, you’ll be well on your way.
The Best Time to Start
For Aristolochia constricta, I’ve found that spring is absolutely your best friend. As the plant wakes up from its winter slumber and starts putting on new growth, it’s got all that energy to invest in rooting. Aim for when you see fresh, tender shoots emerging, but before they’ve gotten too woody. That soft, pliable stage is just perfect for taking cuttings.
Supplies You’ll Need
Gathering your tools beforehand makes the whole process so much smoother. Here’s what I recommend:
- Sharp Pruning Shears or a Craft Knife: Cleanliness is key here to prevent disease.
- Rooting Hormone: A powdered or gel form will help encourage those roots to form. Look for one formulated for semi-hardwood cuttings.
- Well-Draining Potting Mix: A good blend of peat moss or coir, perlite, and a bit of compost works wonderfully. You want it airy!
- Small Pots or Flats: Clean containers with drainage holes are essential.
- Plastic Bags or a Propagation Dome: This will create a humid microclimate.
- Water: For misting and, eventually, for water propagation.
- Labels and a Pen: Because let’s be honest, we’ve all forgotten what we planted where!
- Bottom Heat (Optional but Highly Recommended): A seedling heat mat can make a world of difference.
Propagation Methods
Let’s get our hands dirty! I usually have the best luck with stem cuttings for Aristolochia constricta.
Stem Cuttings:
- Take Your Cuttings: In spring, select healthy, non-flowering stems from your mature plant. Look for stems that bend but don’t snap easily. I like to take cuttings that are about 4-6 inches long.
- Prepare the Cuttings: Using your clean shears or knife, make a clean cut just below a leaf node. This is where the magic will happen. Remove the leaves from the bottom half of the cutting. If the remaining leaves are very large, you can cut them in half horizontally to reduce water loss.
- Apply Rooting Hormone: Dip the cut end of the stem into your rooting hormone, making sure it’s coated. Tap off any excess.
- Pot Up: Fill your small pots or flats with your prepared potting mix. Make a small hole in the center with your finger or a pencil.
- Insert the Cuttings: Gently place the hormone-coated end of the cutting into the hole and firm the soil around it. You can usually fit a few cuttings in one pot, spaced a few inches apart.
- Water Gently: Water the soil thoroughly but carefully, so you don’t dislodge your cuttings.
- Create Humidity: Cover the pots with a plastic bag or place them under a propagation dome. Make sure the leaves aren’t touching the plastic if possible.
Water Propagation (A Note of Caution): While some plants root beautifully in water, I find Aristolochia constricta can be a bit more prone to rot if left in still water for too long. If you do try this, ensure only the very bottom nodes are submerged and change the water frequently. It’s a faster way to see root development, but I often move them to soil as soon as I see tiny root nubs.
The “Secret Sauce” (Pro Tips)
Here are a few little tricks I’ve picked up over the years:
- “Sweating” the Cuttings: After potting, I like to place my covered pots on a heat mat. This warmth from below really stimulates root development. You don’t need it scorching hot, just a gentle warmth.
- The Mist and Monitor: Keep the soil consistently moist but not waterlogged. I like to mist the leaves every day or two, especially if they’re not covered by a dome. This keeps them turgid and happy.
- Patience is Paramount: Aristolochia can be a bit of a slowpoke when it comes to rooting. Don’t be tempted to pull them up too soon to check! Wait at least 4-6 weeks. You’ll often see new leaf growth as a good indicator that roots are forming.
Aftercare & Troubleshooting
Once you see those glorious little roots peeking out of the drainage holes, or your cuttings are showing robust new growth, it’s time for a little more space.
- Gradual Acclimation: If you used a plastic bag or dome, slowly start to ventilate it over a few days. Open it up for a bit longer each day. This helps the new plant adjust to the drier air.
- Potting Up: Gently transplant your new Aristolochia into small pots with your regular potting mix. Water well.
- Light and Watering: Place them in bright, indirect light. Avoid direct sun, which can scorch tender new growth. Continue to keep the soil moist but not soggy.
- Troubleshooting – The Wobblies: If your cutting seems to be wilting and just won’t perk up, it’s usually a sign of dehydration or rot. Rot is often characterized by a mushy, black stem at the soil line. If you see this, sadly, it’s time to discard it and try again. Make sure your drainage is excellent and you’re not overwatering.
A Little Encouragement
Growing plants is such a journey, and propagating Aristolochia constricta is a beautiful part of that. There will be times when things don’t quite work out, and that’s okay! Every attempt is a learning experience. So, be patient, enjoy the process, and celebrate every tiny root, every new leaf. Happy gardening!
Resource:
https://identify.plantnet.org/k-world-flora/species/Aristolochia%20constricta%20Griseb./data