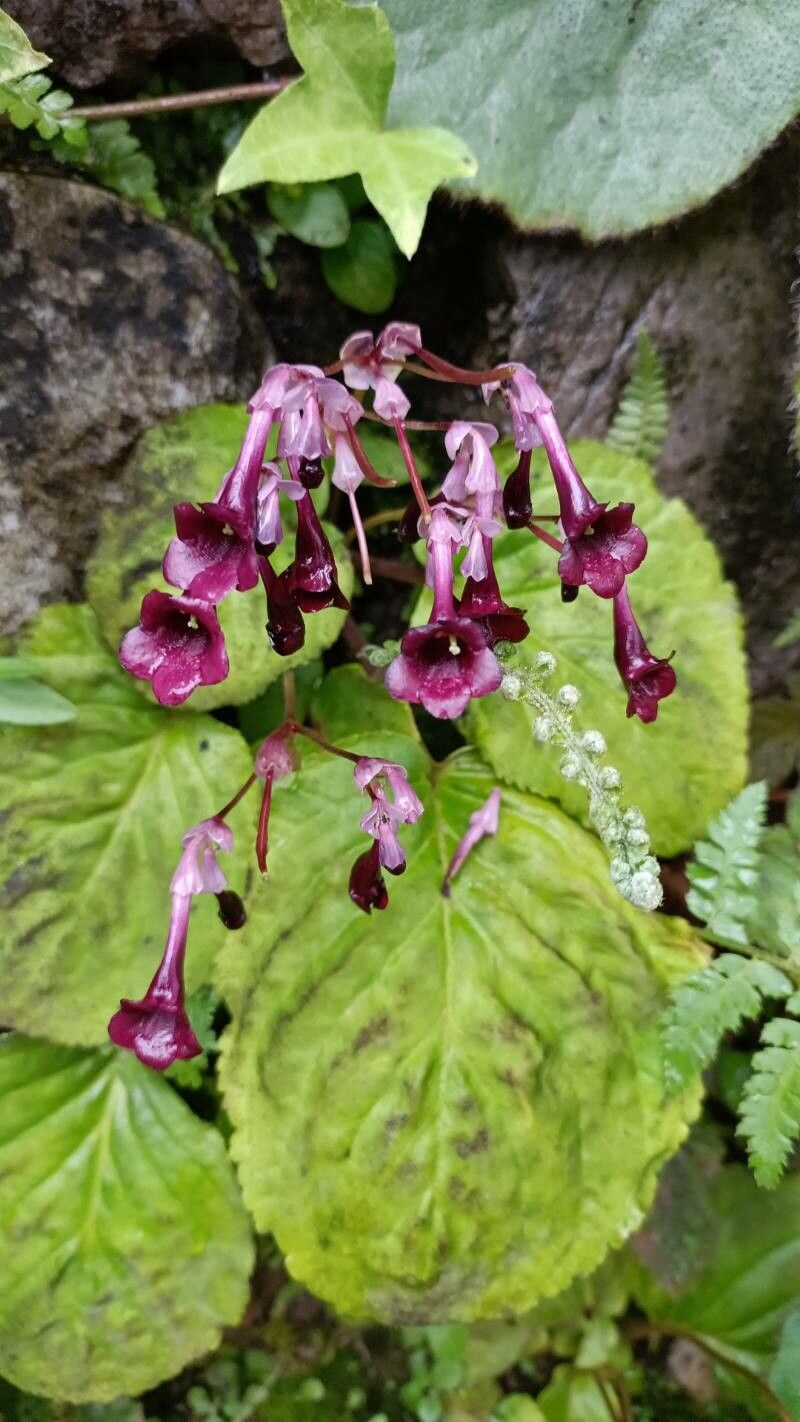
Hello, fellow plant enthusiasts! It’s so wonderful to reconnect with you all. Today, we’re diving into the delightful world of Didymocarpus pedicellatus, often known by its charming common names like the Siamese/Thai Viola or Moon Orchid. This beauty, with its velvety leaves and sprays of delicate, often purple or pink, flowers, brings a touch of the exotic and enchanting to any indoor space.
Propagating these gems is a truly rewarding experience. Watching a tiny cutting or leaf transform into a fully established plant is like witnessing a little miracle unfold. For those new to the propagation game, I’d say Didymocarpus pedicellatus is moderately easy. A little patience and attention to detail go a long way, but you’ll likely get there with a few tries.
The Best Time to Start
When it comes to giving your Didymocarpus pedicellatus the best shot at success, spring is your golden ticket. The plant is actively growing during this period, meaning it has the energy reserves to push out strong roots. Aim for late spring or early summer, when days are longer and temperatures are consistently warm, but before the intense heat of midsummer sets in. Starting with healthy, vigorous parent plants will also significantly boost your chances.
Supplies You’ll Need
Gathering your toolkit beforehand makes the whole process much smoother. Here’s what I usually have on hand:
- Sharp, clean pruning shears or a sharp knife: For making clean cuts.
- Well-draining potting mix: A blend of perlite and peat moss works wonderfully, or a commercial houseplant mix amended with extra perlite.
- Small pots or seedling trays: Clean and with drainage holes, of course.
- Plastic bags or a propagator: To maintain humidity around your cuttings.
- Optional: Rooting hormone: While not always essential for Didymocarpus, it can give an extra boost.
- Watering can with a fine rose: For gentle watering.
Propagation Methods
The most reliable way to propagate Didymocarpus pedicellatus is through leaf cuttings. It’s quite straightforward and yields beautiful results.
Leaf Cuttings
- Select healthy leaves: Choose mature, healthy leaves from your parent plant. Look for leaves that are firm and free from any spots or damage.
- Make the cut: Using your sharp shears or knife, carefully cut the leaf off at the stem, ensuring you get a small piece of the stem attached if possible. If you can’t get stem, don’t fret, just the leaf blade will often work too!
- Prepare the leaf: If you’re using just the leaf blade, you can cut it into sections. Make a cut across the main vein of the leaf, about halfway down. Each section should have at least one vein running through it.
- Planting: Gently insert the cut end of the leaf or leaf section into your prepared, moist potting mix. If you’ve cut the leaf, angle it so the cut edge is in contact with the soil.
- Create humidity: Cover the pot or tray with a plastic bag or a propagator lid to create a humid environment. Make sure the leaves don’t touch the sides of the bag, as this can encourage rot.
- Placement: Place your cuttings in a warm spot with bright, indirect light. Avoid direct sunlight, as it can scorch the delicate leaves.
The “Secret Sauce” (Pro Tips)
Now, for a couple of little nuggets of wisdom that have served me well over the years:
- Don’t let the leaves touch the water: If you do opt for water propagation (which I find a little trickier for Didymocarpus), ensure your leaf cuttings are placed so the leaf blade itself isn’t submerged. Only the cut stem should be in the water. Rot can set in very quickly otherwise.
- Bottom heat is your friend: Especially if your home tends to be on the cooler side, placing your propagation tray on a gentle heated mat designed for seedlings can encourage root development significantly. It mimics the warmth of spring soil.
- Patience is paramount: Didymocarpus can be a little slow to show signs of rooting. Don’t be discouraged if you don’t see new growth for several weeks. Resist the urge to constantly check by pulling them up.
Aftercare & Troubleshooting
Once you spot those magical tiny roots emerging from the cut ends or see a miniature new plant starting to form at the base of the leaf, that’s your cue! Gently remove the plastic cover.
Keep the soil consistently moist but not waterlogged. Water from the bottom if you can, allowing the soil to wick up moisture. As the new plantlet grows and develops its own leaves, you can gradually reduce humidity. When it’s about an inch or two tall and well-rooted, you can carefully transplant it into its own small pot with fresh potting mix.
The most common problem you’ll encounter is rot. If you see leaves turning mushy or black, it’s usually a sign of too much moisture or poor air circulation. Remove any affected leaves immediately and ensure your cuttings are in a well-draining medium. If the whole leaf has rotted, don’t despair; sometimes other leaves in the same tray will still be viable.
A Encouraging Closing
Propagating Didymocarpus pedicellatus is a beautiful journey in itself. It teaches us about patience, observation, and the incredible resilience of nature. Don’t strive for perfection on your first try. Embrace the learning process, celebrate every little success, and enjoy the wonder of growing your own collection of these charming plants. Happy propagating!
Resource:
https://identify.plantnet.org/k-world-flora/species/Didymocarpus%20pedicellatus%20R.Br./data