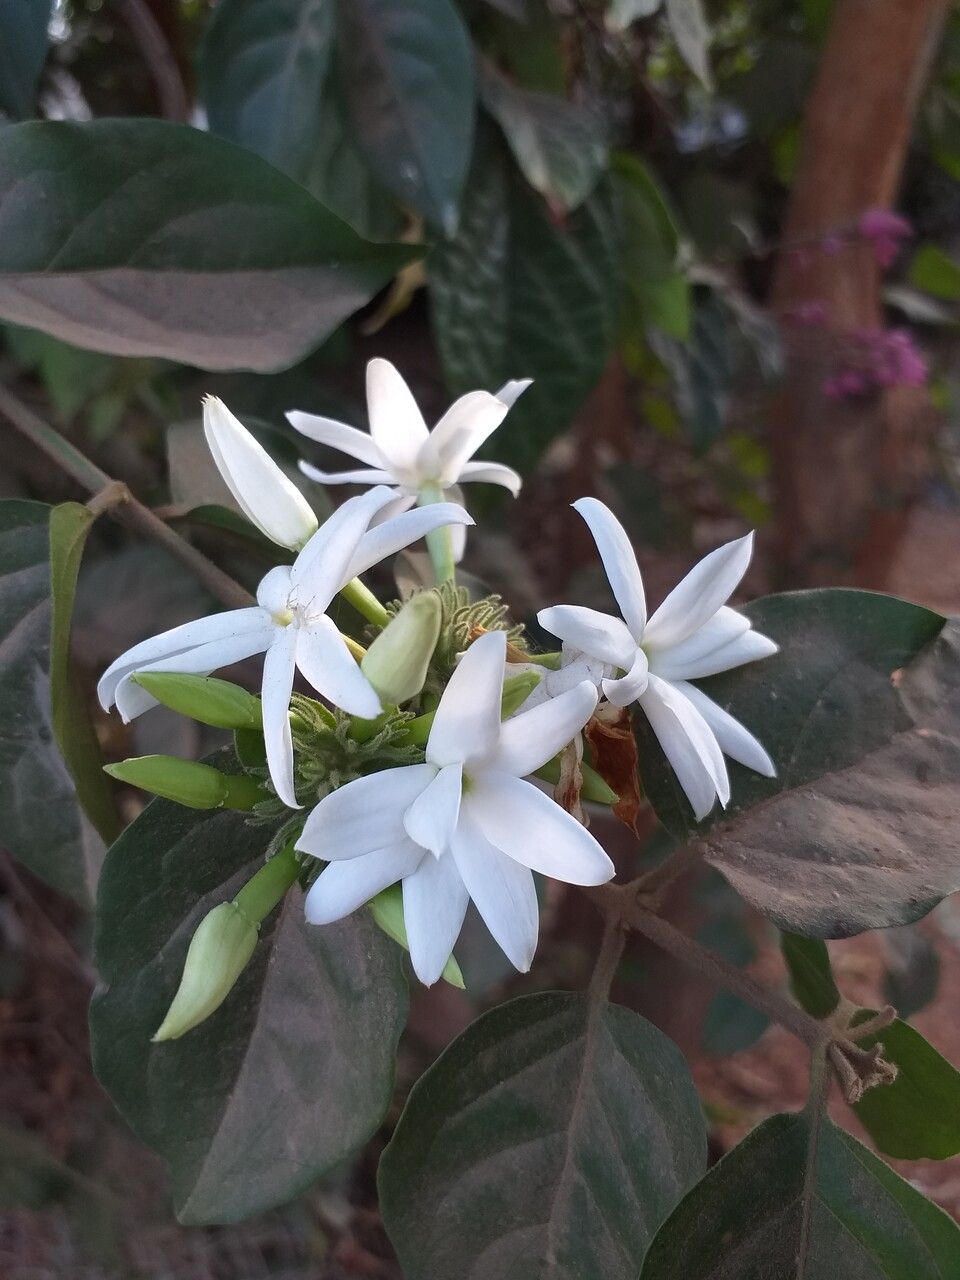
Hello fellow plant lovers! Today, I want to talk to you about a truly special jasmine, Jasminum kerstingii. If you’re looking for a plant that fills your garden with an intoxicating fragrance and delicate, star-shaped blossoms, this is it. Its velvety petals and sweet scent are simply divine. Propagating it yourself? Oh, that’s a truly rewarding experience. You get to witness new life emerge from a tiny cutting, and soon you’ll have a whole new collection of these beauties to share or enjoy! For beginners, I’d say it’s moderately easy, with a little patience and the right approach.
The Best Time to Start
When it comes to getting the best results, I always find late spring to early summer to be the sweet spot for propagating Jasminum kerstingii. This is when the plant is actively growing, and the stems have developed enough to be firm but not yet woody. You’re looking for new, semi-hardwood growth – stems that bend rather than snap. This stage offers the ideal balance of flexibility and a good chance of rooting.
Supplies You’ll Need
Before we get our hands dirty, let’s gather our tools:
- Sharp Pruning Shears or a Clean Knife: For making clean cuts.
- Rooting Hormone (Optional, but Recommended): This can give your cuttings a helpful boost. Look for one that’s formulated for softwood or semi-hardwood cuttings.
- Small Pots or Seedling Trays: With drainage holes, of course!
- Well-Draining Potting Mix: A good blend of peat moss, perlite, and a little sand works wonders. You can also buy a specific seed-starting or propagation mix.
- Clear Plastic Bags or a Propagator Lid: To create a humid environment.
- Watering Can or Spray Bottle: For gentle watering.
- Labels: To keep track of which cutting is which and when you took them.
Propagation Methods
Now, for the fun part! My go-to method for Jasminum kerstingii is stem cuttings.
- Take Cuttings: Select healthy stems from your mature plant. Using your sharp shears or knife, take cuttings that are about 4-6 inches long. Make the cut just below a leaf node (where a leaf emerges from the stem). Remove the lower leaves, leaving just two or three at the top. If any of the leaves are very large, you can even cut them in half to reduce water loss.
- Dip in Rooting Hormone (If Using): Lightly dip the cut end of each stem into your rooting hormone powder or gel. Tap off any excess.
- Pot Them Up: Fill your small pots or trays with your well-draining potting mix. Make a small hole in the center of each pot with your finger or a pencil.
- Insert Cuttings: Gently place the prepared cuttings into the holes, ensuring the leaf nodes you removed are below the soil surface. Firm the soil gently around the base of each cutting to ensure good contact.
- Water Gently: Give the soil a light watering using your watering can or spray bottle. We want the soil to be moist, not soggy.
- Create Humidity: Cover the pots loosely with clear plastic bags or a propagator lid. This traps moisture, mimicking the humid environment cuttings need to root. Make sure the leaves don’t touch the plastic if possible to prevent rot.
- Find a Good Spot: Place your pots in a bright location with indirect light. Avoid direct sun, as this can scorch the tender cuttings.
The “Secret Sauce” (Pro Tips)
Here are a few little tricks I’ve picked up over the years that can really make a difference:
- Bottom Heat is Your Friend: If you have a heating mat or can place your propagator on a warm surface (like a sunny windowsill that doesn’t get too hot), this can significantly speed up the rooting process. A little warmth at the roots encourages them to develop more quickly.
- Change the Water Regularly (If Water Propagating): While I prefer soil propagation for jasmine, if you do try water propagation, change the water every few days. Stagnant water can lead to rot and disease. And remember, for water propagation, never let leaves sit directly in the water; they will yellow and decay.
- Don’t Disturb Too Soon: Resist the urge to constantly tug on your cuttings to check for roots! It can damage delicate new growth. You’ll know they’re rooting when you see new leaf growth emerging from the top.
Aftercare & Troubleshooting
Once you start seeing new growth, it’s a good sign that roots are forming!
- Acclimate Slowly: Gradually remove the plastic cover over a week or so. This helps the new plant get used to the lower humidity of your home or garden.
- Watering: Continue to water gently when the top inch of soil feels dry. As the plant grows, you can gradually move it into a slightly larger pot with fresh potting mix.
- Troubleshooting: Rot: The most common problem you might encounter is rot. If you see stems turning black and mushy, it’s usually due to too much moisture and poor air circulation. Make sure your soil drains well, and don’t overwater. If you catch it early, you might be able to save a cutting by trimming away the rotted parts and repotting in fresh, drier soil. Another sign of failure is cuttings that shrivel and dry out, which can happen if they don’t receive enough humidity or are placed in too much direct sun.
A Gentle Encouragement
Propagating plants is a journey, and every gardener experiences a few bumps along the way. Don’t get discouraged if not every cutting takes. With a little care and these tips, you’ll be well on your way to multiplying your beautiful Jasminum kerstingii. Be patient, enjoy the process, and celebrate each tiny success. Happy gardening!
Resource: