Sharing the Joy of Oncidium lineoligerum: Let’s Get Propagating!
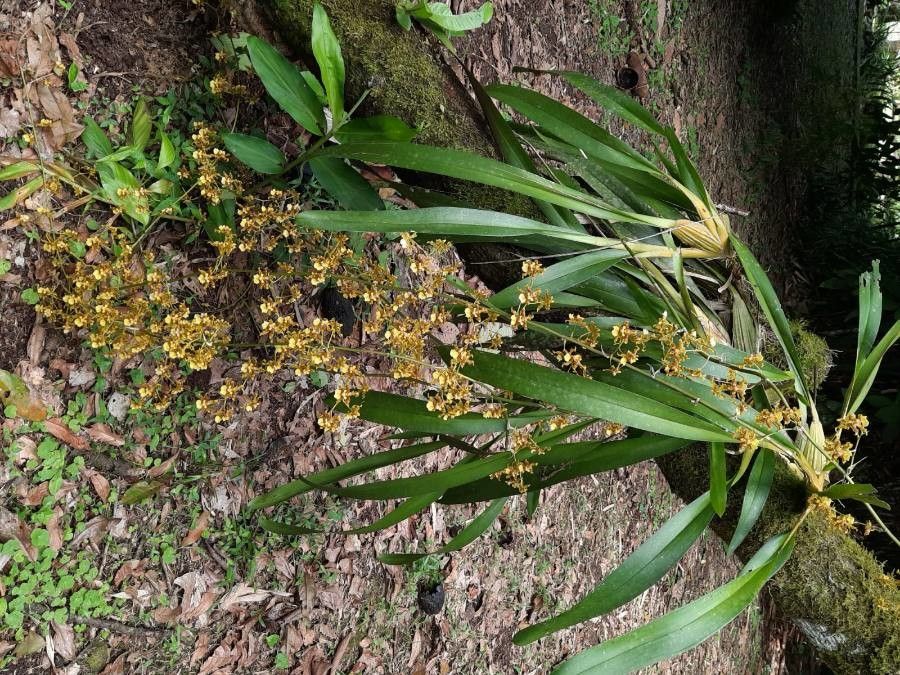
Oh, Oncidium lineoligerum! Isn’t it just a delight? Those delicate, orchid-like blooms with their intricate patterns are truly a showstopper. And the best part? They smell divine, often with a lovely citrusy fragrance that fills a room. For years, I’ve found immense satisfaction in multiplying these beauties, and the thought of sharing that joy with you is just wonderful. Now, you might be wondering if this particular orchid is a tricky one to propagate. Honestly, I’d say it’s moderately easy, especially if you’re comfortable with basic orchid care. It’s not quite as fuss-free as, say, a pothos, but with a little attention, you’ll be rewarded with new plants in no time.
When to Get Started
Timing is everything in gardening, as you know! For Oncidium lineoligerum, the absolute best time to propagate is after it has finished flowering and is entering its active growth phase. This usually happens in the late spring or early summer. You’ll notice new pseudobulbs starting to swell and maybe even some fresh root growth. This energy surge gives the new propagations the best chance to establish themselves. Trying to do it when the plant is resting or stressed will just make things harder on everyone, including you!
What You’ll Need to Gather
Before we dive in, let’s make sure you have your toolkit ready. Having everything on hand makes the process so much smoother.
- Sharp, sterile pruning shears or a clean knife. Sterilize with rubbing alcohol or a flame.
- Sphagnum moss (long-fibered is best) or a specialized orchid bark mix.
- Small pots or containers (about 3-4 inches in diameter). Ensure they have good drainage.
- Rooting hormone (optional, but can give an extra boost).
- A spray bottle for misting.
- A label and pen to mark your new plants.
- A seedling heat mat (highly recommended for faster rooting).
Let’s Get Propagating: Division is Key!
For Oncidium lineoligerum, the most reliable and straightforward method is division. These plants naturally grow in clumps, and dividing them is like giving them a little haircut, encouraging more vigorous growth.
- Gently remove the orchid from its pot. If it’s stuck, you might need to carefully loosen the sides with a knife. Be patient here.
- Carefully wash away the old potting medium. You want to see the root system clearly.
- Inspect the plant. Look for sections that have at least two to three healthy pseudobulbs and some good roots. These will form your new plants.
- Using your sterile pruning shears or knife, carefully cut through the rhizome (the woody stem connecting the pseudobulbs). Make sure each division has enough pseudobulbs and roots. If you’re separating a very large clump, aim for divisions that are about the size of your palm.
- If there are any damaged or dead roots or leaves, trim them away. This helps prevent rot.
- Optional: You can dip the cut end of the rhizome in rooting hormone powder at this stage.
- Pot up your divisions. Place the pseudobulbs in the new pot, ensuring the base is at the same level it was in the original pot. Fill around the roots with your fresh orchid mix or damp sphagnum moss. Don’t pack it too tightly; you want good air circulation.
The “Secret Sauce” from My Greenhouse
Now, here are a few little tricks I’ve learned over the years that really seem to make a difference.
- Don’t water immediately after division. Let the cut surfaces on the rhizome dry and callous over for a day or two. This significantly reduces the risk of rot. I usually just place the newly potted divisions in a slightly shadier spot.
- Bottom heat is your best friend! Place your pots on a seedling heat mat set to around 70-75°F (21-24°C). This warmth encourages rapid root development, which is exactly what you want for a happy new plant. Just make sure the heat isn’t so intense that it dries out your potting medium too quickly.
- High humidity is crucial in the early days. After the initial callousing period, place your newly potted divisions in a humid environment. A mini-greenhouse, a sealed plastic bag with some air holes, or even just placing them in a tray with pebbles and water (making sure the pot isn’t sitting directly in the water) can work wonders.
Aftercare & What to Watch For
Once your new Oncidium lineoligerum is potted up, it needs a bit of tender loving care.
- Watering: Keep the potting medium evenly moist, but never soggy. Spritzing the leaves and roots with your spray bottle frequently will help maintain humidity without waterlogging the roots. As new growth appears and roots fill the pot, you can gradually increase the watering frequency.
- Light: Place them in a bright, indirect light location. Direct sun can scorch those delicate new leaves.
- Patience! It can take several weeks, sometimes even a couple of months, for you to see significant new root or leaf growth. Don’t panic. Check the pot – if it feels light and the medium is dry, it’s time to water.
The most common problem you might encounter is rot. This usually happens if the plant is kept too wet, especially without adequate air circulation. You’ll notice the pseudobulbs shriveling and becoming soft and mushy, often with a dark color. If you see this, try to remove the affected part immediately and improve air circulation. Sometimes, it’s a sign that the plant might not be salvageable, but you can often cut away the rot and try to propagate any healthy sections.
Keep Growing!
Propagating Oncidium lineoligerum is such a rewarding experience. It’s a chance to understand your plants better and multiply the beauty you enjoy so much. Don’t be discouraged if your first attempt isn’t perfect. Every gardener learns through trial and error. Just keep observing your plants, providing them with the right conditions, and most importantly, enjoy the journey. Happy growing!
Resource: