Hey there, fellow garden lovers!
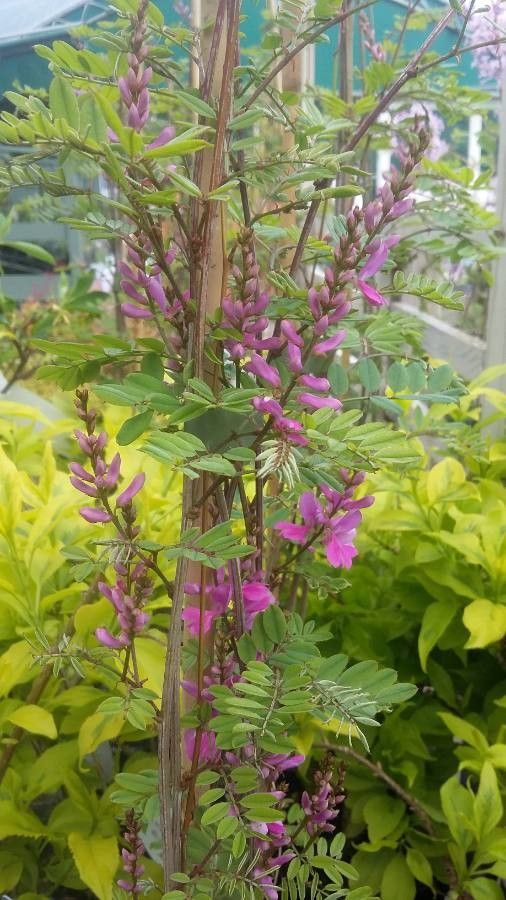
Today, we’re diving into the wonderful world of Indigofera himalayensis. If you haven’t met this beauty yet, you’re in for a treat. Imagine delicate, sky-blue flowers cascading down arching branches – it’s truly a showstopper. Getting more of these stunners for free is incredibly satisfying, and I’m thrilled to share how I coax new life from my existing plants. Now, I won’t sugarcoat it: propagating Indigofera himalayensis can be a little fiddly, but with a bit of patience and the right approach, it’s absolutely doable, even for those just starting out on their propagation journey. Let’s get our hands dirty!
The Best Time to Start
For the highest success rate with Indigofera himalayensis, I find that late spring to early summer is your sweet spot. This is when the plant is actively growing, and the new wood is firm but still flexible. Starting around June, after the initial flush of spring growth has hardened up a bit, has consistently given me the best results. Avoid trying this when the plant is stressed, like during a heatwave or if it’s just finished flowering.
Supplies You’ll Need
Ready to gather your tools? Here’s what I always have on hand:
- Sharp pruning shears or secateurs: Clean cuts are king.
- Rooting hormone powder or gel: This really does give cuttings a boost.
- A well-draining potting mix: I like a blend of equal parts peat moss or coco coir, perlite, and a little compost.
- Small pots or propagation trays: About 4-inch pots work well for individual cuttings. Make sure they have drainage holes!
- Plastic bags or a propagation dome: To create a humid environment.
- Watering can with a fine rose attachment: Gentle watering is key.
- Labels and a permanent marker: So you don’t forget what’s what!
Propagation Methods
I’ve had the most success with stem cuttings for Indigofera himalayensis. It’s straightforward and generally yields good results.
Stem Cuttings:
- Take Your Cuttings: On a cool, overcast morning (if possible), use your clean secateurs to take cuttings from healthy, non-flowering stems. Aim for pieces that are about 4-6 inches long. Make your cut just below a leaf node (where a leaf attaches to the stem). Remove any lower leaves, leaving just a couple of sets at the top.
- Dip in Rooting Hormone: Dip the cut end of each stem into your chosen rooting hormone. Gently tap off any excess.
- Plant Your Cuttings: Fill your small pots with your prepared potting mix. Make a hole in the center of each pot with a pencil or your finger. Carefully insert the dipped end of the cutting into the hole, ensuring the leaf nodes you removed are buried in the soil. Gently firm the soil around the cutting.
- Water Gently: Water the potting mix thoroughly but gently. You want the soil to be moist, not waterlogged.
- Create a Humid Environment: Cover each pot with a clear plastic bag or place them under a propagation dome. This traps moisture and humidity, which cuttings desperately need. You can prop the bag up with a toothpick or stake so it doesn’t touch the leaves.
- Place in Warm, Bright, Indirect Light: Find a spot that receives bright, indirect light. Avoid direct sun, as this can scorch your delicate cuttings.
The “Secret Sauce” (Pro Tips)
Here are a couple of tricks that have elevated my propagation game:
- Bottom Heat is Your Friend: While not strictly essential, placing your cuttings on a heated propagation mat can significantly speed up root formation. It mimics the warmth from the soil that the parent plant enjoys, encouraging those roots to get going.
- Don’t Drown Your Cuttings: It’s tempting to keep things super wet, but overwatering is the quickest way to rot your cuttings before they even have a chance to root. The plastic bag or dome will help retain moisture. Check the soil moisture periodically by gently touching the surface; it should feel consistently damp, not soggy. If it feels too wet, open the bag or dome for a few hours to let it air out.
- Patience, Grasshopper! Seriously, this is the biggest tip. Don’t tug on your cuttings to see if they have roots too early. It can disturb the delicate new growth. Give it at least 4-6 weeks, and even then, be gentle. You’ll often see new leafy growth as a sign of successful rooting.
Aftercare & Troubleshooting
Once you start seeing new leaf growth or feel a slight resistance when you gently tug on a cutting, it’s a good sign that roots have formed!
- Acclimatize: Gradually remove the plastic bag or dome over a week or so, giving the new plant a chance to adjust to lower humidity.
- Light Watering: Continue to water when the top inch of soil feels dry. Avoid letting them dry out completely, but also steer clear of soggy conditions.
- Potting Up: Once the roots are well-established and you see robust new growth (usually a few months after planting), you can pot up your new Indigofera into a slightly larger container with fresh potting mix.
The most common issue you might encounter is rot, which usually stems from overwatering and poor drainage. You’ll notice the stem turning mushy and brown, or the leaves wilting and dropping off. If this happens, unfortunately, that cutting is likely lost. It’s easy to feel discouraged, but remember, propagation is all about trial and error. Just try again with drier soil and better air circulation next time.
So there you have it! Propagating Indigofera himalayensis is a wonderful way to expand your collection and share the beauty of this plant with friends. Be patient with the process, celebrate every little sign of success, and most importantly, enjoy the journey. Happy gardening!
Resource:
https://identify.plantnet.org/k-world-flora/species/Indigofera%20himalayensis%20Ali/data