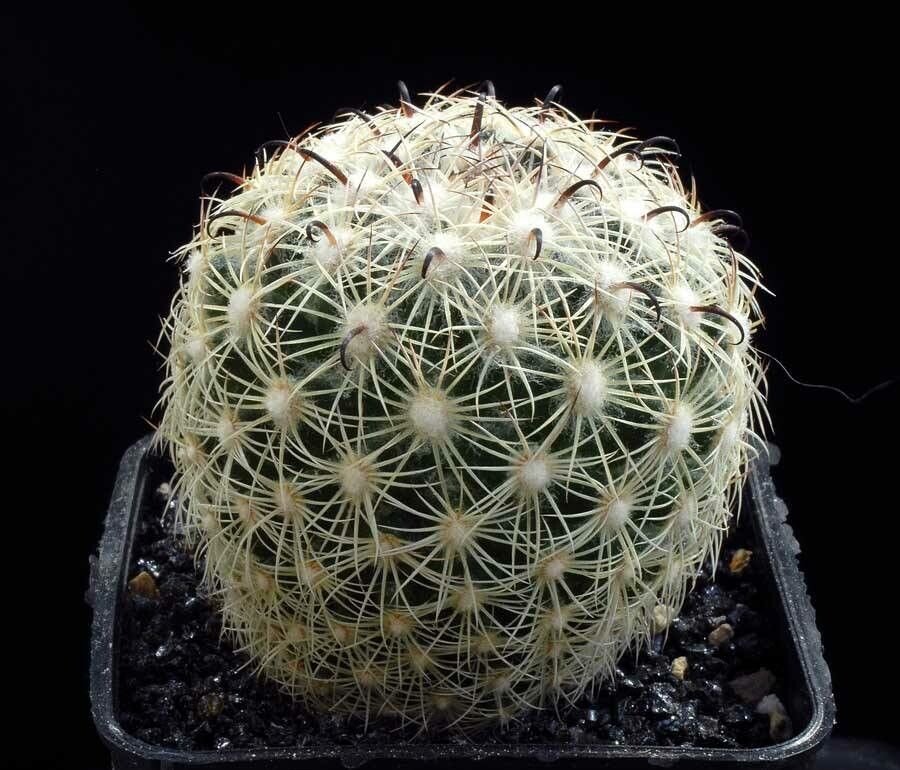
Oh, hello there! Grab a mug of your favorite brew; let’s chat about Coryphantha delicata. If you’ve ever admired this gem with its delicate spines and charming blooms, you’re in for a treat. Being able to grow more of these beauties from your existing ones is truly one of gardening’s greatest joys. And don’t you worry about difficulty – Coryphantha delicata is a wonderfully rewarding plant to propagate, even for those just dipping their toes into the world of cacti.
The Best Time to Start
The absolute best time to get your hands dirty with Coryphantha propagation is during its active growing season. Think late spring through summer. This is when the plant has the most energy to heal and put down roots. You’ll know it’s ready when you see new growth appearing. Avoid doing this when the plant is dormant in the cooler months.
Supplies You’ll Need
To give your little Coryphantha babies the best start, here’s what you’ll want to have on hand:
- Well-draining soil mix: A cactus and succulent mix is perfect. You can also make your own by combining potting soil with perlite or pumice.
- Sharp, sterilized pruning shears or a clean knife: This is crucial for clean cuts that heal well and reduce the risk of disease.
- Rooting hormone (optional but recommended): This can give your cuttings a little boost.
- Small pots or trays: Clean containers with drainage holes are a must.
- Gravel or small stones: For top dressing your pots, which helps with aeration and prevents the base of the cactus from staying too wet.
- Spray bottle: For gentle misting when needed.
- Gloves: Those delicate spines can still pack a poke!
Propagation Methods
Coryphantha delicata is most commonly and successfully propagated by offsets, also known as pups.
Propagating Offsets (Pups):
This is the easiest and most reliable method for Coryphantha. You’ll usually find these little baby plants growing around the base of the parent cactus.
- Locate the Offsets: Gently examine your mature Coryphantha delicata. Look for smaller plants emerging from the sides or base.
- Prepare Your Tools: Make sure your knife or shears are clean and sharp.
- Gently Separate: Carefully twist or cut the offset away from the mother plant. Try to get a little bit of the base attached to the offset. If it’s a bit stubborn, a gentle wiggle usually does the trick.
- Allow to Callus: This is a super important step! Place the removed offset in a dry, well-ventilated spot away from direct sunlight for 2-7 days. You’ll see the cut end dry and form a callous. This prevents rot when you plant it.
- Planting: Once callused, fill your small pot with your well-draining soil mix. Make a small hole in the center and gently place the offset in, making sure the callused end is in contact with the soil. You can use small stones to prop it up if needed. Lightly press the soil around the base.
- Initial Watering: Do not water immediately. Wait for about a week or two after planting. This gives the cutting time to settle and any tiny wounds to fully heal. When you do water, do so sparingly.
The “Secret Sauce” (Pro Tips)
Here are a couple of things I’ve learned over the years that really make a difference:
- The “Dry Wait” is Non-Negotiable: Seriously, don’t skip the callusing step after removing the pup. I’ve seen so many people eager to plant and water, only to end up with rotten stumps because the cut wasn’t dry. Patience here is key.
- Bottom Heat is Your Friend: If you can, placing your pots on a seedling heat mat during propagation can dramatically speed up root development. Cacti love warmth, and consistent, gentle bottom heat mimics their natural environment and encourages those roots to grow.
Aftercare & Troubleshooting
Once your offset has developed roots (you can test this by gently tugging – if there’s resistance, you’ve got roots!), it’s time for slightly more regular care.
- Watering: Water only when the soil is completely dry. Stick your finger in an inch or so; if it feels dry, it’s time. For young plants, misting the soil surface can be a good way to deliver moisture without waterlogging.
- Light: Provide bright, indirect light. Too much intense sun can scorch a new, unrooted plant. As it establishes, you can gradually introduce it to more sun.
- Troubleshooting – Rot: The most common issue is rot, usually caused by overwatering or not callusing properly. If you see the offset becoming mushy, discolored, or developing a foul smell, it’s likely rotting. You might be able to save a piece if you catch it very early by cutting away the affected part and allowing a healthy section to callus again, but unfortunately, rot can be terminal.
- Troubleshooting – No Roots: If after several weeks, there’s still no sign of rooting, and the plant looks healthy, don’t despair. Some plants are just slower. Ensure it’s in a warm spot with bright light and continues to receive infrequent watering.
A Encouraging Closing
Propagating your Coryphantha delicata is a wonderful way to multiply your collection and share these little marvels with friends. Be patient with the process – nature does its own timing. Enjoy watching those tiny roots emerge and your new plant begin to thrive. Happy propagating!
Resource:
https://identify.plantnet.org/k-world-flora/species/Coryphantha%20delicata%20L.Bremer/data